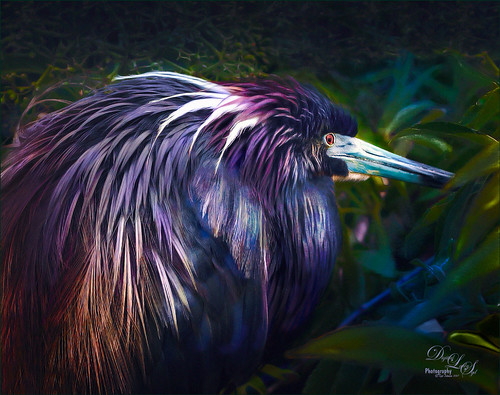
Hiding Out at the Rookery

This Tricolored Heron was trying to be inconspicuous which meant I had to take his picture. He really did not want my attention at the St. Augustine Alligator Farm Rookery. Therefore he now has a beautiful bright-colored plumage to show off. Felt like getting back to my favorite type of Photoshop – painting and adding a few filters. I have done so many Tri-Colored Herons that adding the extreme color effect was fun to try. A technique by Glyn Dewis was presented in his How to Retouch a Dog Portrait video where he duplicates the background twice. On the first he applies PS Reduce Noise twice using just the Strength slider set to 10 and 4. On the top layer he applied a PS High Pass filter set to just 1 pixel to bring back sharpness. These layers were then grouped. It gives a very subtle painterly feel and gives a good place to start by smoothing over the background. On a couple layers on top, several blobs of color were added on the bird to make him more color. The layer opacity was set to around 50% and Overlay and Vivid Light blend modes. Had to clean up the background and fill in some holes. On a stamped layer (CTRL+ALT+SHIFT+E) the Camera Raw Filter was opened where several Radial Filters were used to direct light. On another New Layer new hair was painted in to fill out the color on the birds lower body. A Selective Color Adjustment Layer was used to add a bluish tint into the image. On a clean up layer, some of the too sharp leaves were painted to soften their effect. Then on two stamped layers, Topaz (see sidebar for website link) ReStyle was applied using on one layer the Rum Purple preset (set to Multiply blend mode at 45% layer opacity) and the Wedgewood Blue and Tan preset (set to 55% layer opacity) on the other. A layer mask was added to the Wedgewood layer and parts of the bird were painted back even more. An Exposure Adjustment Layer was used to sharpen the eye. On a New Layer set to Overlay blend mode and 71% layer opacity, a Spotlight effect was created to emphasize the face a little more. Nik Viveza 2 was used to further enhance the focal point. A subtle vignette using How to Create a Subtle Vignette blog was added. Last step involved adding a Lens Blur Noise effect on a stamped layer (see my 10 Now so Well Known Photoshop Tips blog – first tip). That was it. Got to love these beautiful herons!…..Digital Lady Syd


Leave a Reply
You must be logged in to post a comment.