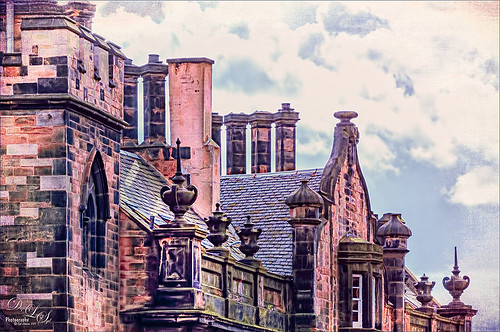
A Little Scottish Architecture

Just an image of the beautiful architecture taken near Edinburgh Castle in Scotland. The original image in Lightroom was major dark – not sure why. Used the Basic sliders to brighten up the image, but the noise was pretty bad. Therefore , in Photoshop Topaz (see sidebar for website link) DeNoise was used. Topaz Glow was used on a stamped layer above and my SJ Graph III preset was applied – layer was set to Overlay blend mode at 65% layer opacity. (Here are the settings: Primary Glow: Glow Type Dark, Glow Strength 0.17, Effect Sharpness 0.09, Electrify 0.23, Simplify Details 0.25, Edge Color 0.20, Detail Strength 18, Detail Size 0.24, Brightness 0.23, Contrast 0.17, Sat 0.01, Line Rotation 0.09, and Glow Spread 0.20; Secondary Glow: Glow Type Light, Glow Strength 0, Effect Sharpness 0.47, Electrify 0.17, Simplify Details 0, Brightness 0.36, and Contrast 0.62; Color Red Sat 1.00; Orange Sat 0.27; Yellow Sat 0.20 and Lightness 0.09; Aqua Sat 0.78 and Lightness -0.26; and Blue Sat 0.49; Finishing Touches: Effect Coverage 0, Smudge 0.00, Sharpness 0.25, Sharp Radius 0 and Vignette Size 0.) Also in the Layer Style, the sky was brought back using Blend If Underlying Layer slider and splitting the white tab (ALT+drag on tab to split) with settings of 122/145. Topaz Lens Effects Reflector filter was used to lighten up the face of the buildings (Type Golden, Strength 0.28, Transition 0.31, Position 0.49, and Angle 208.5). By adding a layer mask, the sky was painted black so the effect only applied to the buildings. Next on a stamped layer used Nik Color Efex Pro using Tonal Contrast, Brilliance/Warmth, and Vignette Lens. A vintage frame was added on top and set to Overlay blend mode. I love working on images from Scotland!…..Digital Lady Syd


Leave a Reply
You must be logged in to post a comment.