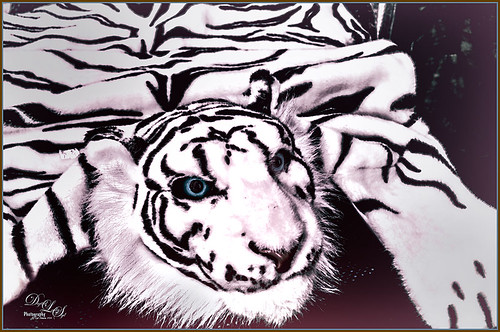
There’s a Leopard on the Floor!

Just having fun here. Took this image of a Snow Leopard Rug at the Native American Festival in Ormond Beach, Florida. No, I do not believe it was a real snow leopard skin, but it caught my eye so I snapped a shot. In Lightroom just used Seim’s (see sidebar for website link) Power Workflow 4 Super Hero X WhiBal and Tint 82A Cooling presets. Next in Photoshop I applied the Shake Reduction filter – seem to be getting good results with this. On a duplicate layer, the image was opened up in Topaz (see sidebar for website link) Black & White Effects and a preset I had created a while back was applied (settings for my SJ Sky and Green Preset are: Conversion section Basic Exposure Contrast 0.02, Brightness 0.02, Boost Blacks 0.71 and Boost Whites 0.25; Adaptive Exposure 0.62, Regions 34, Protect Highlights and Shadows 0.01, Detail 2.47, Detail Boost 1.04, and check Process Details Independently; Creative Effects Diffusion Softness 0.17, Diffusion 0.69, and Diffusion Transition 0.50; Local Adjustments Detail Brush (Brush Size 110, Opacity 0.45, Hardness 0.01 and Edge Aware 1.00) and painted over eyes and some of the facial features in the face; with Burn brush painted in (using a small Brush Size 10, Opacity 0.23, Hardness 0, and Edge Aware 1.00) some of the hairs around the face and up to the ear; and using the Color Brush with the same settings painted in the eyes and a bit of the nose; Finishing Touches Silver and Paper Tone set to Tonal Strength 0.19, Balance 0, Silver Hue 42.58, Silver Tone Strength 0.46, Paper Hue 46.48, and Paper Tone Strength 0.48; Quad Tone Color 1 Region (black) set to 0.00, Color 2 Region (R3/G36/B22) set to 67.18, Color 3 Region (R214/G223/B238) set to 146.6, and Color 4 Region Set (white) set to 255.0; Vignette Center – had to center on the right eye since clicking on the image in a whitish area left a noticeable white blog – think it is a glitch in the plug-in, Vignette Strength -0.25, Vignette Size 0.01, Vignette Transition 0.17, and Vignette Curvature 0.50; and Transparency slider set to 0.89). On a New Layer some clean up was done to remove distracting objects. On a stamped layer on top (CTRL+ALT+SHIFT+E), Nik Analog Efex Pro 2 was applied (settings for my preset SJ Blown Out Beach: Basic Adjustment Detail Extractor 18%, Brightness -10%, Contrast 13%, and Saturation 0%; Light Leaks Strength 13% and Soft First leak upper left with control point placed in upper right to darken down the corner showing Texture Strength set to 68%; Lens Vignette Amount 36%, Circle under ct in Rectangle, and Size 72% with the vignette set over the left eye; and Levels & Curves Opacity set to 70% and just bumping up the end of right bottom curve to 0/2 in the RGB curve, and dragged down the curve in the middle of the Luminosity slider to pop the picture a little). Nik Viveza 2 was added on another stamped layer and 6 control points were added – each corner was darkened down a little and softened by moving the Structure slider to the negative side, and a control point was placed on his face to brighten it up to draw the eye. Back in Photoshop a New Layer was created and just the eyes and nose were sharpened. On a final stamped layer my free SJ Thin Double Edge Frame layer style was added and colors sampled from the image. That was all that was done – just basically followed my Plug-in Workflow (see Digital Lady Syd’s Plug-in Workflow)…..Digital Lady Syd


Leave a Reply
You must be logged in to post a comment.