Spotlight Effect With the New Subtract Blend Mode
 |
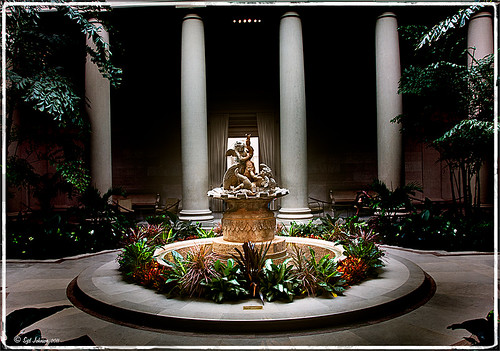
This beautiful sculpture, called Cherubs Playing with a Swan and created by Jean-Baptiste Tuby I in 1672-73, is located in the West Garden Court of the West Building of the National Gallery of Art in Washington, DC. I used an effect I learned from Calvin Hollywood recently in a video called “New Blend Modes – Divide and Subtract.” In this technique, the Subtract blend mode creates the dark feel to the image. Hover over the image to see the original camera raw image.
The basic steps used on the above image above are:
- Cropped image to balance in Lightroom.
- Opened image in Photoshop and duplicated the Background Layer.
- Change the top layer blend mode to Subtract.
- Went to Filter -> Bur -> Gaussian Blur and set Radius to 250. The image now has a night effect and not that blurry.
- Added a Layer Mask and painted white using a low opacity brush on the mask to emphasizing the sculpture and the areas to be lightened.
- A Curves Adjustment Layer and a Color Balance Adjustment Layer to adjust contrast and color were applied.
- A Composite Layer (CTRL+SHIFT+ALT+E) was created on top of the layer stack.
- Image was sharpened using the High Pass Filter set to a 9.1 radius and the blend mode changed to Soft Light.
I was surprised by the beautiful effect created on this image! It was interesting to learn that there is a useful purpose for this blend mode. Give it a try on an image and see what you get……Digital Lady Syd


Leave a Reply
You must be logged in to post a comment.