Topaz DeNoise 5 and InstaTone

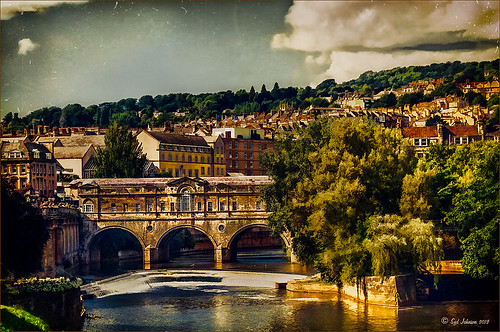
This image had an ISO of 2500 – that is really high for me but I actually took this shot from a moving tour bus – it is the Pulteney Bridge over the Avon River near Bath in England. The basic workflow involved running Topaz (see sidebar for website link) DeNoise first – must be sure that the Sharpening and Noise Reduction sliders are set to 0 in Lightroom or Adobe Camera Raw so you are not applying noise correction twice. I usually apply DeNoise on it’s own layer – that way it can be selectively removed if it is too soft in some places. The Overall Strength was set to 17. Topaz cautions about overdoing this or it will lose detail and edges will be soft. The Detail Recovery slider was set to 19. That was all that was needed. In Topaz photoFXlab, the new plug-in interface, the InstaTone tab was selected and the tones from a 500 px image called Nobody by shachar levcovich turned this image into an old English look. Topaz Simplify 4 was added and my BuzSim Modified preset was applied – this is one I had created in Simplify 3 but I still love it. (Selected BuzSim and changed: Simplify panel – Simplify Size to .15, and Edges panel: Edge Type Color Edge Fine and Edge Strength to 1.50.) Back in Photoshop a vignette was added to focus on the bridge and ShadowHouse Creations Scratch Overlay Texture set to Overlay with the center painted out in black in the layer mask so the texture basically frames the image. Now I have a beautiful vintage feel but not overly painterly. I can imagine the beautiful bridge looking like this a long time ago. Beautiful place!…..Digital Lady Syd
Digital Lady Syd Related Blogs:
Digital Lady Syd Reviews Topaz DeNoise 5
InstaTone in photoFXlabs – Great Fun and Great Results!
Digital Lady Syd’s Review of Topaz photoFXlab v1.1
Digital Lady Syd Reviews Topaz Simplify 4


Leave a Reply
You must be logged in to post a comment.