Topaz Simplify and Topaz Detail Together
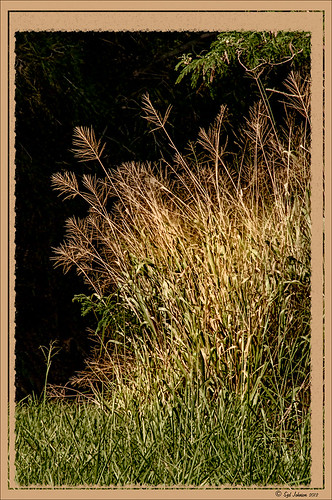
Recently I watched a video, this time for Topaz plug-ins (see sidebar for Topaz website and more blog links below), and learned a couple new things I thought I would share. If you have read my blogs before you know that I am a big fan of Topaz products – they may not be the most sophisticated, but they do some very cool effects the other major companies can’t achieve. Scott Stulberg did a lengthy video called “Memorable Travel and Stock Photography” where he covers Topaz Adjust, Detail and Simplify. I tried to incorporate a few of these tips in this image of sun-lighted grass growing on the road to Waipi’o Valley on the Big Island in Hawaii. Gosh it is hard to take a bad picture in Hawaii!
To begin with, Topaz Simplify was used. Scott suggested this plug-in is great to use on a shot that is a bit soft from a gentle breeze or a not-so-great lens – this effect can save an image and turn it into something very nice. There are two color space choices – RGB (more vivid colors) or YCbCr color space (more muted colors). This image used the YCbCr color space. Scott mainly uses the BuzSim preset – the trick is to move the Simplify Size slider to the left from the default setting (0.33) and you will see the detail return but the color stays saturated. On this image the Simplify Size slider was set to 0.05, Details Boost slider set to 0.79 (default is 1.00), and Details Size set to 0.13 (default is 0.20). It is a very similar result to using Vibrance in Photoshop but Simplify has much better color saturation. In the Adjust section, the Saturation was toned down a bit to 0.96 (default 1.31) and Saturation Boost set to 1.00 (default 1.15). He is basically lowering or turning off all the artistic settings and leaving the saturation turned on. One small problem I seem to have with Topaz products is that sometimes I have trouble retrieving the settings when using a Smart Object layer, which is supposed to retrieve the plug-in settings used on the image. Therefore, create a preset and name it something that will remind you of the image if you liked the result.
Next Topaz Detail was used. Scott feels that this plug-in makes it appear you were using a better lens than you really were. Basically you want to move the Medium Detail slider, then the Small Detail and Large Detail sliders until you get a sharper feeling image. He does very little sharpening to his photos but uses Detail to do the sharpening – it is like using the Clarity slider in a realistic way. That is how the plug-in was used for this image.
The final touch I added was a Hue/Saturation slider boosting the yellow saturation up quite a bit. Then I filled the layer mask with black (CTRL+Backspace) and painted with a very low opacity soft brush in to give just a soft yellow tone. OnOne’s Dave Cross 14 frame (see sidebar for website link) was added using a color sampled from the shot.
Sometimes it feels like I harp on all these these plug-ins, but they really are fun to use and they can take your images to a new level…..Digital Lady Syd
Digital Lady Syd Related Posts:
Simplifier and Simplify Filters
Topaz Plug-Ins – Same Image Trying Each! – this blog has many of my Topaz blog links at the bottom if you would like more information on any Topaz products


Leave a Reply
You must be logged in to post a comment.