Using the Hue/Saturation Adjustment Layer Temperature Slider for Color Change
 |
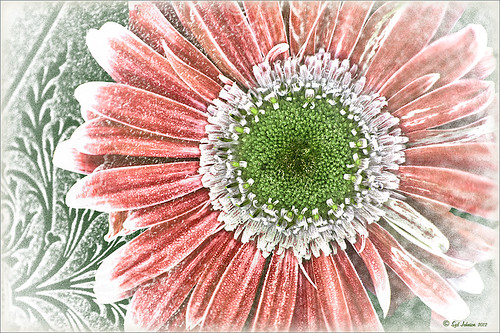
I tend to shoot HDR when I am at home photographing my flowers. I like having the different exposure options to choose from even if I do not create an HDR image. In this case an AF Micro Nikkor 60 mm lens at F/3.2, 180 sec, ISO 200 with a Bower 0.5 x High Resolution Digital Lens with Macro was used to shoot 5 exposures set to exposure compensations of -2, -1, 0, +1, +2. These five images were processed in CS5 using Photoshop’s Merge to HDR program – click on the image to see the original Photoshop HDR composite. (Here are the HDR settings used: Radius 350, Strength 1.86, Gamma 2.03, Exposure -0.45, Details 228, Shadow 100, Highlight -86, Vibrance 75, and Saturation -26 – a curve was created with points at Input 25 Output 43 and Input 58 and Output 65. I saved this down as a preset to use again.)
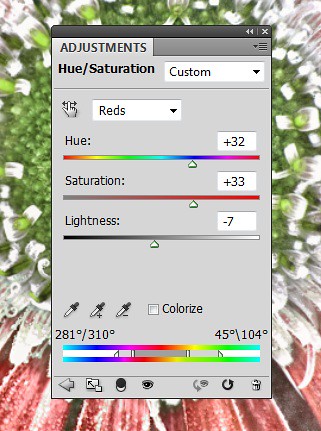
To get a little different look, I decided to use the red-green dynamic color combination. A Hue/Saturation Adjustment Layer was used to change the Reds to Hue +32, Saturation +33 and Lightness -7. To get the center green, while still in the Reds, I moved the temperature tabs on the slider at the bottom of the adjustment layer – see settings below. The center color totally popped! In Magentas the Saturation was set to +14. That was all it took change the colors to something really dynamic!

The final steps involved adding a few control points in Nik’s Viveza 2 for contrast and detail and a Sharpen Tool layer to emphasize the center. OnOne PhotoFrame Taufer Texture 07 was applied (see sidebar for website link). The background was changed to a darkish green to give more color contrast.
Once again, by just playing around in Photoshop and trying a few filters and different colors, you can make an ordinary image into something quite spectacular. Go try out the Hue/Saturation Adjustment Layer temperature slider too – it gives some very interesting results…..Digital Lady Syd


Leave a Reply
You must be logged in to post a comment.