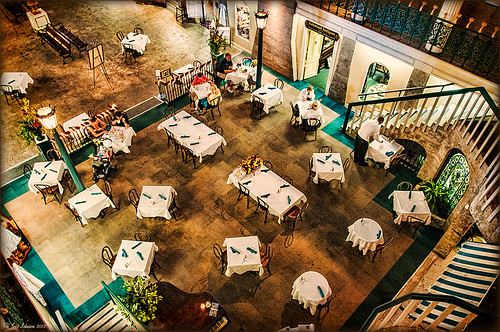
Cafe Alcazar and Vintage Topaz Adjust

Here is an image of the Cafe Alcazar that is located in the old swimming pool area of the current Lightner Museum (old Hotel Alcazar) in St. Augustine, Florida – one of the best places to grab lunch if you are in the city. I did very little to this image but apply a Topaz Adjust preset called Daylight to Tungsten II which gave the browns the rich tones, sharpened using my LAB sharpening method and added a Curves Adjustment Layer to increase contrast. Topaz Labs did a nice video on their Film and Vintage Effects with Adjust, B&W Effects and Lens Effects that does a good job of explaining how to get this look. I really love the feel of this image – gives a little of that vintage effect the historic location instills……Digital Lady Syd
Digital Lady Syd Related Blogs:
Where Am I? (Cafe Alcazar)
Unsharp Mask Filter In LAB Mode
I Didn’t Know That! Curves Adjustment Layers
Quad Tones in Topaz Black and White Effects Plug-in
Quad Tones in Topaz Black and White Effects Plug-in
 |
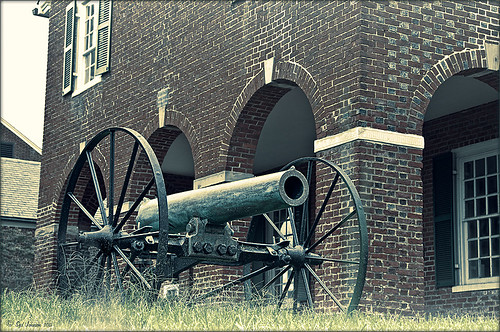
This image is of an old cannon on the grounds of the Historic Fairfax County Courthouse in Virginia. I do love NIK’s new Color Efex Pro 4 plug-in, but I keep going back to Topaz’s new Black and White Effects plug-in. (Hover over image to see original shot.)
The Topaz Black and White Effects preset I created gives a really nice sunny vintage feel and I think it is great for that historic look. To create the preset, select the Van Dyke Brown Collection Effect and Chamoisee Cyan preset as a starting point. The trick to getting this look is to set up in Finishing Touches the Quad Tones using these settings: Color 1 Region (R1 G1 B12) – 15.08; Color 2 Region (R63 G78 B85) – 143.9; Color 3 Region (R216 G211 B129) – 227.5; and Color 4 Region (R255 G254 B237) – 225.0. The sliders will need to be adjusted depending upon the image used. The Transparency setting was set to 1.00. For this image a small light Edge was added. Also, I was able to brush away the distortion over the back part of the left wheel using the Burn tool with a large brush and lightly clicking a few times, then using a smaller brush to run over the details just a bit. It totally disappeared! These brushes work wonders! To bring out the cannon a little more, back in Photoshop the image was sharpened using a High Pass Filter set to 9.1 Radius, a black mask was added to cover up the effect, and then by painting just the cannon on the mask, only it becomes sharp.
I really like the Quad Tone effect in this plug-in. Topaz has created a very nice video on how to use this section called “Quick Tip – Quad Toning Explored.” This may be the key to why it is hard to reproduce this look in other plug-ins.
For more information on this plug-in, see these related posts:
Fun Photoshop Blog: “Topaz B&W Effects Plug-In-A Real Winner!”
Tidbits Blog: “Topaz B&W Effects vs. Nik’s Silver Efex Pro”
Tidbits Blog: “Just Another Topaz Black and White Effect Example“


