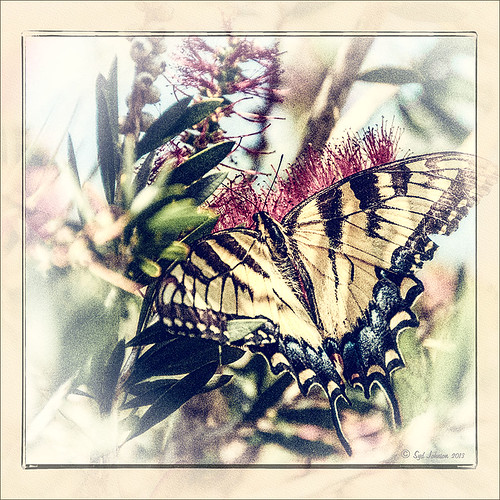
Eastern Swallowtail Butterfly

Just had to display this beautiful butterfly that appeared on my Bottle Brush bush recently. This is a female Eastern Tiger Swallowtail and had at least a 4-inch wide wing span. I did basic processing in Lightroom and then opened it in Photoshop. Just did a clean up layer and a Topaz (see website link in sidebar) Detail filter using the Overall Medium Detail II preset. I tried several different textures and nothing seemed to look right. So the layer was duplicated and the image was opened in Nik Color Efex Pro 4. These filters were stacked: Detail Extractor, Monday Morning using the Neutral color set and an opacity of 58%, Film Efex Vintage set to Film Type 13, and Vignette using a white color. These are all favorite filters of mine in this plug-in. Next OnOne’s (see website link in sidebar) old PhotoFrame 4.6 filter was applied using Kevin Kubota’s preset Kinky set to 63% opacity and a size increase of 7% and using a creamy color sampled from the image. Back in Photoshop a Hue/Saturation Adjustment Layer was added and the Reds Saturation was set to -58 to tone down the bottle brush color. I love the vintage feel of this image. I am sorry that OnOne is not longer releasing PhotoFrames – I am having trouble duplicating these effects in their new suite……Digital Lady Syd
“Perfect” Perfect Layers!
I keep finding excuses to use Perfect Layers, this fairly new plug-in for Lightroom, by OnOne Software. I really did not think that I would use it that much, but then I start playing around with an image, and there I go, back into Perfect Layers! It is so easy to try out the effects of my favorite textures on my images, and it is easy to stack virtual copies (and other textures or images – the layers can be dragged up or down in the stack) to get a totally unexpected look.

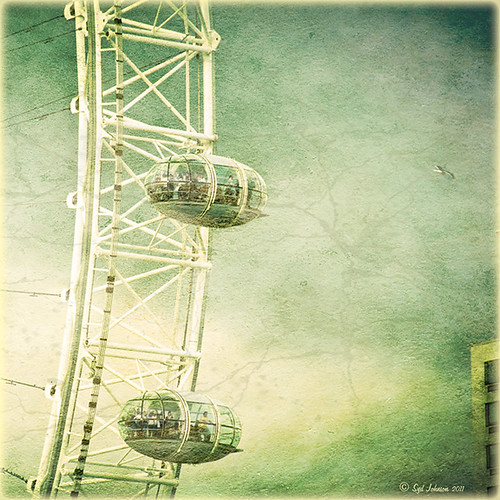
For this image of the London Eye, I cropped the original image and then created a Lomographic Preset (follow this very simple video from Michael Rather at the Digital Photography Connection on “Creating a Lomography Image) on a Virtual Copy of the cropped image. Select both the original and virtual copy images and open them up in Perfect Layers to create two layers stacked. A new image, Shadowhouse Creations Oil Painting-5 texture, was then imported and stacked as a layer on top and set to Hard Light. The top two layer’s opacity was adjusted to taste, and voila – a pretty nice texturized image! (By the way, I keep using this set of textures all the time – gives a real painterly canvas look to the image.) Here is a link to Lomo Presets from Matt Kloskowski’s Lightroom Killer Tips that have similar settings but a slightly different color and look. I have actually seen presets with a blue tint instead of green for this effect.
Definitely give this plug-in a try if you have Lightroom. I believe there is room for a lot of creativity and it is much quicker than going into Photoshop to see what results you are getting. Have fun creating!…..Digital Lady Syd


