I Didn’t Know That! Curves Adjustment Layers
Every now and then I find something that makes me go – “Wow – I didn’t know that!” Last week I watched a video by Moose Peterson, one of the very best wildlife photographers, called “Finishing Techniques using Nik Software.” Listen to this video if you have time – some very interesting images and processing tips are included.

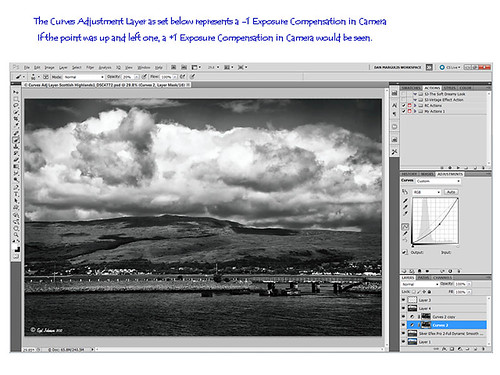
In the image above of the Scottish Highlands, I used the Curves Adjustment Layer set to -1 Exposure Compensation so I could darken the foreground a bit and some parts of the clouds – the image was overall much brighter. The layer mask was then filled with black. With a white soft paintbrush set to 20% opacity, I painted over any areas that needed to be darkened slightly. The Curves Adjustment Layer was duplicated because I liked the vignette effect it was creating.
This tip could become very useful, if for example, you discover an image you really like is just a bit over-exposed. In Photoshop a Curves Adjustment Layer set as shown above could bring just a bit of contrast back into the image, as if you had adjusted the shot when taking the picture. Try using a +1 Exposure Compensation Curves Adjustment Layer if parts of an image need to be lightened a bit.
It had never occurred to me what I was really doing with the Curves Adjustment Layer. Thank you Moose! Hope this tip helped you a bit…..Digital Lady Syd


