32-Bit HDR Using Lightroom and CS6
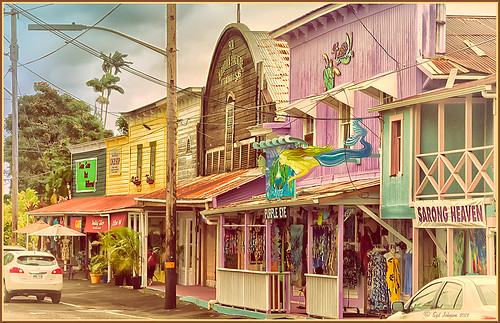
This is a beautiful little town called Honomu is on the road to Akaka Falls on the Hilo side of the Big Island. I love how this image turned out – the original tonemapped file was totally flat. This image was processed as a 32-bit HDR image in Photoshop CS6’s Merge to HDR program, then brought back into Lightroom 4.1 as a TIFF file where it was adjusted using mainly the Basic sliders, then edited back in Photoshop CS6 as a 16-bit PSD file. From there, Nik’s Color Efex Pro 4‘s was opened and these filters stacked: Detail Extractor at 68%, Graduated Filters using Blue No.1 as the sky was an ugly gray color, and finally the Film Efex Vintage set to Film Type 21. Next Nik’s Viveza 2 was added and that is what really made the difference in this image – the detail was popped in the signage areas but smoothed in the sky. Imagenomics Noiseware was added to smooth out the roughness of the whole image. The frame I used is called SJ Thin Double Edge Frame and can be downloaded at my Tidbits Blog DLS Free Layer Style Frames. The colors for frame were sampled from the image. Once again an image that did not have too much going for it turned out really nice……Digital Lady Syd
Digital Lady Syd Related Blogs:
New Lightroom and Photoshop 32-bit Processing Capability
Hawaiian Bliss!
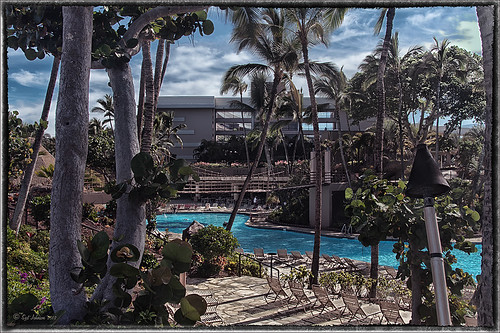
Every now and then I have to post another image from this wonderful resort! I know, a lot of people may consider it a little touristy, but I guess I am just a big tourist at heart and totally loved it!. This of course is the Hilton Waikoloa Village on the Big Island in Hawaii. A three shot HDR image was taken, processed in Photoshop’s Merge to HDR with no changes – just Remove Ghosting checked, then Nik’s Color Efex Pro 4 (stacked these filters: Film Efex Vintage – Film Type 11, Detail Extractor using overall strength of filter to 86%, and Image Border – Type 11), and Nik’s Viveza to darken the corners a little and bring out the detail in the center of the image. Not very difficult but then when it is as beautiful as Hawaii, it is pretty easy to get great pictures!…..Digital Lady Syd
Digital Lady Syd’s Related Blogs:
Nik’s Viveza 2 Plug-In – A Hidden Gem!
Whale Watching with Nik’s Color Efex Pro 4 & Viveza 2
Using NIK’s Color Efex Pro 4 and Viveza Together
Where Am I?
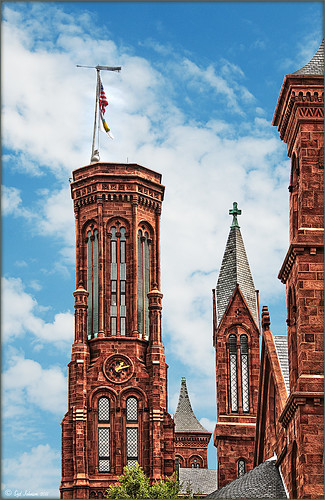
This image was processed as an HDR image in Photoshop CS5 using five images. I used Scott 5 preset (see my Fun Photoshop Blog “With One Good Photo – Try the Pseudo HDR Effect“) as a starting point and adjusted to my taste. I also changed out the sky as the day was very overcast when this image was taken and the HDR effect looked terrible in this area. The Puppet Warp Tool was used to straighten the left tower (see my Tidbits Blog “Straightening with Puppet Warp“).
So where am I?
If you have been to Washington, DC and spent any time on The Mall, you would have seen this very distinctive building called the Smithsonian Castle. I was interested in checking it out as the DC area experienced a 5.8 magnitude earthquake on August 23, 2011 and five decorative turrets on the east side of the Castle sustained damage. I did not take pictures on the east side of the building, but as far as I could tell, the building looked in good shape. The Castle was built and finished in 1855 by Mr. James Renwick, Jr. Apparently the museum did not expand beyond this building until the 1960s. I wish I could go back a 100 years in time for a few hours and see what was going on in this building. If you get a chance to visit this area, go check it out…..Digital Lady Syd
Like a Chameleon – The Color Replacement Tool!
Below is a 7-image Camera Raw HDR file (using Merge to Photoshop Pro in CS5) where just one color was changed very quickly but created a big impact. Hover over the image to see the original image.
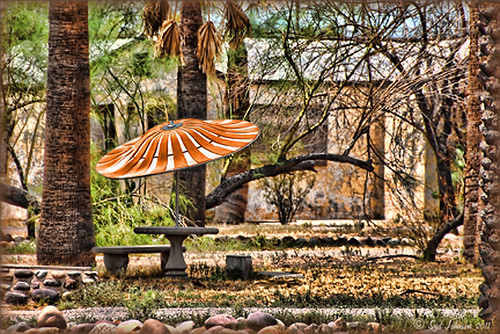 |
I used a little known tool, the Color Replacement Tool, which is hidden in the toolbox with the Brush Tool. It has been in Photoshop since CS but over the different versions, it has been placed with different tools. Not sure why it is not used more as I found it very easy to make this change.
Do your original clean up to the image. The last thing to do is use the Color Replacement Tool on the umbrella. Using the Color Replacement Tool, create a brush in the drop-down box. My settings were: Brush size 33 pixels, Hardness 0, Spacing 1%, Angle 0, Roundness 100%, and since I use a Wacom tablet, I set Size and Tolerance to pen pressure. Other settings in the Options Bar were Mode – Color, Sampling – Continuous icon pressed, Limits – Find Edges, Tolerance 30% and Anti-alias checked. Set Foreground color in the color picker to the new color and drag/paint away. Remember the brush only changes the pixels you drag over – try using a selection of the area you are changing to keep the brush from spilling over into other parts of the image if adjusting the Tolerance does notwork. It is amazing how it turns out!
I saved the brush settings as a Tool Preset (upper left icon on Options Bar) for the next time I want to replace a color quickly. (It is saved as a Tool Preset because of all the changes to be saved from the Options Bar that saving as a Brush preset will not retain.)
Try experimenting with some of the other settings. It is also used to get rid of red eye in images. I love it when I learn something new in Photoshop!…..Digital Lady Syd

