Photoshop CS5 and Elements: Hand-Tinting the Easy Way
 |
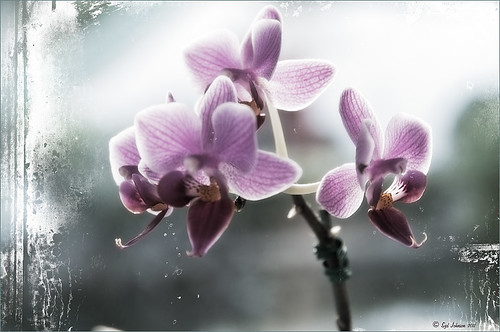
The above purple orchard was on the table at the Ming Court Restaurant in Orlando, Florida (one of our favorite restaurant in Orlando). I was not really happy with the original image (hover over image to see) – the flowers came out a little soft to my liking. I was pleased to see this hand-painting technique saved a beautiful flower image and gave it a soft painterly feel.
The steps to create this look are easy and could probably be put in an action. The process was taken from an article in Mastering Digital Photo Processing Magazine from the Fall 2008 issue. Here are the basic steps to creating this image:
1. Do any exposure adjusting in Lightroom or Adobe Camera Raw.
2. In Photoshop, create two copies of the original layer and turn off the top layer.
3. On middle layer convert image to black and white – I used the Black and White Adjustment Layer to get a nice conversion. There are so many ways to do this – choose your favorite. For Elements users, go to Enhance -> Convert to Black and White and select one of the canned styles as a starting point – then adjust the sliders, especially the contrast slider.
4. Turn on the top layer and add a Gaussian Blur filter with a Radius set to 18. Change blend mode to Overlay (or try others if you do not like the effect) and lower the opacity to get the pleasing hand-painted look. The opacity for the above was 61%.
Optional Step – Can add a Photo Filter Adjustment Layer. Choose a color using the Color swatch and adjust the Density slider. The magazine suggested this can “increase the sense of oils being applied over a black-and-white print.” I did not do this here, but it did give an interesting look with the default Warming Filter (85) color.
5. At this point a New Layer was created and the Sharpen Tool was used to show definition more clearly between the flower petals.
6. A Curves Adjustment Layer was added for contrast. Elements users add Levels Adjustment Layer.
7. To add a border or layer style, create a Composite Layer on top (CTRL+ALT+SHIFT+E). OnOne’s PhotoFrame Taufer_Texture_10 was added to give the frosted window effect – one of my favorite looks. (See sidebar for OnOne’s website link.)
That’s it! A pretty easy workflow and it gives a beautiful soft look. Hope you enjoy trying this short and sweet workflow – until next time…..Digital Lady Syd


