Red Flowers in the Snow

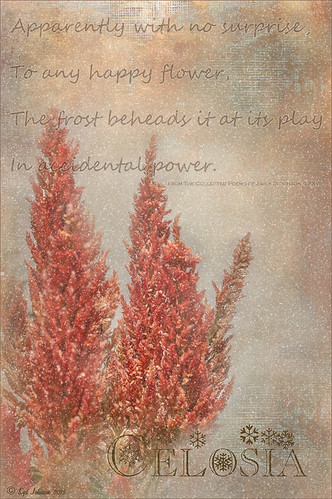
Once again here is an image I never thought I would process, but thanks to all the beautiful textures out there, the flowers end up looking like I remember them – well sort of – minus the snow. These Celosia flowers were taken in the courtyard at Flagler College (the old Ponce de Leon Hotel) in St. Augustine, Florida. This image was first processed in Lightroom where cropping and Basic Panel sliders were adjusted. An Adjustment Brush was applied to sharpen some of the foreground flower tips. In Photoshop Melissa Gallo of Painted Textures in her tutorial video Turn Your Photo into a Pastel Painting, Pencil Drawing or Pen and Ink, the second example, was followed. First the background was duplicated and the top row was set to Screen Blend Mode. A black layer mask was applied and with a white brush, the dark areas of the flower was painted in white to lighten the color on the mask. A Levels Adjustment Layer was applied the Midtones set to .78 to increase contrast just a little. A composite was created on top (CTRL+SHIFT+ALT+E). Next 2 Lil’ Owls Mosaic Set’s Claude texture (see sidebar for website link) was added and a layer mask added where the flower was painted back into the image using a soft 30% opacity black brush. A text layer was added showing the name of the flower using Flakes font at 131 pt size and a brown color. Another line of text was created using a quotation from Emily Dickinson using Chopin Script font and set to a grayish brown color. My free SJ Snow Overlay-slight blur was duplicated several times, merged, and set to 75% opacity. A Curves Adjustment Layer was the last step to add a little contrast. I loved the final result, and for some reason the snow just added a special effect to a red flower look…..Digital Lady Syd
02/19/2013 | Categories: Textures | Tags: 2 lil Owls textures, flowers, free overlay, Melissa Gallo textures, Textures | Leave A Comment »
When Was the Last Time You Saw a Phillips 66 Gas Pump?

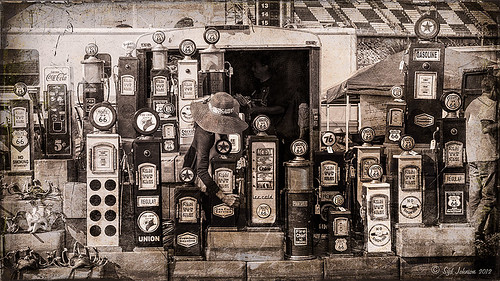
Really loved how this 3 image HDR turned out. Who knew you could actually buy old gas pumps! They were being sold at the 38th Annual Turkey Run located in the Daytona International Speedway infield last month. The three images were stacked using the free Lightroom Photomatix Merge to 32-bit HDR if you own Photomatix HDR Pro. My duChemin Maasai Chocolate split tone preset (that I created from settings in David duChemin’s Vision & Voice: Refining Your Vision in Adobe Photoshop Lightroom book) was also applied. In Photoshop 2 Lil Owls texture 6 (see sidebar for website link) was set to Vivid Light at 45% opacity. A Levels Adjustment Layer was added, some clean up done, and French Kiss Glorious Grunge Edging overlay border was added and changed to a dark brown color using a Solid Color Fill Layer clicked to the overlay. That was it.
12/27/2012 | Categories: HDR, Lightroom, Textures | Tags: 2 lil Owls textures, duChemin, free overlay, French Kiss Overlay, HDR, Merge to 32-bit HDR, vintage | Leave A Comment »
Christmas Wreaths at SeaWorld

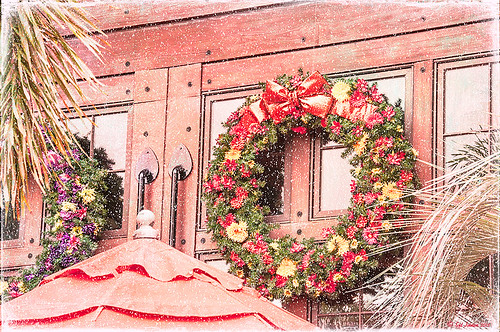
For this wonderful holiday, thought I would show this pretty image of wreaths from SeaWorld Orlando. Just a little basic processing in Lightroom before taking the image into Photoshop. Topaz (see sidebar for website link) Adjust 5’s High Key preset was applied with the Overall Transparency set to .24. Next Topaz Detail 3 was applied using the HDR Enhancement II preset. French Kiss’s Artiste Chamante texture was applied and set to Overlay at 100% opacity. My free Snow1 Overlay was next applied and set to 75% opacity. French Kiss’s Glorious Grunge Edging Overlay was applied next and a Solid Color Adjustment Layer set to a light pink was added. Since the edging did not seem to show up real well, it was duplicated along with the Adjustment Layer. That was all that was done and I love the final effect – the umbrella really added to the shot. Hope all are having a wonderful week!…..Digital Lady Syd
12/25/2012 | Categories: Photoshop Filters, Textures | Tags: Adjust, Detail, filters, free overlay, French Kiss Overlays, French Kiss Textures, plug-in, plugins, SeaWorld, SeaWorld Orlando, Snow Overlay, Topaz Adjust 5, Topaz Detail 3 | Leave A Comment »
Little Red Corvette

Just felt like using a couple of my old standby favorite plug-ins to create a vintage feel to this image. This old red corvette image was taken at the 39th Annual Daytona Turkey Run at the Daytona International Speedway infield. I love the way the raceway seats are in the background – it just seems to the be the right setting for this old girl – I love corvettes! It was processed first in Lightroom starting out with cropping and applying one of David duChemin’s Lightroom 4 presets called Warmer Sunset -.66 Grad – I was surprised it gave such a nice vintage feel for starting post-processing of the image. From there several adjustments basic Lightroom adjustments were done and the chrome was sharpened using an Adjustment Brush. In Photoshop Nik Viveza 2 was used with control points placed on the windshield to clean up some window glare (this plug-in does an amazing job with window glare) and on the detailing on the car. Then Nik Color Efex Pro 4 was applied and several of my favorite filters were stacked – Darken/Lighten Center, Detail Extractor, and my favorite for getting this vintage feel, Film Efex Vintage set to Film Type 14 with an overall opacity of 56%. A Curves Adjustment Layer was added and French Kiss free Glorious Grunge Edging Overlay with the lines inside removed was applied and set to a tan color. I wish I could fix up this car – she really was a beauty!…..Digital Lady Syd
Digital Lady Syd Related Blogs:
Yellow Dogface Butterfly in her Glory!
Soft and Sharp Image at the Same Time!
12/20/2012 | Categories: Lightroom, Photoshop Filters | Tags: Color Efex Pro, corvette, free overlay, French Kiss Overlays, French Kiss Textures, Lightroom, Lightroom presets, NIK Color Efex Pro 4, Nik Viveza 2, plug-ins, plugins, vintage, Viveza | Leave A Comment »


