Creating a Calendar in Adobe Lightroom

Since I have been presenting calendar techniques this past week, I thought I would pass along yet another way to create a calendar via the Lightroom and Photoshop guru, Matt Kloskowski, on his Killer Lightroom Tips Blog. See his blog “Creating Calendars in the Print Module.”
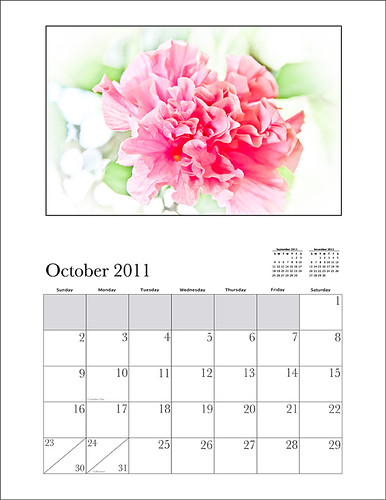
Basically the technique involves first downloading the calendars (Matt used some from iStockPhoto.com but I used this free download link from PrintRunner – scroll down to the Calendars section and select the first one). I used Photoshop to open the calendar files – go to File –> Open and select the month you want to insert from the downloaded Printrunner PDF file and click OK. NOTE: You must open the file from within Photoshop – I could not get the Bridge to open the PDF files to place into Photoshop.) Save to the Graphics folder as a jpg file.
Then go into Lightroom and highlight your Graphic’s folder or collection and enter the Print Module. In Page Set Up, select the size (Matt used 17″ X 22″ but my printer does not support this, so I used standard paper size 8 1/2″ X 11″.) Check the Lock Aspect Ratio in Cells section, and just drag your calendar month into your document along with an image for the top. Now you can Print to: Print or JPEG File (click Print to File to save down as a JPEG to E-mail out or post on-line). Very simple technique!
I personally like using my template (see links below) but this is definitely a nice alternative. Hope this gives you another great idea on creating your own personal calendars. Have a Happy New Year!…..Digital Lady Syd
Digital Lady Syd Related Blogs:
Free Calendar Template
Calendar Template for 2012
Create Calendar Photoshop Templates
Colorful Blown Out Look Lightroom and Adobe Camera Raw Preset
Free Calendar Template for Use with Elements
For my Elements friends, here is the same template following basically the exact same instructions as noted in my blog “Free Calendar Template” from last year. The template opens up great in Elements and the same steps to placing the items is totally the same. The only difference is that the step that it in the layer mask for the Gradient Layer. In this case, to copy the layer mask on the Color Fill 2 layer, you must: 1) click on the Color Fill 2 layer mask, 2) CTRL+A to select the whole mask, 3) CTRL+C to copy the whole mask, and 4) highlight the top layer and CTRL+V to paste the layer mask into this layer. A New Layer was created on top and snow was sprinkled around the edges. That’s it! Very simple.
The image is the top of the Standard Life building in Jackson, Mississippi. The gradient used is from Gorgeous Gradients – PrimaveraII, and the snow is a very useful snow brush called Snow Drop by Frostbo. The lettering on the building is called Kingsthings Christmas font, the Flying Santa Sleigh is by Fina, the fog was created using Sampled Brush #3 and #12 from Brushes Fogs and Mists, the green Christmas Tree and Icicles are in Obisian Dawn’s Holiday set, and the icy edges are an OnOne PhotoFrame Taufer Texture 08 frame (see sidebar for OnOne Perfect Photo Suite 6.0 for website). I have to admit this image was a bit of a challenge but I really liked the final effect.
Well, once again, it just goes to show that lots of what can be done in Photoshop can be done in Elements – sometimes with just a few workarounds. Try putting some of your new photos together and make a calendar for a family keepsake! Enjoy!…..Digital Lady Syd
Digital Lady Syd Related Blogs:
Free Calendar Template
Calendar Template for 2012
Create Calendar Photoshop Templates
Colorful Blown Out Look Lightroom and Adobe Camera Raw Preset
Colorful Blown Out Look Lightroom and Adobe Camera Raw Preset
 |
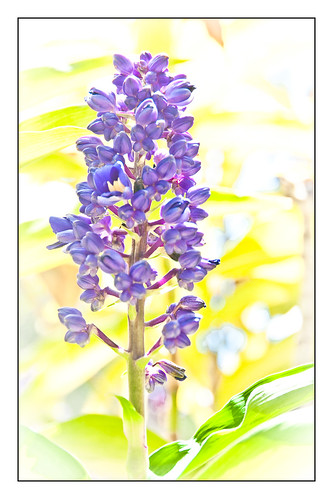
While in Hawaii, after taking a lot of beautiful flower images, I created the above effect as a Lightroom preset that I have used many times. It looks especially nice for a calendar image. Hover over image above to see the original.

This preset I call “Colorful Blown Out” and mainly has Basic and Luminance settings. You can download the free Lightroom preset here and the Adobe Camera Raw preset here. For a softer look, try increasing the Recovery slider and the Brightness slider. It is a good starting point for a very nice flower look. For information on where to download the calendar template and how to apply it, see my Photoshop Fun Blog Free Calendar Template for instructions.
Give it a try on other types of images too. Hope you enjoy!…..Digital Lady Syd


