Anything Photoshop or Photography

Latest

The Frontier Saga Movie Poster

Image of a western style movie poster

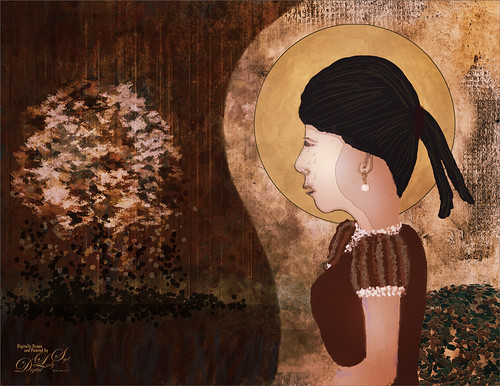
Just had fun creating this after watching a couple videos this weekend that got me inspired. The original image is from Unsplash (etty fidele-457310-Bologna Italy – can’t find a link as it is an old download). It was cropped down using the Default Crop, and then followed a pretty cool video by Marty at Blue Lightning called Create a Pencil Drawing from a Photo (he supplies you with brushes and a paper texture also). My image was turned into a brown and yellow one by adding a Gradient Map on top that went from oranges to reds and was set to Vivid Light blend mode at 98% opacity. Next extended down the image using the new Crop Tool Generative Expand – incredible. In the prompt typed “brown and yellow western scene pencil effect” and that is where the little scene at the bottom appeared in the one of the choices. How did I know to do this? I also watched this really interesting video by Lisa Carney (Hollywood poster creator) and Tomasz Opansinski (Creative Technologist for AI/ML at Adobe) where they talked about everything posters. It was called Adobe Firefly Live Weekly Meetup: Using Ai for Entertainment Design and that is how I knew to add a little scene at the bottom – classic poster design. His glasses were removed using the Remove Tool which did a great job on this. The rest was just basic Photoshop creating 3 Text layers and some glows around them and some clean up. Creating digital posters is really fun to do!…..Digital Lady Syd

Older Woman of Another Generation

AI Image of an older woman

I recently read an interesting article Unveiling the Intriguing World of Face Cubism: Exploring the Artistic Journey on how to do a Basic Cubism Portrait so it seemed like a good idea to try it out in PS Beta AI. Using an image by Jude Infantini at Unsplash, it did not work well, but I did get an effect that I sort of liked. Actually it looked like a man with all this hair (because I used Dave Kelly’s Gen Fill Photo Painting Action set to 40% so the image will not look much like the original), but the overall image was quite striking. Added several New Layers on top and just started painting in the image the way I wanted it. Added in the necklace using AI – with the Lasso Tool selected where necklace should go, I ran Generative AI again (Prompt: Native American Necklace). Ended up using a Curves Adjustment Layer, the Sharpen Tool, and a Layer Style to finish off the image. I am currently reading The Travels of Marco Polo, and I think this rather older woman could possibly look like what a women of this region from back in the 13th Century. Anyway, it was fun to ponder…..Digital Lady Syd

Vintage Fashion Statement

AI created image of a vintage model with a flowered hat

AI created image using Jerzy GorecKi’s Pixabay model image for starters. First added in some room on the left side and top side with the Crop Tool and using Generative Fill. On a stamped layer, ran Generative Fill with a prompt saying “vintage old fashioned look” – generated and got all kinds of results. Liked this image the best except for her eyes. Therefore, used the Lasso Tool around eyes and ran Generate to get the eyes shown. A little clean up removing a misplaced earring and that was it. It does have a nice vintage feel to it……Digital Lady Syd

A Halloween AI Party

AI created image from the Natural Bridge - used Halloween theme.

I have always loved doing Halloween images so it was a lot of fun to create this one after this rather weird AI generated background from the Photoshop Beta software was produced. The prompt used on this one was “flowers and river oil painting” – see my AI Digital Oil Painting – How To Do This Fun Photoshop Blog for more on how this was done (used Method 2 by Brian Mataish called Photoshop Generative Fill AI Can Turn Photos into Paintings. This Tidbits Blog is on just the post-processing steps used after the AI background was created.

The original AI background had this pretty scary vampire looking guy on the right, so that felt very much like Halloween. A Halloween theme was created using a free Color Lookup Adjustment Layer called SS Vieru 02 for the basic color that I thought looked really good (to download click Sparkle Stock Canyon Film). On a New Layer the Vampire was painted in using my SJ-Pastel-3 Painting Brush (see my How to Create My Favorite Brush Fun Photoshop Blog for the settings) and some cloning was done on another layer. The Remove Tool/Spot Healing Brush layer was created to remove some bad looking areas – I am finding I do switch between them (see center of my Photoshop Beta AI with Fenced Zoo Images Fun Photoshop Blog for more on this). The Pot and Fire were both generated in two different generation layer prompts and read “Halloween black witches pot” and “flames” – then smoke was added on layer above using some really old smoke brushes. The bat was generated using “Halloween bat” in the prompt. The cat is from a Halloween Obsidian Dawn vectors set ($4 set) which had the cat brush, skeleton brush and the raven brush. The cat was painted with a Cheetah Fur brush that the great Aaron Blaise taught how to make (see How to Make a Digital Brush using a Photo) and the tail was flared out to look scary (used Coyote Mange Rough Tough brush for this – still the best animal fur brushes around!). The Dark Skin Cobra Attacking Pose Snake is from PixelSquid, the greatest object resource item around – hopefully even after AI – it is a pay-to-use site. (For more info on them, check out my Some Compositing Tips and Resources Fun Photoshop Blog halfway down.) A sampled light orange was used on a New Layer to add some Fog (used Grut-I Fixray brush – he has the best brushes around – and a free brush weekly!) and then on another New Layer used the same brush with a darker sampled color for a slight vignette effect. Two layers were added as Darken and Highlight layers using Sam Peterson’s brush and colors – see my A Few Photoshop and Lightroom Tips and Tricks Fun Photoshop Blog – Tip 2 – use this for pinpointing light and shadows on an object. A Black and White Adjustment Layer set to Luminosity (because it always looks good) was added next. Used Pratik Naik’s technique Tip 2 for lightening and darkening parts of image (on new layers above set to Overlay blend mode – use at least a 100 px soft round brush set to Airbrush in the Options Bar and Flow at 9% and use white or light color to lighten image or black or darker color to darken image – different colors give some great results – use layer opacity to lower effect). This enhanced the light at the top coming and the dark in areas for more of a cave feel. Last step involved adding a New Layer on top with a few little sprinklers to add some texture in the lighted areas. Phew! That was it – took a while to complete!…..Digital Lady Syd

Another AI Oil Painted Image of the Natural Bridge

Another AI Iteration of the Natural Bridge

The process used for this AI image is from Brian Mataish’s video called Photoshop Generative Fill AI Can Turn Photos into Paintings using the Quick Mask to set the partial opacity selection. Check out my blog at AI Digital Oil Painting – How To Do Fun Photoshop Blog for info on this technique. This blog is to show the post-processing after the Generative Fill was created to demonstrate what can be done with an AI generated image.

Had to use the Remove Tool/Spot Healing Brush on a layer first thing (see center of my Photoshop Beta AI with Fenced Zoo Images Fun Photoshop Blog for more on this). Then a Color Lookup Adjustment Layer using On1’s Heat Wave 7 preset (yep they work in PS too) was added. I was not happy with the results yet so this time Luminar’s Neo was opened and only my favorite filter called Mystical (a bit like the Orton Effect) was selected. It was masked so the foreground water mainly used it. A swan was added using Midnightstouch Swan Lake set brush #22 (the set is on DeviantArt) – just painted over it with my SJ Pastel-3 Painting brush (it is set to 67% opacity most of the time – see my How to Create My Favorite Brush Fun Photoshop Blog for the settings) and lowered the layer opacity to blend it in. I felt a focal point needed to be supplied. A bluish texture was applied using the Adobe Paper Texture Pro panel (Caspian) set to Saturation blend mode at 79% layer opacity, and used a Levels Adjustment Layer to fine tune the using only the color Channels (followed Aaron Nace’s video called Make Amazing Photoshop Composites Quickly-part 1 at the 22-minute point – really interesting technique). A Curves Adjustment Layer for tone was added (see Denny Tang’s site with a Tone Chart Photoshop Action to download for doing this – have been using this technique as an action for over 5 years – it’s the best way to do this and use it on almost every image). There was this ugly blob on the right side of the image which was supposed to be a tree. Selected the tree area – generated it and got what you see in this image which looks so much better. The color was off a little so a Curves Adjustment Layer was clipped to it to make it match – to clip use the first icon at the bottom. Some sparkly dots were added to add a texture interest on two different layers – one using light colors and one using darker ones. Last step used Pratik Naik’s technique (see How to Create a Fun Cartoon Tip 2 Fun Photoshop Blog – on a layer above set to Overlay blend mode – use at least a 100 px soft round brush set to Airbrush in the Options Bar and Flow at 9% and use white or light color to lighten image or black or darker – different colors give some great results – use layer opacity to lower effect) to draw the eye to the swan. Still using a pretty basic workflow!…..Digital Lady Syd

AI Painted Image of Natural Bridge

AI Digital Oil Painting of the Natural Bridge trail

Here is another AI generated Oil painted image using the same Natural Bridge photo but has a totally different feel to it. To see how this was created and what the original image looked like, check out my AI Digital Oil Painting – How To Do This Fun Photoshop Blog. The post-processing for this image was pretty simple after the AI Generated Fill background was selected (used the prompt “river and flowers oil painting”).

Started with a Color Lookup Adjustment Layer with bluish tones in it and set to 79% layer opacity (see Sparkle Stock’s free Bleak – Trellick 01 preset); a Curves Adjustment Layer for tone (see Denny Tang’s site with a Tone Chart Photoshop Action to download for doing this – have been using this technique as an action for over 5 years – it’s the best way to do this and use it on almost every image); a Levels Adjustment Layer to adjust the Blue color (followed Aaron Nace’s video called Make Amazing Photoshop Composites Quickly-part 1 at the 22-minute point – really interesting technique); a Black and White Adjustment Layer set to Luminosity blend mode (because it always looks good – see my How to Use a Black & White Adjustment Layer to See Contrast in a Layer Fun Photoshop Blog); Lighten and Darken layers using Pratik Naik’s technique (see How to Create a Fun Cartoon Tip 2 Fun Photoshop Blog – on a layer above set to Overlay blend mode – use at least a 100 px soft round brush set to Airbrush in the Options Bar and Flow at 9% and use white or light color to lighten image or black or darker – different colors give some great results – use layer opacity to lower effect) which was used especially where the light is coming into the image; and finished with a Remove Tool layer for smoothing out a couple tiny water issues. In other words most of my basic workflow – now you know what I do! Quite a difference from the original image!…Digital Lady Syd

Same Natural Bridge with Different AI Oil Paint Results

AI generated image from the Natural Bridge trail

This digital AI oil painting was created by following Marty at Blue Lightning’s steps in his video Photoshop AI Transform Photos into Oil Paintings and it created this interesting photo from my original Natural Bridge image. Can you see the frog? For more info on the AI was created, see my AI Digital Oil Painting – How To Do This Fun Photoshop Blog. The Generative Fill prompt said “very spring oil painting.”

This blog is giving all the particulars as to how this image was post-processed after the Photoshop Beta Generative Fill layer was created. A Color Lookup (PS’s Foggy Night preset at 52 % layer opacity) Adjustment Layer; two textures (still using the obsolete Adobe Texture Pro panel even in the Beta!-used Sakura Skies set to Overlay at 100% layer opacity and Masque set to Color Burn blend mode at 28% layer opacity) for the more pastel look; a Levels Adjustment Layer in the Blue and Red Channels (followed Aaron Nace’s video called Make Amazing Photoshop Composites Quickly-part 1 at the 22-minute point – really interesting technique); a Remove Tool layer for getting rid of some of the artifacts that Generative Fill seems to add sometimes; some painting to create the frog – the eyes were already there (used my SJ Pastel-3 Painting brush that I have used forever – it is set to 67% opacity most of the time – see my How to Create My Favorite Brush Fun Photoshop Blog for the settings); and some Darken and Highlight layers using Sam Peterson’s brush and colors – See my A Few Photoshop and Lightroom Tips and Tricks Fun Photoshop Blog – Tip 2. I really like the dreamy effect the AI digital oil created. …..Digital Lady Syd

Masked

Drawing of a girl looking at a dying tree

Kyle T. Webster, the Photoshop Evangelist at Adobe, recently did two Masterclass YouTube videos called Learn from Greats – Mark English – Part One and Part Two. In Part One many of the Mark’s various pieces of art and how he created the images were discussed, and in the other Kyle created an image showing how to use some of these same techniques. That is what was attempted with this image, but it is a lot less abstract than most of Mark’s images. 26 different PS brushes were used – some created on the fly. Several layer styles were added and even PS’s Craquelure filter was used (lower right bush). Three Color Lookup Adjustment Layers and three Texture Layers were used. Lots going on here, but it was a lot of fun to try and get some of the expression that Mark English had in his paintings. I am going to try and get a better example using his techniques soon!…..Digital Lady Syd

Some Pretty Trees with the Help of AI

Image of fall trees with a reflection pond

Had to post my first attempt at trying out the Adobe Photoshop Beta version with its new Generative Fill ability. This image was just of a beautiful fall tree line. I decided to make the image longer and then had the Generative Fill function fill in the area added. It gives you three choices which I did not like so another group of three was generated – this was the forth one generated. It was created with no description in the field – just clicked the generate button. The Portraits – Moody Blues Adjustment preset was added. Then I typed in the generative field “foreground oak tree” – had to clone out a shiny spot in one small area but overall it looks great! That was it! It took all of five minutes to get this final fantastic image from one that was pretty good to begin with. ….. Digital Lady Syd

Spring Colors for this Flower

Image of a white flower with orange tips and a little extra color.

Had some fun with this phone image of a beautiful spring flower. Not sure what type it is, but it is gorgeous. Actually post-processed a very normal image, but I decided to try an alternate version. In this case Topaz Studio 2 was opened and just a vignette and AI ReMix filters were applied. Remix was set to Abstract Swirl Style using only 0.17 opacity and Sat set 0.75 (other were default settings). It applied these beautiful brush effects to the petals which is what you see above. I am still mourning the fact this filter studio is no long available from Topaz. Some Gaussian Blur was added to the background as it was pretty busy. I used a new technique learned from PS Guru Corey Barker – instead of using a brush to even out the shadows, the Gradient Tool was selected with default black to white colors set in the color swatches. In the Options Bar, the gradient will now show black to clear – set to radial gradient at 48% opacity used on the petals. On a New Layer set to Overlay blend mode, drag a very small amount to get a very small black effect which can be pinpointed very closely to where it needs to be added. Really nice technique, and different colors can also be selected along with white. This flower was really fun to do!….Digital Lady Syd