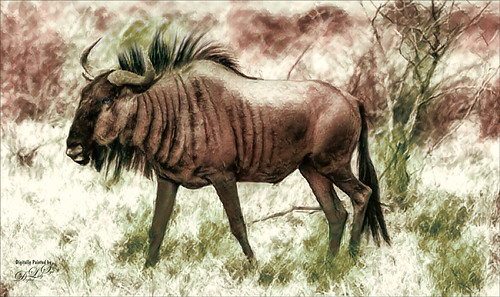
This image of a Wildebeest was in a packet of images I recently bought from Deal Jumbo in a set called Amazing Wild Animals 2 from images taken at South Africa, Namibia and Botswana. I would love to go there and take images, but will settle for this since I love animals! This is very simple post-processing – on the original image just added a Curves Adjustment Layer and a Black and White Adjustment Layer to get the contrast correct and turn the image into a black and white. Then Topaz’s (see sidebar for website link) new AI ReMix adjustment was applied. Unfortunately I lost all the setting for this, but I was able to figure out it used the last swatch in the list. Then used Color Theme adjustment to change colors around (it is the only adjustment that I find to change colors in the image after AI Remix was applied – I placed a preset called SJ Abstract Animal Effect in the Community that is similar to the above results). Back in PS, a little paint was used to adjust out the coloring in his legs which had turned very green. Created a vignette using Matt K’s technique (see my How to Create a Subtle Vignette blog). That was it. Love playing with these type of images!…..Digital Lady Syd

Latest
The Mighty Zebra
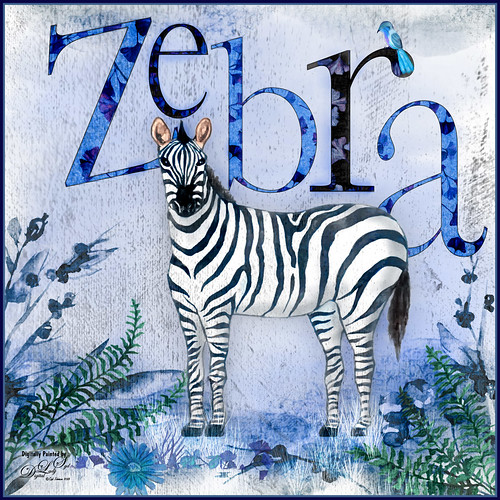
Just had a little fun with this one – started by painting a blue background with a large watercolor brush. Next added a background template by Anastezia-Luneva which added the side detail. Next a Zebra from Freepik was added. The letters from Ginko Textured Watercolor Graphics by Paperly Studio were added underneath along with the green ferns and flowers in foreground. Topaz (see sidebar for website link) Studio was opened and the new Topaz AI ReMix adjustment (see my What is Topaz AI ReMix???? blog) was applied using the swatch that looks like a B&W drawing (Col 2/Row 9). The adjustment was set to Opacity 0.47 and Overlay blend mode. Then added a Texture adjustment and used my cat painting texture (can download at my Deviant Art site) and painted the texture off the dark parts of the lettering. Last added an HSL Color Tuning adjustment and changed the Blue and Gray saturation sliders. The brush used to create the grass was from one of my very favorite natural brush sets at DeviantArt called Grass Set2 Frostbo Grass. A basic little painted bird was added. Some shading was painted onto the Zebra to give him some depth. The border is my Layer Style with sampled colors from the image (can download here). That is all that was done but it was a lot of fun to do!…..Digital Lady Syd
A Pretty Design
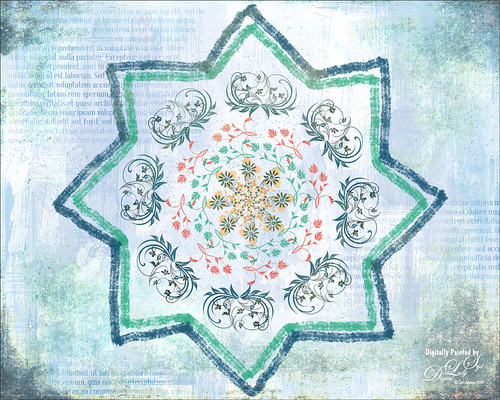
Decided to try out the Paint Symmetry in Photoshop CC 2018 – to load go to Preferences -> Technology Previews -> Enable Paint Symmetry. A little butterfly icon shows up in the Options Bar when the Brush Tool (or Eraser Tool or Pencil Tool) is chosen. Click the icon and several choices can be made from a drop-down menu. Once a shape mode is selected, it can be manipulated by adjusting the already activated transform controls or any of the Path Tools. Since this image would be using a special option called the Radial Symmetry, the New Dual Axis was chosen. The path in the Paths Panel was renamed to “radial symmetry 8” (can set up to 12 segments) – this can be added anytime while you are adding strokes. This will create the identical lines all around the design. There is also a Mandala Symmetry which is a little more complicated and will give a different look – just rename the path “mandala symmetry 8” (can be set up to 10 segments). Then go to the Layer Panel and choose a brush (does not support airbrush, bristles tip or erodible types) to create your effect. With a little experimentation, some great looks can be obtained. The thick lines are regular brush strokes using Grut’s G Flow Co brush, and the floral designs were created by a single stamp from 3 different brushes in a set by Coy Dreamer Floral Brushes and. Under these layers one of my Gesso textures was placed which had text added. On a new layer on top, a gritty brush effect was added to the edges. The last step used 2 Lil’ Owls Studio (see sidebar for website link) Cosmos 18 set to Pin Light at 77% layer opacity. This was just a fun little project to see learn how the Symmetry Painting worked. I wonder if Adobe will have some new features when it is actually added into the program. …..Digital Lady Syd
What a View!

Had some fun with this image of London along the Thames River in England. This is basically stacking a couple layers using different presets in Topaz Studio (see sidebar for website link), specifically the Simplify presets. First duplicated the background (actually did some clean up on the image first) and in Topaz Studio, applied the Flat I preset. This really just blocks in color as if it were painted as an underpainting layer. A Hue/Saturation Adjustment Layer and Curves Adjustment Layer were added to adjust the color. Went back to the original layer and duplicated it again. This time it was put on top and back into Topaz Studio, this time using my SJ Graphic Sketch 1 preset (it can be downloaded from the Community if you search for it) and set it to Luminosity blend mode at 71% layer opacity. 2 Lil’ Owls (see sidebar for website link) Color Bokeh Grunge Set no. 5 texture was applied and set to 54% layer opacity. On a layer above used Grut’s fabulous Cloud brushes (the best ones you will ever find!) to create some clouds in the flat sky – the layer was set to 40. Added a Black and White Adjustment Layer on top, adjusted the slider so the colors were not so over-the-top bright and set it to 20% layer opacity. Last step was to add a Red Channel Luminosity Curves Adjustment Layer. I love the painterly effect these presets created!…..Digital Lady Syd
Lots of Bikes at Flagler College

This is a different angle of some of the colorful bikes taken at Flagler College (the old Ponce de Leon Hotel) in St. Augustine, Florida. In Lightroom used the Auto button to tweak the original image and added a little more color into the bike colors. In Photoshop had to use the Adaptive Wide Angle filter to straighten the walls and then used Topaz Studio (see sidebar for website link) and applied SJ Subtle Colored Pencil which is up in the Community for your use. Back in Photoshop a Red Channel Luminosity Curves Adjustment Layer was used to increase contrast. Nik Viveza 2 was used to add a slight vignette. Last step was to add a Levels Adjustment Layer with the black Output Levels set to 27 and the Midtone slider set to 0.81 to get that flat matte Instagram effect. Really love these bikes!…..Digital Lady Syd
Enjoying a Swim
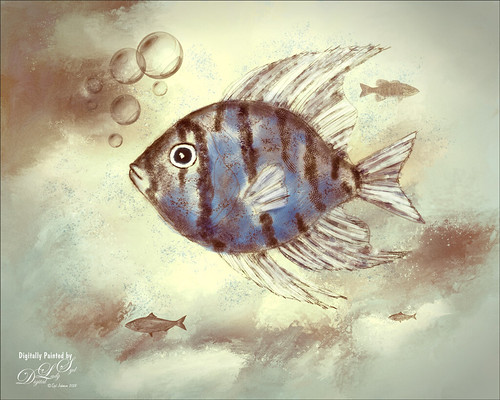
I am not the best drawer, but I did this Angelfish image following a really fun blog called How to Draw a Tropical Fish by Eugenia Hauss at Envato Tuts. It does not look exactly like the final result of the tutorial, but this was all done digitally where the tutorial is using actual graphite pencils. For the drawing Grut’s I Qwillo brush for doing the beginning design, Grut’s H Hatch Blanket brush (he has the best hatch brushes around), and Grut’s NM Shim Timber for shading were used. One of my Corel Painter textures was placed underneath for the watery look. The little fish are from Fish No2 Ars Frafix (no longer available) and the bubbles are from Lisa Carney’s Filters and Smart Objects Creative Live class which created a bubbles brush. A stamped layer was placed on top and Topaz ReStyle’s Silver and Ivory Cloak preset was applied with a few changes. Nik’s Color Efex Pro 4 was used on another stamped layer and the Film Efex Vintage filter with no changes and a Vignette set very softly were added. A Luminosity Red Channel Curves Adjustment Layer and a Dodge and Burn layer using a 50% gray layer set to Overlay to finish up. It was a lot of fun to create!…..Digital Lady Syd
Entangled Noses
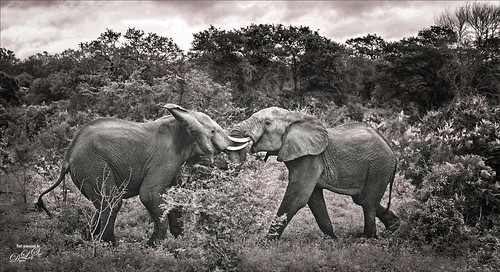
I usually take my own image but this interesting image of elephants in an encounter look good for trying the effect used in the video linked below. It was taken at the Kruger National Park in South Africa and provided in a set of animal wildlife images from Deal Jumbo. The video followed is called Create a Powerful Emotional Effect for Your Portraits in 9 Easy Steps by Adam Scheff. This image was converted to the resulting sepia tone using a split tone preset in the Camera Raw filter. Some dodging and burning and sharpening was also used on this image. A Levels Adjustment Layer was used to give a slight matte tone to the shadows. Just a lot of fun to try a different look……Digital Lady Syd
Happy Valentines Day
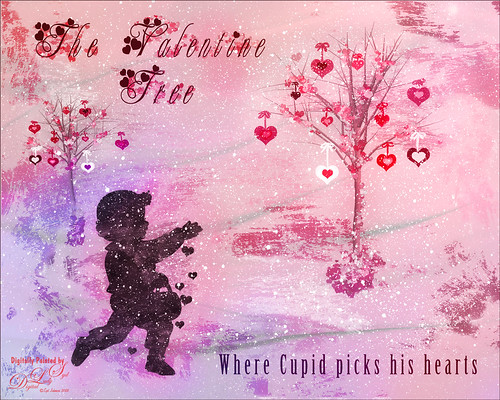
Just another Valentine – love to create them. These are my Valentine Trees created using the Render Tree filter (see my How to Create a Photoshop Artistic Tree blog) in Photoshop by selecting the Foliage Plant with no leaves. Some hearts were brushed on to hang from the tree using the shape brush created in my Happy Valentines Day (with a Few Tips!) blog. The little scattered valentines were added to the branches and used to create some valentine flowers at the bottom. Paint Swipes (White) by People Love Process is a freebie called Design and Illustration Textures from Design Cuts if you sign up with them – this is a wonderful pack of PNG and PSD files. Different shades of pink were used to paint in the paint swipes. And their Spatter Spray (White) was applied for the snowing looking background. The cupid is one of the brushes I created using Julie Mead at E-scape & Scrap set also from my Valentine blog tips. The image was taken into Luminar 2018 (see sidebar for website link) and the Accent Filter, Image Radiance, Sun Rays very lightly applied to brighten the trees, and the Darken & Lighten filters were used. In PS the layer was set to 57% layer opacity. A pink and blue overlay set to Hue blend mode at 82% was applied to add a little more color in the background. The fonts used were MC Sweetie Hearts and Birch Standard. The last step was adding a Red Channel Luminosity Curves Adjustment Layer. Hope everyone has a Happy Valentines Day!…..Digital Lady Syd
Statue of Queen Anne
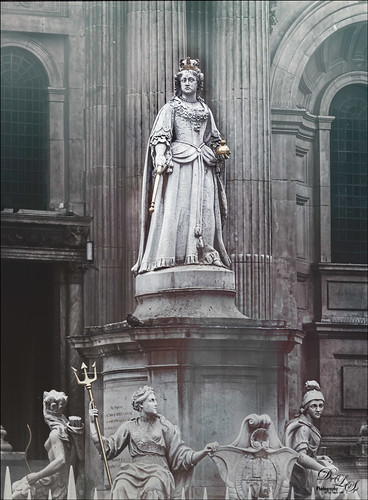
I was pretty pleased with how this image of the statue of Queen Anne in St. Paul’s Churchyard in London turned out as the RAW file was not too great. I actually did a lot of the toning in On1 (see sidebar for website link) Photo Raw 2018 Effects module using the Tone Enhancer, Sunrise, and Dynamic Contrast filters – I am finding I really like the Dynamic Contrast filter for sharpening up the images. It did a really good job on the statue. In Topaz Studio (see sidebar for website link) two textures were added on the image. Used Blake Rudis’s 5 Tone Heat Map to adjust the tone. The Foggy Night preset in the Color Lookup Adjustment Layer was set to 23% on a layer on top. Nik Viveza 2 was used to brighten the Queen up a little. A little reddish tone was used to give a vintage feel to the image. Lots of fun to try these different filters together……Digital Lady Syd
Castillo de San Marcos
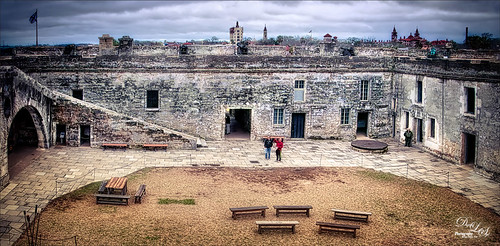
This image of Castillo de San Marcos, the old fort in St. Augustine, Florida, was built in 1672. The weather was a little overcast but many famous building spires can still be seen in the background. A lot was done to this image, mainly starting the HDR process in Aurora 2018 (see sidebar for website link) using three-images, and then in Photoshop, On1 Photo Raw 2018 Develop module was opened to increase Detail. The PS Adaptive Wide Angle filter had to be used to straighten the walls of the structure. (See my How to use the Adaptive wide Angle Filter blog on how to do this.) What a wonderful historic place to explore in the US…..Digital Lady Syd
Topaz Labs AI Gigapixel
Check out AI Gigapixel stand-alone software for upsizing your images. It’s incredible! And it can now be used as a plugin when in Photoshop. Also Topaz Labs Photo AI has some great sharpening and denoise tools along with Photo Video AI.

Luminar Neo
Click here to visit Luminar for more info and check out their new AI Filters.

GRUT BRUSHES – Photoshop Brushes for Digital Artists
Click here to visit GrutBrushes.com
And be sure to check out his Free Brush of the Week and Brush Sampler! These are the best brushes you can find!

Topaz Studio 2 and Legacy Topaz Labs Filters
Unfortunately Topaz Studio 2 and other Topaz Lab filters are no longer available for sale as of 2020. If you had bought these filters and would like to put them back on, here is a link to the Legacy Apps where they can be downloaded again. Below is an example of the wonderful Remix AI Filter from Studio 2. The wonderful Impression still works fine in Photoshop right now along with Adjust (all versions), ReStyle, and even PhotoFXLab!

On1 Photo Raw
Wonderful software to use as a substitute for or plugin with Photoshop. Many great filter effects and lots of AI capabilities!
