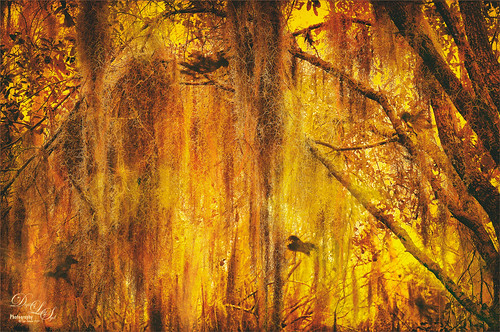
This image is actually of trees covered with Spanish Moss, but apparently I got carried away thinking about all the fires in the West and ended up with a very scary image. Some think it actually looks like a really sunny day in Autumn. I actually turned this image into a black and white with Nik Silver Efex Pro. The birds were created in Corel Particle Shop. Then a Gradient Map was applied to add this brilliant orange and yellow effect using a gradient made up of reds and oranges and yellows and set to Color Burn blend mode. On separate layers painted in clouds that looked like smoke in brown, beige, yellow and orange. Then back into Particle Shop to add some more smoke effects. Used Viveza to add the final border vignette and that was about it. It was fun to just take an image and see what can be done with it!…..Digital Lady Syd

Latest
Enjoying a Covered Patio

Had some fun with the beautiful lighting of this covered patio at The Garlic Restaurant in New Smyrna, Florida. Lots of nice tables outside to enjoy a refreshment before the evening arrives. This image was a bit hard to post-process due to the lighting issues. Luminar 4 was used to get the rich colors (I find this Photoshop plugin is great for this – see sidebar for website link) and Viveza was able to draw the focus to the correct areas. A few Adjustment Layers to lighten and darken some parts of the image and that was about it. Wish I lived closer to this place – a great place to have dinner!…..Digital Lady Syd
Standing Guard at the Hospital
This image was taken a while back of the Spanish Military Hospital Museum in St. Augustine, Florida. What I was trying to do was get an interesting texture on the building. This was done using one of my very favorite Photoshop plugins, Luminar 4 (see sidebar for website link). By following one of their fun videos on YouTube called Create an Antique Faded Look by Darlene Hildebrandt, the effect was created. The Essentials Color filter, Creative Matte Look filter, and the Professional Split Toning (Amount 50 and Shadows Hue 56 and Sat 60) were applied to get the antique effect. Then Lucis Pro 6.09 (which appears to be no long available unfortunately) was used to get really cool color wash look. Just a lot of fun. ….. Digital Lady Syd
Sleeping Boats

I have to admit I am a lover of wood boats and this is probably one of the reasons I loved the Hilton Waikoloa Village resort on the Big Island in Hawaii. They have a wonderful long waterway where you can ride in the boats as long as you want – at night the stars are incredible to see. I will not go over all the detail used on this image but it took me forever to get it to look good. Just used all my workflow and a few paint and clone tricks to even everything out. And I did use Topaz (see sidebar for website link) Sharpen AI – it did a fabulous job on this particular image – this program just keeps getting better and better! …..Digital Lady Syd
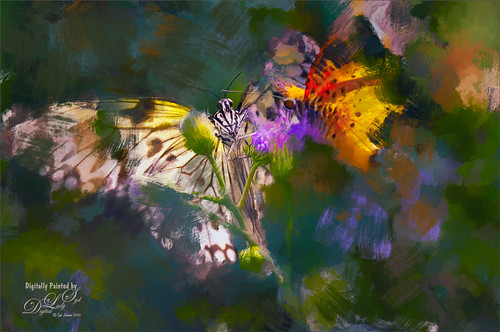
Butterflies Posing in Abstract

Continued having some fun with the Art History Tool in Photoshop (see my Creating an Art History Action blog for more info on this). Just added a few clean up layers after running the action and then used Viveza to direct the eye to the butterfly. This was a lot of fun to do as I really love these bright colors!…..Digital Lady Syd
New Guinea Singing Dog – Singing?

This was one of the cutest animals I have ever seen in a zoo – this one at the Palm Beach Zoo – seemed totally happy. He also had a buddy running around outside his doghouse. Just used a lot of different filters here – Topaz DeNoise AI (this filter is getting really good!), Luminar 4 (this program is becoming my go-to plugin for cleaning up an image – it is incredible) (see sidebar for website link), and an Exposure Adjustment Layer for the eyes. And then several individual layers were used to just clean up some of the edges of his face, muzzle and ears using an erodible brush by Aaron Blaise. That was it!…..Digital Lady Syd
Fisherman’s Cabin

This image was created using one of Shorpy.com’s great images called Fisherman’s Cabin-Shore Road-Magnolia-Cloucester-Massachusetts, cc1905. This image was run through the Image Colorizer (see my How to Colorize Using Image Colorizer blog for info on this) first, then after some clean up in PS before taking the image into Topaz Studio 2 where Impression, Edges, and Color Theme filters were applied. Then the image was taken into Corel Painter and the image was painted over where the canned Impression program left stroke I did not like. Back in PS, the Mixer brushes were used to do the final clean up on the image. Lots of fun to do!…..Digital Lady Syd
A Leopard Thinking

Just thought I would post my Leopard drawing – it looks a lot like the one Aaron Blaise teaches you how to draw in his Wildlife Painting Bundle – Leopard Painting Tutorial. (See my Got Some Free Time! Try Drawing! blog for the Elephant drawing I did from the same bundle.) Since being stuck at home so much, it was the perfect opportunity to work some more on my drawing skills. This image took a very long time to finish (yes many hours went into this), but overall it was a lot of fun to do. For me that is the name of the game! If you want to learn some of Aaron’s techniques, check out the link above for some super inexpensive offers or check out Aaron’s fabulous YouTube channel. And lots of great animal brushes are at his website also. ….. Digital Lady Syd
The Mighty Dragonfly
Had some fun giving this guy new background. The original background e was pretty much out of focus the image was shot at F5/6, and so a splash brush was used on a layer above to add some texture over the original background. (See my recent How to Use a Spatter Brush for a Background Effect blog for how to do this.) Topaz (see sidebar for website link) Sharpen AI was used to sharpen just the dragonfly. Some Dodging and Burning and Spotlight Effect was used on him. Last step was a Gradient Map Adjustment Layer using just reds and warm cream color. ….. Digital Lady Syd
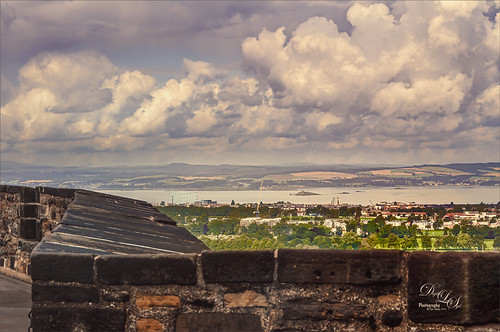
What a Beautiful View!

This is an image taken a while back at Edinburgh Castle in Scotland – missing not having any gorgeous landscape images to take like this one. Hard to believe these clouds were so dramatic! Not much done on this photo – just some LR basic processing, then in PS, Topaz (see sidebar for the website link) Denoise AI was used. Next a little Luminar (see sidebar for website link) and finished off with Viveza. All my favorite plugins!…..Digital Lady Syd


