Joyous Ornaments Lining Up for the Tree
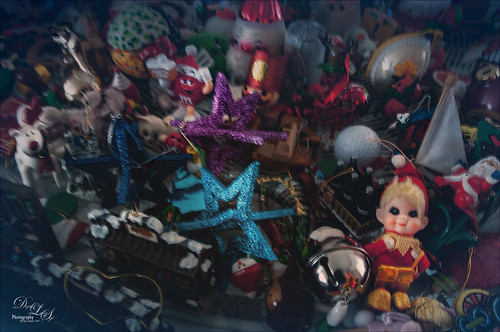
This is just one of those crazy photos that make me laugh. It is not all that sharp but sort of exemplifies the total chaos it is for me to get all the ornaments up and hanging right! Biggest issue I had was to get this image sharper without deteriorating the quality. In Lightroom’s Develop module, used my SJ Sharply Dark LUT (created in my blog and video called How to Create Profiles in ACR from LR Presets and Some PS LUT Files) and set it to Amount 81. Then did just the normal adjustments. Radial Filters were used to help sharpen up some of the ornaments I wanted particularly in focus. Went into Topaz (see sidebar for website link) Studio from LR and used AI Clear (applied it twice to get some additional sharpness and it worked!), the Precision Contrast adjustment, Topaz Lens Effects Diffusion Adjustment to soften overall just a little and Topaz Studio Focal Blur Adjustment, placing it over the main ornaments to keep sharp. Then back to LR where it was opened up in Photoshop. Did a little clean up of some edges and used Nik Viveza 2 to emphasize the focal point on a few ornaments. That was it. I find this a really soft sort of happy image – not one that goes up on the wall but one that reminds me of Christmas!…..Digital Lady Syd
View from The London Eye
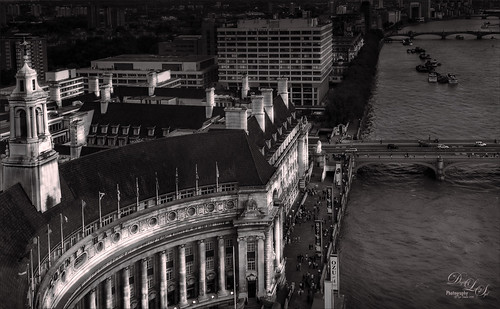
Just thought this image from the London Eye looked nice with a black and white treatment. This time in Lightroom used one of Sergei Ramelli‘s preset called AA Drama Gradient Filter (subscribe to Serge’s newsletter to get the preset and lots of others) and then went in and tweaked the settings – added some Radial Filters also to emphasize the setting sun on the buildings. Did a crop of the image before taking into Photoshop. On a duplicate layer used Topaz (see sidebar for website link) AI Clear Adjustment, applied it, and opened up Topaz Black and White Effects plug-in from the top drop-down. This time selected from the Traditional Collection the Classic with Grain preset – but turned off the Basic section and used mainly the Adaptive Exposure, Regions, Detail, and Detail boost sliders. In the Finishing Touches selected the Silver and Paper Tone and adjusted to get a nice off-black, almost purple color. Back in Photoshop added a Curves Adjustment Layer. Not much too it…..Digital Lady Syd
Fishing the Osprey Way
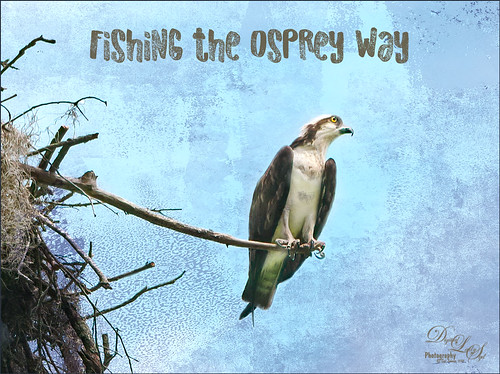
Here’s an image of a beautiful Osprey checking out the swampy area he apparently lives above. I don’t know how he balances on that tiny branch, but you can see how big his talons are so that explains it. Initially I did not think the image was sharp enough to use this cropped in. After adding Topaz (see sidebar for website link) Studio’s AI Clear adjustment and following Unmesh Dinda’s video called The Hidden 3D “Contrast” in Photoshop, the bird just sort of popped. Used a rather washed out texture I created behind him and added a Hue/Saturation Adjustment Layer on top for the blue tones. Then added a Curves Adjustment Layer to brighten the image back up. The free font is called Old Originals……Digital Lady Syd
Mickey Shopping on Main Street USA
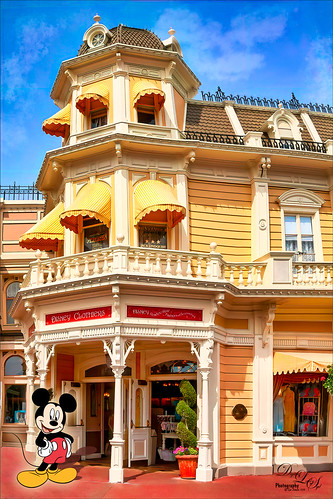
Had some fun working on this image. This image is of a shop on Main Street USA, Magic Kingdom in Orlando, Florida (click on link to see more info and other interesting buildings). I really love the color yellow so this shop always catches my attention. There was a lot of manipulation done to get rid of the people in front of parts of the image, straightening the building, and adding the Mickey Mouse cloud. Note that the top floors are not as high as the bottom floor – Disney does that on all the buildings to make them look bigger than they are. Just a few Basic panel changes done in LR before going into PS. Next the people were removed in front using the new Content Aware-Fill command and little more clean up. Next the Adaptive Wide Angle filter was used to straighten up the columns and the image was cropped (see my How to Use the Adaptive Wide Angle Filter blog). Next on a Composite layer (CTRL+ALT+SHIFT+E) , Topaz (see sidebar for website link) Studio’s AI Clear Adjustment and HSL Color Tuning Adjustment were used. Back in PS on a New Layer on top, Grut’s FX Cloud Kernel Hi brush (these Cloud Brushes are the best around) was used to paint in the Mickey Mouse cloud face. Then Grut’s Cloud Lumens Hi and Sparco HI brushes were used on other sky areas. Another composite layer was created and taken into Skylum’s Luminar 2018 (see sidebar for website link). This used their wonderful new AI Sky Enhancer which really popped the sky. (Settings: On bottom layer used Accent AI Filter Boost 67; AI Sky Enhancer Amount 38; Tone: Exposure 0, Contrast 4, Smart Tone 66, Highlights 31, Shadows -6, Whites 92, and Blacks -80; and Golden Hour Amount 17 and Sat -62. On top layer used my SJ Matt Look preset – Sun Rays which contains Matt Look (Amount 47, Fade 20, Contrast 20, Vividness -44, Toning 7, Hue 256, and Sat 46; and Sunrays – placed the sun down halfway on right side of house (X104/&55) with center off the side of the image, and the rest of the settings: Amount 30, Look 31, Number 23, Length 65, Warmth 67, Radius 63, Glow Radius 69, Glow Amount 66, Warmth 72, Penetration 78, and Randomize 8.) The last step involved adding a Mickey Mouse vector object from Shutter Stock (noted that an .eps file from Illustrator can be opened in PS – to see it first, find file in Adobe Bridge and place into your image) and created shadow for him. I love the color and how sharp the image is!…..Digital Lady Syd
Native American Playing a Flute
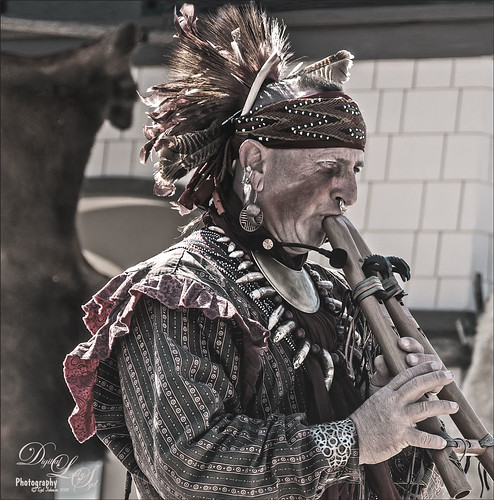
Happy Thanksgiving to everyone here in the States! Usually I put up a funny turkey, but this year I am posting image from the Native American Festival that occurs annually in Ormond Beach, Florida. The first Thanksgiving celebration theoretically occurred in October of 1621 after their first harvest in Plymouth and was attended by 90 Native Americans and 53 Pilgrims. I believe a Native American drone flute is being played. This image uses a technique learned from Adam Sheff of Photoshop Tutorials called Create a Powerful Emotional Effect for Your Portraits in 9 Easy Steps. First cropped the image quite a bit and then used Topaz (see sidebar for website link) Studio’s AI Clear to do a great overall sharpening and noise reduction (this little filter is amazing!). To finish, just followed the steps in the tutorial. Lots of fun to do. Everybody enjoy your day (I have got to go cook a turkey…..)…..Digital Lady Syd
Here is some info on the flute from Wikipedia that I thought was interesting: A double Native American flute is a type of double flute. It has two sound chambers that can be played simultaneously. The two chambers could have the same length or be different lengths. The secondary sound chamber can hold a fixed pitch, in which case the term “drone flute” is sometimes used. The fixed pitch could match the fingering of the main sound chamber with all the finger holes covered, or it could match some other pitch on the main sound chamber. Alternately, various configurations of finger holes on the two sound chambers can be used, in which case terms such as “harmony flute” or “harmonic flute” are sometimes used.
Graham Swamp
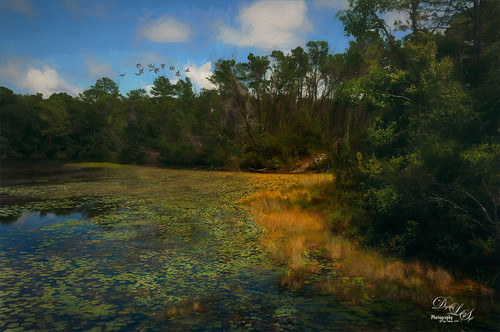
Graham Swamp is a place I have photographed many times. It is not really that pretty most of the time, but this fall it contained just enough color to create this image. And Topaz (see sidebar for website link) came to the rescue for me. In Studio, the new AI Clear Adjustment was terrific on this type of image. Really helped sharpen up all the little details without over-sharpening them. Learned a new workflow from a Topaz Webinar by Joel Wolfson called The Simple Path to Stunning Images with Topaz. Not sure it is posted yet, but do check out the Topaz webinars – there are some really informative ones like this one. Basically it uses Topaz Adjust to adjust exposure without losing the Shadows or Highlights in the image. I had forgotten this and it is a very useful tip. So here is the tip: since the Adaptive Exposure slider is connected to the Regions slider, use them in together – the higher the Adaptive Exposure amount is, the more Regions should be set. Used the Dehaze, Precision Contrast, Precision Detail Adjustments, and somewhere in the mix some Impression and the ReStyle Plugin. Turned this rather dreary image into a beautiful autumn look…..Digital Lady Syd
Deserted Beach on Spanish Cay
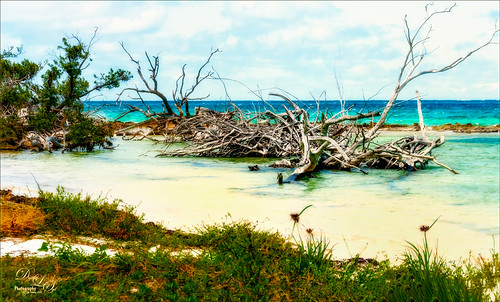
This image of a very deserted beach on Spanish Cay in the Bahamas was post-processed using the new On1 Photo Raw 2019 (see sidebar for website link). The software has had a major update and is much better. First of all, it is even faster loading your images . The next big improvement is that you can quickly switch between the Develop, Effects, Portrait (a new module) and Local tabs when accessed from Photoshop. This image used the Dynamic Contrast filter set to Natural, Glow Filter using Softlight Strong and painting out the dead trees, and Color Adjustment Filter changing the blue color a little. All the filters were set to an Opacity of 65. Then back in PS, a blue Solid Color Adjustment Layer was set to Hard Mix blend mode, layer Opacity 100%, and Fill set to 8%. Nik Viveza 2 was applied to add just a little warmth to the foreground water area. A spotlight effect was added to the wood and the edges were darkened down a little for a slight vignette effect. Last step was a Curves Adjustment Layer to add a little contrast. I will be learning more about this software soon and pass any tips along. I really like what I am seeing with the new On1 software!…..Digital Lady Syd
Colorful Queen Emma Lily
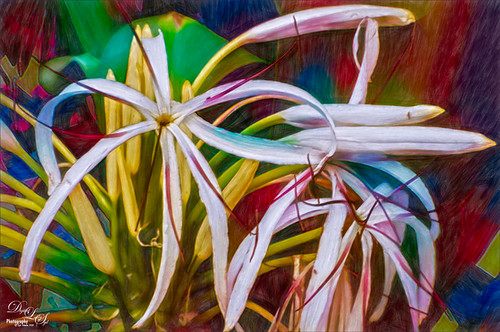
Enjoyed post-processing this Queen Emma Lily growing in my front yard (they bloom all year long). I was mainly experimenting more with Topaz (see sidebar for website link) Studio AI ReMix. This time used the Neon Rise Style set to Linear Light blend mode and added Impression’s default settings except for Paint Opacity at 0.05 and Precision Detail. Back in Photoshop, added Nik Viveza 2 to sharpen up the center of the flower for focus and that was it. I just love the colorful results! For more on AI ReMix, check out my Topaz ReMix – Update and Better than Ever! blog for more information.
First Snow of the Season
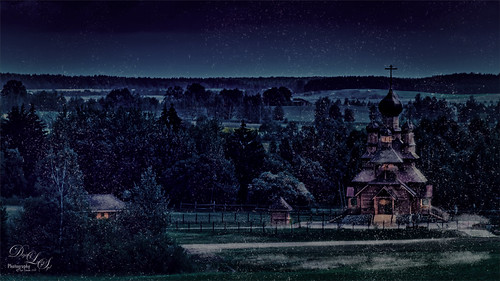
Decided to try using Serge Ramelli tutorial in KelbyOne’s Lightroom 30 Magazine on how to “Transform a Day Photo into a Night Photo.” It would probably be better if a street scene was chosen, but after fiddling around with the Radial Filters in Lightroom a bit, the results turned out pretty nice. Then the image was taken into Photoshop and I decided to add this wonderful, fairly new plug-in for us Windows users, called Luminar 2018 (see sidebar for website link). Several filters were added to get just the correct light to dark ratio (Accent AI Filter, Saturation/Vibrance, Dehaze, Brilliance/Warmth, and LUT Mapping using Color Punch Hot preset). On a second layer in the plugin Joel Grimes Indian Summer preset was applied which really sharpened up the church details. Then I decided I wanted a little snow effect so a couple layers were created using Glyn Dewis’s Dirt Debris Snow brush (created in his How to make a Dirt, Debris and Snow Brush in Photoshop video). A little snow was piled up on the sidewalk and roofs with a few specialty brushes I had created. I really liked the overall effect using a really bright image……Digital Lady Syd
Color of the Wind
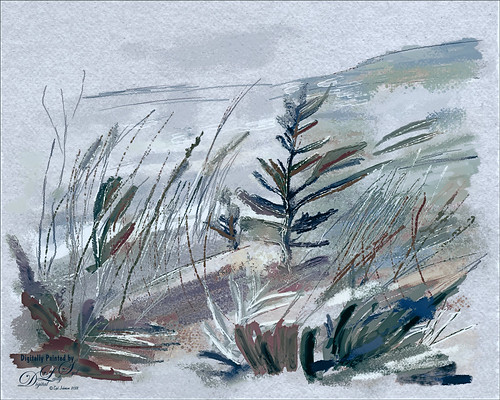
Once again just had some fun – this time painting with Grut’s Ink Brushes and paper. Decided to try and create an image somewhat like an Andrew Wyeth. (Right, like I could paint like Andrew Wyeth – I would be in heaven!) He is one of my favorite painters. It also gave me a chance to go through all the wonderful Ink Brush Nicolai has created at his Grut Brush site. There were so many I wanted to use but stayed instead to these brushes: Gone Coral, Coven Sloth, Pensive Linny, Bed Kelp, Bone Soak, Holy Slips, Go Folly, Raggedy Tag, and Wain Pip. (These were all placed into a brush Group named SJ Grut Ink Brush Favs – and backed up in the Preset Manager.) I also used his Oil Impasto Chip Gimble brush for ground cover. All these were used on separate layers so they could be adjusted and the opacity set correctly. Nicolai also has some marvelous papers – this one started with SP Espaloaf which gave the beautiful overall texture. To finish up, Topaz ReStyle was opened up and the Peppermint Gray preset applied for a very cool feeling to the image. Last step was to use Nik Viveza 2 to bring in the focus to the main tree. If you like ink brushes I suggest you check the Grut Brush Site – lots to choose from and for a low price, you can get all his brushes including these ink brushes. And the best deal is he gives away a free brush each week under his Freebies tab – all different kinds. I can’t tell you how many brushes I have gotten from this free downloads. …..Digital Lady Syd
White Abstract Flowers
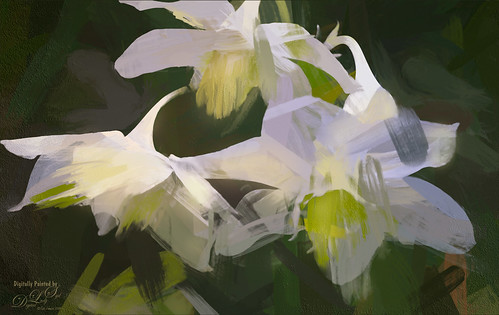
Love the results of this abstract applied to a rather ordinary grouping of white flowers. Applied a basic Topaz (see sidebar for website link) Impression Abstract preset to the flowers to remove the details. Then took the image into Corel Painter to paint in more of the flowers. Saved as a PSD file and opened up in Photoshop to further paint in details with Mixer Brushes. To get the interesting texture effect, added a rather light edged painted border in white and in the layer style, set the Bevel & Emboss to one created by John Derry. At this point I could not find a link where these can be purchased (I got them several years ago) but try playing around with this layer style effect. The opacity of this layer was set to 44% and the Fill amount set to 5% to get the interesting painting look. Used Nik Viveza 2 and added some color for lighting effect……Digital Lady Syd
Chatting with the Ladies on the Bridge
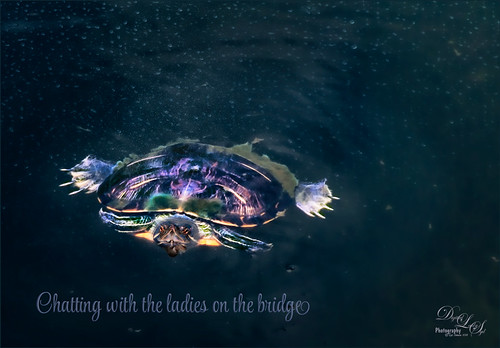
This was a fairly large sized turtle that was hanging around the bridge platform where I was talking with a few other ladies – he seemed totally enthralled with our conversation. Something tells me he was looking for a hand-out. Lucis Pro was added to sharpen him up a little first. Then Topaz (see sidebar for website link) Studio Texture Effects filter (started with Earthy Cat and Window Gaze preset – only used these adjustments: Blurs, Basic Adjustment, Texture and set the Opacity to 0.30 – used as it gave a natural looking interest in the water; added Dehaze Adj – 0.72 opacity and Strength 0.91 and Suppress Artifacts 0.73 – gave water a darker richer color; next added Radiance Adj – 0.97 opacity, Overlay bm, Radiance Type Light, Strength 0.53, Width 0.16, Length -0.28, Curl 0, Suppress Weak 0.01, Effect Coverage 1.00, Fade 0.13, and Sat 0.63 – in mask painted around turtle with small brush which lightened it up around turtle, then used the Adjust settings and set the Density and Contrast to blend the color into the water color – gave a very soft edge around the turtle; the Glow filter was added last – Opacity 0.58, Overlay bm, Primary Glow Type 0.10, Primary Effect Sharpness 0.74, Primary Electrify 0.23, Primary Simplify Details 0.87, Primary Edge Color 0.17, Primary Detail Strength -0.40, Primary Detail Size 0.20, Primary Brightness 0.37, Primary Contrast 0.98, Primary Sat 0.23, Primary Line Rotation 0, Primary Glow Spread 0.08, Coverage Transition 0.31 and Sharp Radius 0.10). In Photoshop a Vignette was created using Matt K’s technique (see my How to Create a Subtle Vignette blog). The font is called Style Casual, one of my favorites. ….. Digital Lady Syd
Emily the Pig
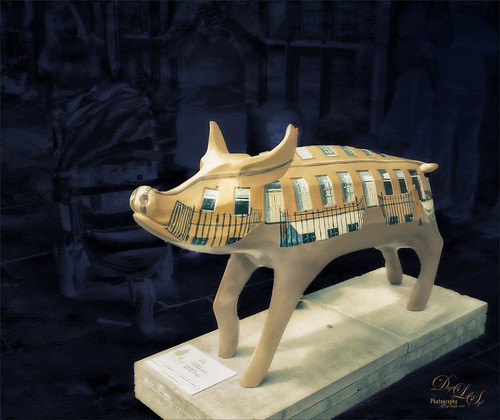
This little pig has the same story as another pig image I took way back in 2008 when the Town of Bath in England was having a public art event to celebrate Bath’s origins and artists. (See my King Bladud’s Pig blog.) King Bladud’s (cc 863 BC) pig, named Emily and painted by Charlotte Moore, is one of 106 pigs that were on display all over the city (I only saw a few) and they were sold at auction to raise money for the benefit of Bath’s Two Tunnels Project. Not a lot was done with this image. The pig was selected and a texture was placed behind her and set to Difference blend mode – that is why you can see the people behind her but not real clearly. Then Luminar was opened and one of my favorite presets by Joel Grimes was applied (Soft and Desaturated) – these preset can still be downloaded from Luminar for free from inside the program. Back in Photoshop a New Layer was opened and just a bit of black was added to darken the bright areas a little more. Last step used Nik Viveza 2 to emphasis the focal point a little more. That was it!…..Digital Lady Syd
Oahu Landscape
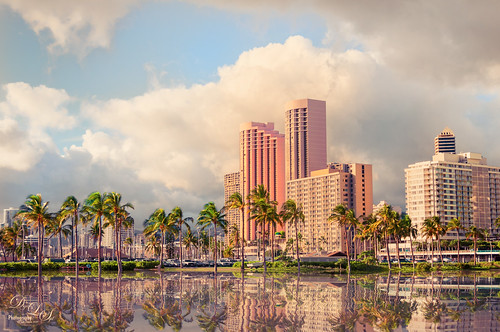
Had some fun with this image of some of the hotels and buildings along the beach of Waikiki. This image actually has a big pool of water in front with a large sandy beach and people swimming. Instead I added the Flaming Pear’s Flood Filter to create a beautiful reflection of the palm trees along the edge of the original water. A Channel Mixer Adjustment Layer was added to brighten up the colors – ran a free action by Sparklestock called Ultimate Vibrance. In a black layer mask the buildings and trees were painted back. On a stamped layer Nik Viveza 2 was applied to sharpen up the hotel fronts and add a subtle vignette around the edges. The last step involved going into the PS Camera Raw and applying a favorite preset from David duChemin’s older “Refining Your Vision in Adobe Photoshop Lightroom” book (all his books are great) named Classic India Split Tone (here are the very simple settings: use Split Toning section either in Lightroom or Camera Raw and set Highlights Hue to 50, Sat 60, Balance 0, Shadows Hue 266, and Sat 35). That was it. I loved the pinkish tones which this preset brings out…..Digital Lady Syd
Leaf Waterfall in a Rain Forest
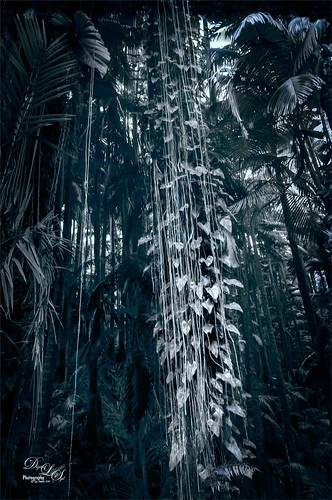
Image was taken at the Hawaii Tropical Botanical Garden on the Big Island near Hilo. This is a wonderful place to visit if you get on the island. Everything grows in giant size here including these philodendrons on a vine around the tree trunk – it really did look like a waterfall made of leaves. I created the image as a black and white and decided I liked having the dark green blue color in the image as it looked more natural to me. To change the color, Topaz (see sidebar for website link) ReStyle was used by applying the Midnight on Swan Lake preset. A Matt K vignette was created (see my How to Create a Subtle Vignette blog) and that that was about it.
Girl Playing Erhu
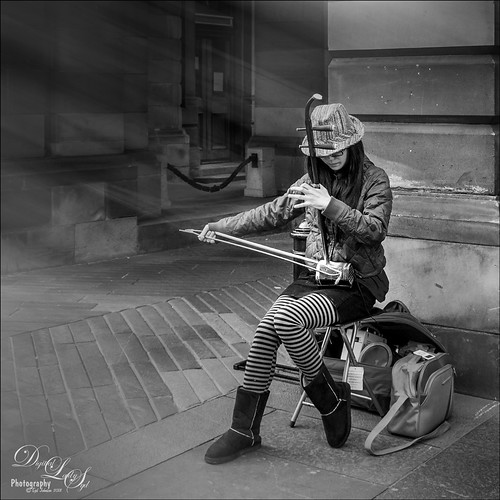
This is an image of a girl playing an Erhu, a traditional Chinese musical instrument from the Song Dynasty dating back to 1104 AD. She was playing along the Royal Mile, the main road through the historic district of Edinburgh, Scotland. This instrument has a very lovely sound and I actually bought a CD from her called Erhu by Yan Shi (unable to find a link for it as it is written mainly in Chinese). This image just seemed to need a black and white treatment so in Lightroom, one of Sergi Ramelli’s presets in his B&W pack called AA Drama Radial Circle Dark was applied and adjusted to fit. Then in Photoshop, Topaz (see sidebar for website link) Lens Effects was applied using the Streak Filter. I have never used this before, but I love the way it gave just a little light effect and added a motion feel to the bow. On a stamped layer, Nik Viveza 2 was applied to adjust the focus on her face and hand. That was basically all that was done. I wish had more images like this one. …..Digital Lady Syd
Tiny Bubbles
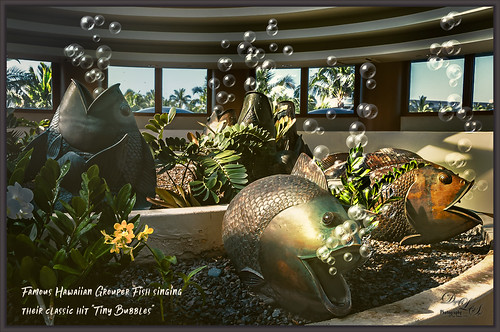
Been thinking about Hawaii’s Big Island getting hit by a hurricane and knowing how awful that is. Decided to post an image taken at the Hilton Waikoloa Village a while back at the Waters Edge Breakfast Buffet. These bubble blowers may not be grouper fish, but they are pretty close. It was a lot of fun to a do something with a little humor in it. This image was post processed using On1 (see sidebar for website link) Photo Raw 2018 Effects using the Dynamic Contrast, Sharpening, HDR Look, and Color Enhancer filters – I can really see improvements with this program. Some bubbles were created using a Lisa Cagney trick. Nik Viveza 2 was used so all the bubbles would show up. PS Color Lookup Table using the Foggy Night preset at 33% layer opacity was applied. Then a Gradient Fill Adjustment Layer beige to tan gradient at 36% layer opacity was applied. A couple Spotlight Effect layers were used to apply a little lightening and darkening effect. The text is Soak Up the Sun Script Bold. That was it. These guys always made me smile when we went to breakfast!…..Digital Lady Syd
Umbrellas Galore!
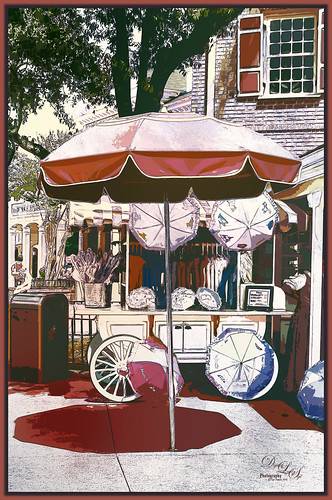
Love the color at the Magic Kingdom – total “eye candy” for the camera! This is one of my favorite images of the Umbrella Cart on Mainstreet USA. This time a sketch effect was added. I am one of those people that really like the sketch look. And although I have a couple actions and Topaz Simplify has some very good outline programs, it is hard to find one that fits all images. This technique did not work well on all my images, but for bright non-people images, it seems to be perfect. I learned this technique from a recent video called Creating a Realistic Pencil Sketch Effect in Photoshop at Davrophotofx. It was done using Elements, but it works fine in regular Photoshop since the filters are all the same. Biggest problem I had was that the Photo Copy Filter was not working correctly until I realized I had the foreground swatch set to white – it should be at the default black and white to look correct. Otherwise very simple steps. A couple of my textures were added and Nik Viveza 2 was used to adjust the color somewhat. Used a layer style for the border and that was it. Lots of fun to do this kind of image …..Digital Lady Syd
Pretty as a Postcard
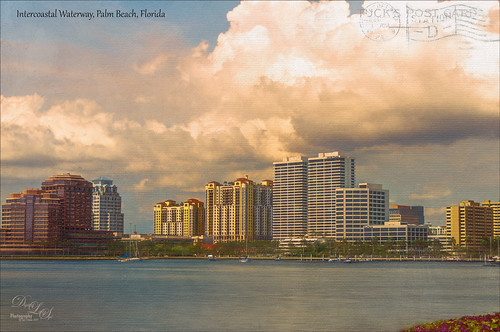
This is the Intracoastal Waterway (ICW) in Palm Beach, Florida. The skies were rather spectacular this day. Lucis Pro (now available for purchase again – see my Lucis Pro is Back!!!!! blog) was used on this image first. Then Photoshop’s Motion Blur Filter was opened and set to a Distance of 2000 pixels – once applied the far right icon on the layer was clicked and set to 63% opacity. A Selective Color Adjustment layer was applied to adjust the colors. On a stamped layer, Topaz Lens Effects (see sidebar for website link) Motion Blur was opened and 12.68 pixels was applied. Back in PS only the water was allowed to be visible in the layer mask so water looks smooth. The font Gabriola was used next. French Kiss (see sidebar for website link) Tableau Chateau was used to add texture to the image – this was done by clipping a Hue/Saturation Adjustment Layer to the image and setting the Saturation to -100. The texture was set to Hard Light at 15% layer opacity. Finally a Levels Adjustment Layer was also clipped to the texture to get the nice vintage postcard look. Nik Viveza 2 was added to add some emphasis to the buildings and a stamp from 2 Little Owls (see sidebar for website link) was added to further enhance the old look. I was love Palm Beach! …..Digital Lady Syd
Backwater in St. Augustine
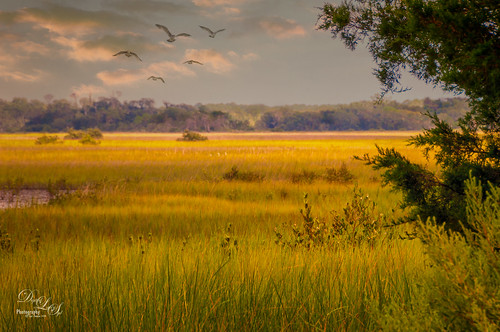
This is an image of the backwater area behind the ICW (Intracoastal Waterway) in St. Augustine and taken from the back side of Camachee Cove. Just had fun creating this image. Added a new sky from KelbyOne to the plain sky and a Curve Adjustment Layer to get the lighting just right. Also added some seagulls birds from a Pixabay image and softened them so they were not so sharp edged using the Blur Tool set to 30% Strength. Two Curves Adjustment Layers were added – one for darkening and one for lightening the image (filled masks with black and painted back where it needed to be adjusted). On a New Layer added a yellow light effect by setting the layer to Overlay blend mode and brush to 9% opacity. On a stamped layer (CTRL+ALT+SHIFT+E) applied Nik Analog Efex Pro 2 (Basic Adjustment, Lens Vignette, and Levels & Curves, especially the Luminosity Curve. It was set to 59%. The last step was to use Nik Viveza 2 to further sharpen the focal point of the flower-weeds sticking up. I love the warm feeling of this image…..Digital Lady Syd
Just Another Beautiful Hawaiian View
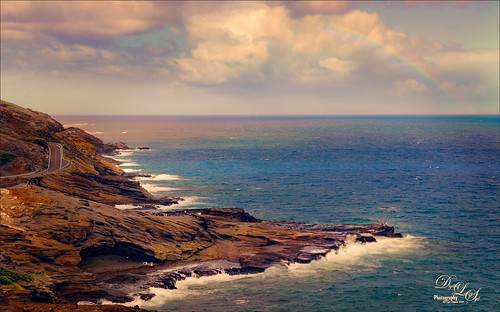
Just thought I would post another beautiful view taken on Maui in the Hawaiian Islands. There are several people in this image, especially a couple guys fishing out on the point. I actually added a little saturation this image to make it pop some. Topaz (see sidebar for website link) ReStyle’s Zambezi Zest preset was used to get the colors – this is one of my favorite presets for landscapes. The Spotlight Effect was used to lighten up some of the rocks out toward the fishermen. Otherwise just a pretty standard image…..Digital Lady Syd
Camachee Cove Yacht Harbor
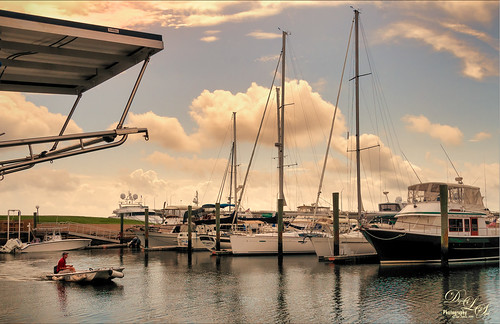
One of my favorite places to visit and take photos is at Camachee Cove Yacht Harbor in St. Augustine, Florida. If you’re a sailor, this is one of the best places to keep your boat along the whole East Coast of the U.S. Anyway, just wanted to prove that you can take a good image even in really bright light. This image was taken at around 11:00 AM and it was just fine. I know, it does not happen all the time, but it does happen! Not a lot needed to be done to it either. In Lightroom a Crisp Warm Soft profile was used from the free Matt Kloskowski Profile Sampler (same settings as the LUT file in Photoshop). Then just the same Basic slider changes. In Photoshop, Luminar 2018 (see sidebar for website link) was applied using just the AI Filter and the Brilliance/Warmth Filter – that was all and it looked incredible! Next my favorite Nik Viveza 2 was opened and the focal point was sharpened a bit – the guy in the boat and back of the boats. There was a blown out spot that was colored (yes you can do this in Viveza) to color in the effect. The last step was a Curves Adjustment Layer where just a small S-curve was used. That was it. What a beautiful day it was!…..Digital Lady Syd
Distant View of a St. Andrews Golf Course
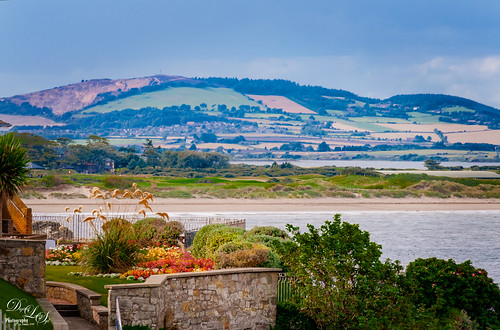
Wish I was at Carnoustie in Scotland to see the British Open, but at least I did have a chance to go to St. Andrews several years ago. (There are seven courses at St. Andrews now and this one is probably showing the Castle Course, but I am not sure.) Would love to live in this house! Not much done to this image – just some adjustments in Lightroom (used the Modern 07 profile) before doing clean up in Photoshop. Some spotlight effect on the flowers and a little darkening in the bushes. Used Nik Viveza to draw focus to the flowers and emphasize the plants sticking up. Added a slight vignette and that was it! Love Scotland in the summer!…..Digital Lady Syd
Fireworks at Epcot
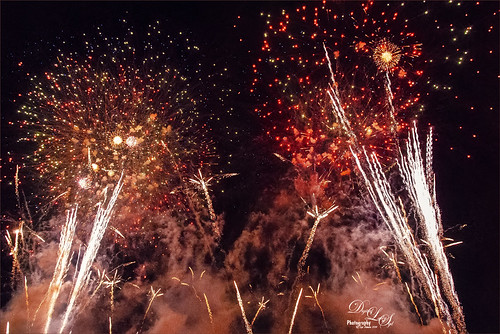
Did not get to a fireworks celebration this past July 4th, but still always enjoy my images from an Epcot nightly fireworks event at Disney World, Orlando, Florida. Not sure if they still are using real fireworks as this shot was taken a while back. In ACR used Adobe Vivid profile and made a few basic adjustments. On a duplicate rasterized layer, Luminar 2018 was opened and two filters were applied: Structure and AI Filter. Some Noise Removal was done due to the smoke noise created by the fireworks in the dark background areas only. Last step used the Color Lookup Adjustment Layer and set to Foggy Night preset at 24% layer opacity. Pretty simple – even though this is not the traditional fireworks image, it really reminds me of all the craziness going on at the fireworks!…..Digital Lady Syd


