First View of Land

This was a pretty exciting moment when land is first seen after sailing across the Gulf Stream all night. There was a sailboat off in the distance in this image, but we did not see another one until Spanish Cay – the ocean is very empty around here. To post process the image, very little was done. The water was adjusted in Topaz (see sidebar for website link) Studio 2 by adding a little bit of the Impression filter set to the default to tone down all the white reflection on the water – it was masked off the sky. This is exactly how the clouds looked – totally incredible. A Color Lookup Adjustment Layer was added using the free SparkleStock’s Wedding LUT called Airy 01 set to 58% layer opacity. A Curves Adjustment Layer was added on top where the RGB curve was set to a little S curve for contrast and the Red Channel was used to lighten up the Cyan just a little. That was it. ….. Digital Lady Syd
Savannah Home
Just enjoyed painting an image I took quite a while ago in Savannah, Georgia. These type of homes are everywhere in the historic district. In Photoshop used the Fan-Flat Blender that Photoshop provides in their Legacy set. Also used a couple others to get the smooth effect I wanted on the steps. In Corel Painter, used one of the newer Thick Paint Brushes to add texture and lighting to the ferns which were quite flat in the original image. Then brought the image back into PS to finish up. Actually ended up using a really old Topaz (see sidebar for website link) program called photoFXLabs and the Instatone effect since I could not get an the correct palette for the image. It worked great!…..Digital Lady Syd
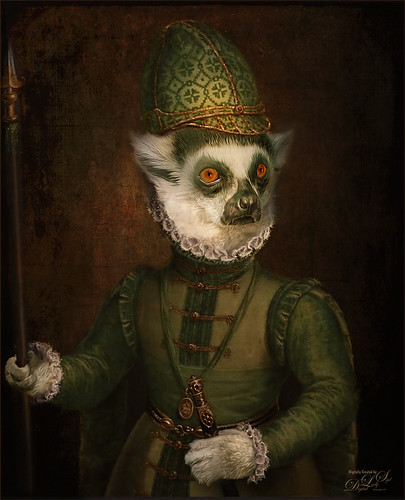
A Distinguished Forefather Lemur
I have always wanted to try this and I finally found a really great Photoshop tutorial on how to do it. This image started with a wonderful painting by Sofonsiba Anguissola called Portrait of a Spanish Prince from 1567 (it is probably an image of Prince Phillip III – the link gives some interesting perspective on this guy). Anyway, I will not go into all the steps since I pretty much just followed the steps presented in Chris Spooner’s video called How to Make a Fun Oil Painting Pet Portrait in Photoshop. This effect is especially popular with people’s pet images. The trick is to find an image that works with your pet image. It took a lot of manipulation using the Free Transform Tool with the Warp in the Options Bar to get it looking correct. And in this case, I had to use two other images of lemurs for the hands. The colors can be matched using the video after the images are combined. 2 Little Owl’s Carnevala 23 texture was added on top and set to Vivid Light at 65% layer opacity to get the illuminated effect in the background. If you want to have some fun, give this a try……Digital Lady Syd
Don’t Even Think About It!
In Lightroom I started out with a new free preset downloaded from SparkleStock called Instant Hipster X Pro 2 and a few Basic changes before going into Photoshop. On a stamped layer applied Topaz (see sidebar for website link) Sharpen AI set to Stabilize, Reduce Blur 0.80 and Noise Reduction 0.12 – a whole bunch of detail became visible in the wings especially. Next a Color Lookup Adjustment Layer was added using PhotoFocus’s Africa preset set to 49% layer opacity. On another stamped layer set to a Smart Object (for any additional edits), Luminar Flex was opened and the Structure and Details filters were applied. Back in PS, A black mask was added and just the wing lines were painted back for a little more detail. An Exposure Adjustment Layer was used on the eye. (See my The Eye Have It – How to Make Them Pop in an Image blog.) That was all that was done! Love this crazy bird!…..Digital Lady Syd
Checking out a Flower
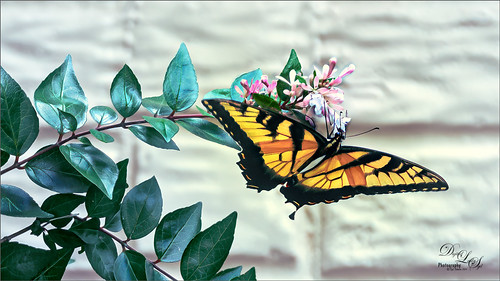
This beautiful Swallowtail Butterfly (of some type I believe) was enjoying a pink and white flower while in a rural area of Virginia a couple months ago. What a beauty she was! And this plant had at last 20 or 30 butterflies flying around it. In LR, just my basic changes were made – no presets, filters or brushes. In PS Topaz Sharpen AI was set to Stabilize, Remove Blur 0.79 and Suppress Noise 0.49. A Color Lookup Adjustment Layer set to PhotoFocus LUT called PF-Candlelight at 62% layer opacity was next. On a New Layer, some of the small halos around the green leaves was renived by cloning out with a very small brush. The image was lightened just a little with a Curves Adjustment Layer. A New Layer was set to Overlay blend mode and used a small brush to add some contrast into just the flowers. Viveza 2 was used last to adjust the colors and focus of the image. What a pretty butterfly!…..Digital Lady Syd
The Purplepassion Flower

This Purplepassion Flower image was taken at the Harry P. Leu Gardens in Orlando, Florida a while ago. It is a very beautiful bloom and there is a little bee hiding in it. Mainy did the clean up in Luminar (see sidebar for website link) Flex with their wonderful Structure, Detail Enhancer, Image Radiance, Microstructure, and HSL filters. In Photoshop used a Gradient Map tAdjustment Layer to emphasize the color a little. Then used Topaz (see sidebar for website link) Studio 2’s fabulous Impression filter – just adjusted the default settings a little to smooth out the background. Then used Mixers brushes back in Photoshop to further blend in the effect. Finally used Topaz Lens Effects Fog filter to lighten the top slightly. Viveza 2 was used to adjust the focal point and the last step was a Curves Adjustment Layer. The text is a font called Brettany ….. Digital Lady Syd
Hiding in a Palm Tree

I think this is a little Eastern Bluebird female who was helping me while I cleaned up my flower beds in my front yard. Not much was done in Lightroom, and Photoshop added Viveza 2 filter to sharpen her up a bit. The light was really dark in the palm tree, but really bright behind her so it was hard to get that looking correct. A Curves Adjustment Layer was used for this. Just a slight painterly effect was added in Topaz (see sidebar for website link) Studio 2’s Impression filter. Then in PS on a few New Layers, mainly just painted in some lines in the foreground palm fronds as they were really blurred. The Camera Raw filter was used to further tweak the color in the HSL panel. Topaz Lens Effects’ Soft Olive Green Vignette preset was added. That was it!…..Digital Lady Syd
Quietly Reflecting

Just a quick blog – was practicing my photography today and got an image of a beautiful orange Bird of Paradise bloom in my yard. Had some creative fun by adding a Flaming Pear’s Flood Filter effect. It still has the best reflection effects of any Photoshop plug-in around. The free font is one called East Liberty Signature. Very little was done to this image other than the background was darkened down and a few old leaves were removed. Overall a pretty simple image. …..Digital Lady Syd
Ahh! That Feels Good

This sweet Jaguar resides the Jacksonville Zoo and seems a lot more relaxed than her crazy “cagemate” who spends most of his time prancing around his exhibit and roaring at anyone who looks at him. (See my Don’t Take My Picture!!! Tidbits Blog.) She sat posing for me and then I got this rather cute image – she looks just like a large domestic cat. Don’t think I would test this theory though! Not much was done to the image. In Lightroom the regular basic adjustments were done. In PS tried out an interesting new technique presented by Unmesh Dinda in his Free 100+ Amazing Duotone Presets for Photoshop! video. I liked the colors resulting from this technique. Used Viveza to sharpen up her face. Used a Levels Adjustment Layer to create a vignette and ended up with a Curves Adjustment Layer to add a little more contrast to the image. That was it!…..Digital Lady Syd
On Duty at the Zoo
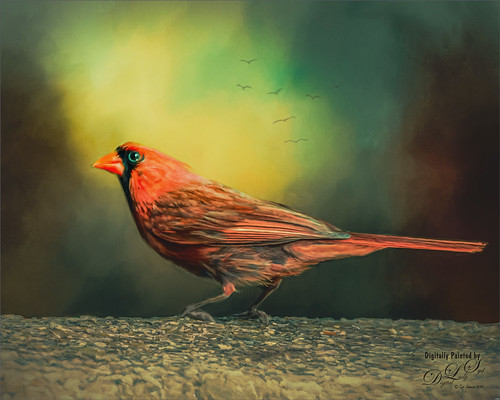
This beautiful male Northern Cardinal just sort popped in front of my while I was visiting the Lion exhibit at the Smithsonian National Zoo in Washington, DC recently. I decided to give him a better location as he was right in the middle of a bunch of us tourists. He was painted with mixer brushes and I believe an older Jai Johnson texture, with the colors and size of the texture changed to fit the scene. You do not have to keep a texture exactly the way it was when you got it. That is what makes it fun! Topaz (see sidebar for website link) Impression was used to paint in the foreground rocks – just the default settings with Brush 06 using the Graduated Filter to line it up on the front. The background birds are a brush from Jenteva Plant Brushes. Last step was a Curves Adjustment Layer. It is so relaxing to paint birds!…..Digital Lady Syd
Bird of Paradise Bark
Took this image of a Bird of Paradise tree growing in my front yard – it is huge and has some great textures in its bark. The little spike in the middle is the beginning of a flower. This image was taken in manual mode (200 mm, F/13, 1/160 sec, ISO 200, and 0.5 EV) and just Basic work was done in Lightroom before bringing it into Photoshop. Topaz AI Clear was used to remove a little noise and sharpen it up a bit. A Gradient Map using pink and blue tones was added and set to Soft Light blend mode at 88% opacity. More blue color was added into the image on a New Layer. On a stamped layer Viveza 2 was used to sharpen up the focal point before a Curves Adjustment Layer was used to add back contrast. Very simple. Lots of fun to work with colorful patterns!…..Digital Lady Syd
A Busy Place
Not a whole lot done to my beautiful Bird of Paradise bloom that I photographed yesterday. Looks like the ants are taking over – eish! In Lightroom just did some basic adjustments and used an Adjustment Brush to sharpen up the ants. In Photoshop Luminar’s Flex was used to further sharpen up the blooms and ants and a Vignette was used to darken the background. Then on another layer, used Topaz Studio 2 and applied AI ReMix – a BW filter preset from Greg Rostami was applied (uses Neon Feathers, Style Strength High, Brightness 0.56, Contrast 1.97, Smooth Edge 0.14, Sharpness 0.44, and Suppress Artifacts 0.79.) and set to Luminosity blend mode to give a colored sketch look (check out Greg Rostami’s Topaz webinar AI Magic with ReMix and Clear). In Photoshop a black layer mask was added and painted the effect back in a few places with a low opacity brush on the ants and some of the texture was added in the petals. That was it……Digital Lady Syd
Where is This?

This is another image from the totally fabulous art show called Infinite Space in Washington, DC until September 2nd. The art is by Refik Anadol and is an exceptional virtual experience. For another example, check out my recent Star Wars on Steroids Tidbits Blog.
Very little was done in post-processing for this image. Only a little texture added in Lightroom. In Photoshop, just some cropping to even out the edges, Luminar Flex was used to sharpen it up a little using their Structure, Details Enhancer,and Microstructure filters – then selectively adding them with a Masking brush. And of course AI Clear to remove Noise – but is was masked out so in the black areas but left in the colored areas as I liked the natural grainy effect it created. last step was a Curves Adjustment Layer. That was it! I really love this art!…..Digital Lady Syd
Woodpecker on Guard

This little male Downy Woodpecker was visiting one of his favorite snack spots in a beautiful shaded yard. Not much was done with this image as the bokeh effect was from the 70-300 mm lens shot at 300 mm and set to f/7.1 at ISO 200, 1/50 sec and EV -1/2. In Photoshop Topaz (see sidebar for website link) Sharpen AI was used to really popped the bird (Processing Mode Stabilize, Remove Blur 0.50, and Suppress Noise 0.20). Otherwise not a lot here. Viveza 2 was used to further sharpen the bird and a Curves Adjustment Layer was added to add some contrast. What a wonderful little bird!…..Digital Lady Syd
Bison Buddies

These two Bison were trying to find a nice shady place to hide from the exceptionally hot day in Washington, DC. Since the original color in the image was so beige and brown already, it was an easy choice to make the image a sepia tone. I started with the color tones from one of the best wildlife photographer’s, Nick Brandt, creating a Lightroom very subtle preset (Split Tone section: Highlights Hue 23/Sat 6 and Shadows Hue 41/Sat 6). There was a large fence line through the bison and two different methods to remove it were used. For Wilma, just a Curves Adjustment Layer and a Hue/Saturation Adjustment Layer clipped to it. Zora was a little harder – had to select and feather the fence line and then put the selection on its own layer. Again a Curves Adjustment Layer was used, but the edges were still showing so several painting layers using Coyotemange fur and poodle curl brushes were used to sample and match the regular fur. The light color was just harder to match so you do what you have to do! Then a little text and some Viveza 2 to finish them off. ….. Digital Lady Syd
Star Wars on Steroids

Image taken at the Infinite Space Art Show by Refik Anadol in Washington, DC. If you get a chance to see it, definitely go – absolutely wonderful. The silhouette was created from people sitting on soft cushions enjoying the show. This image, shot during a video, reminded me of flying into the Death Star in Star Wars. Not much work had to be done to the image. Luminar Flex was opened and Structure, Details Enhancer and Exposure filters were used to really sharpen up the image. Then on a stamped layer in PS, Topaz (see sidebar for website link) Studio 2 was opened and AI Clear was used to remove the noise in the image. Precision Detail was used just on the Highlights and Precision Contrast’s High Contrast slider was used to really darken the black. Back in PS a Curves Adjustment Layer was added. That was it. This show was full of beautiful color and movement!…..Digital Lady Syd
A Rose Hanging In There

This once beautiful rose was trying its best to show pretty even though its outer ring of leaves were pretty much spent. I decided to paint it since it had some pretty leaves and nice central rosebud. Several painting layers were created using Photoshop’s Legacy Brush called the Fan Flat Blender. I created a couple variants so color could be added easily, but it is pretty much the same brush. What is so nice is that it has a texture in the brush which adds a great effect to the mixer brush. Also Color Efex Pro 4 was added using the Darken/Lighten Center, Film Efex Vintage, and Detail Extractor filters. In PS On1’s Moody 5 Color Lookup preset was added at 61% layer opacity. And the last step was to use Viveza 2 to emphasize the center of the flower and give a slight vignette effect…..Digital Lady Syd
The Queen Emma Bloom

This is one of my favorite blooms in my yard. I take a lot of images of them and here is another one. This one was shot at using my Nikon 60 mm macro lens at F/5.6, ISO 200, and -1/2 EV. In Lightroom Serge Ramelli’s Safari Warm Dramatic Light preset was applied (to download, check out his How to Edit Amazing Landscape Photos video). In Photoshop Topaz (see sidebar for website link) Sharpen AI set to Remove Blur 30 and Suppress Noise 40 was applied – then a layer mask was added and the effect was painted off the dark background area. Luminar (see sidebar for website link) Flex was applied on a duplicate layer – used these filters: Structure, Brilliance/Warmth, and Advanced Contrast. That was all that was done – pretty simple. ….. Digital Lady Syd
Flagler Beach Fishing Pier
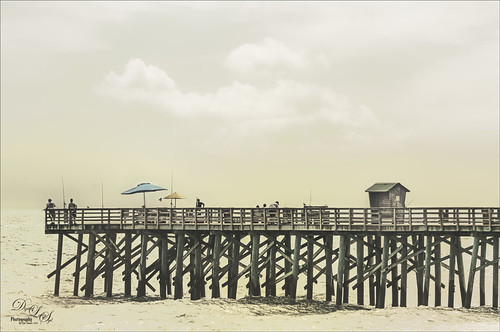
Now I love my image of the Flagler Beach Fishing Pier taken a while back. It was not that great an image so I added a new sky of the beautiful clouds taken at my house which is only 7 miles away. Luminar (see sidebar for website link) Flex was opened and many filters applied to get this sort of vintage feel to the image. A Color Look Up table was used in the Photoshop and a Gradient Overlay Adjustment Layer to get the soft colors. A little Viveza 2 was used to even out the colors for the focal points and that was it! ….. Digital Lady Syd
Look Up!
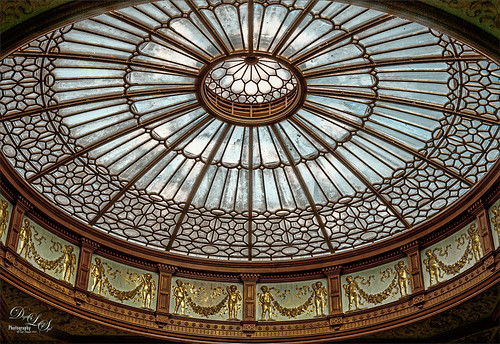
Sometimes you see something really spectacular if you just Look Up! This glass dome structure is located at the Waverley Railway Station (cc1866) in Edinburgh, Scotland. I did not think much about the image, but started playing around with it this week, and got a pretty interesting result. Just regular workflow in Lightroom. In Photoshop used the Luminar (see sidebar for website link) Flex filters – these are really fabulous, especially if you want sharp details. Details Enhancer and Structure filters were used to get that sharpness. It was converted to a black and white in Flex also and back in Photoshop set to the Darken blend mode. A PS Photo Filter Adjustment Layer using a Cyan Filter at 46% Density was added and set to 59% layer opacity. Then my favorite Grut Cloud Brush Set were used in a new layer to add the white clouds above the dome. To remove the clouds from the dome form, a Blend If Layer Style – Underlying Layer was used so the darker dome lines popped back. Last step was Viveza 2 to add a little brightness to the dome to pop it. Not sure how I missed this image!…..Digital Lady Syd
Swimming in My Secret Pool

This image was just a lot of fun to do. It was actually taken from the Harry P. Leu Gardens of the edge of large Lake Rowena. I just had to give this a fairy tale look. To achieve this effect, a Midnightstouch Swan Lake brush was used to place the swan in the scene. Luminar (see sidebar for website link) Flex was opened and on its bottom layer used these filters: Details Enhancer (be sure to check this fabulous filter out), Foliage Enhancer, Image Radiance, and Dramatic. On a layer on top, Joel Grimes Soft and Desaturated preset was applied and set to 76%. Viveza was used to sharpen up the swan. A Color Lookup Adjustment Layer used On1 Vintage Chrome preset at 60% Layer opacity. A Gradient Map using a Gray, Blue and Beige map was set to Soft Light blend mode and 46% layer opacity. Darken and Lighten Curves Adjustment Layers were added to dodge and burn and a Highlights Curves Adjustment Layer was the last step. This was a lot of fun to create this quiet looking spot. ….. Digital Lady Syd
Hibiscus Stamen

This interesting stamen was part of a huge Hibiscus flower at the Harry P. Leu Gardens in Orlando, Florida. Luminar (see sidebar for website link) Flex was used to sharpen up a stacked macro image. Then PS mixer Flat Blender was used to paint and add texture into the strokes. A variation was created to add color using the same brush. One of my Corel Painter Textures was added on top – the Blend If sliders were used to add a little more texture effect in the background. It took a while to finish up, but it was a lot of fun to create!…..Digital Lady Syd
Beautiful Leaves

This macro image was taken with my 60 mm Nikor Lens at F/2.8 with a Bower 0.5 x High Resolution Digital Lens with Macro added to the lens. This leaf image taken at the Harry P. Leu Gardens in Orlando, Florida, was actually turned into black and white in Lightroom before bringing it into Photoshop. In the Camera Raw Filter a profile called Underworld was added to turn it more of a dark blue and white which was really kind of nice. Viveza 2 was used to emphasize certain leaf parts and a Gradient Map was used to turn the color to green and white. I thought it looked more natural in green. Some clean up was done along with Darken and Lighten Curves Adjustment Layers. A Color Balance Adjustment Layer finally adjusted out the tones. A slight vignette was added to finish up!…..Digital Lady Syd
The Contortionist

This funny Green Tree Snake at the St. Augustine Alligator Farm was showing off one of his many tricks in his exhibit. He loves it when people stop by – very friendly! Not much was done on this image as he was perfectly lighted in his exhibit – apparently he likes it very warm. Topaz (see sidebar for website link)k DeNoise AI was used along with Aurora 2019. A Look Up Table Adjustment Layer and Viveza 2 was used. A Charming Font is the text font. I love this entertaining guy!…..Digital Lady Syd


