The Lioness
This drawing is one created by following the great Disney drawer Aaron Blaise’s tutorial on creating Lion Heads in his How to Draw Big Cats set. He provides a head skull drawing to use as a template to draw the actual structure of the head for eye, jaw, cheek, and ear placement. Fabulous technique! He also gives lots of tips about the actual animal and its traits. The background was created using three different textures: the bottom one was just a middle gray color; the one on top was one I had previously created in his Wildlife Painting Bundle – Lion Painting Tutorial (87% layer opacity); and the top used one of the free Japanese textures (to convert to pattern go to Edit -> Define a Pattern) from Resource Boy at DealJumbo (Pat 268 rev at 10.23 Angle and 297% Scale) – it was converted into a pattern. To get the pretty orange and turquoise colors in the background a Color Lookup Adjustment Layer using SparkleStock Clover 3DLUT file SS Sham Rocker 02.cube (link for the free ones but can’t fine direct line to the free Clover LUTs) with the Table Order set to RGB (was set to BGR), Lighter Color blend mode, and Layer Opacity of 88%. A couple other adjustment layers and a Camera Raw filter for a slight vignette were added to finish up. I totally love Aaron’s drawing tutorials and all the great tips he gives you!…..Digital Lady Syd
Dancing Maiden

Had a lot of fun just being creative with this one. First ran a Grok AI Image Generator character using the prompt “create vector black and white full length sketch of a young lady dancing gracefully” to get the pretty maiden dancing. Then decided to put her in a free file called Scribble Portrait Effect by Deeezy. Also downloaded Deal Jumbo’s 500 Free Photoshop Brushes and added a couple to the image along with the scribble border (use Free Transform to get the brush stroke to fit the image). An old Melissa Gallo impasto texture was added at the bottom. After making all the changes, put a stamped image into an old filter by Topaz called ReStyle to get the pretty frozen look. Added in some snow and free text also from Deeezy is Fladeo inline grunge. That was it!….Digital Lady Syd
Guarding the House
This rather boring and cluttered looking image of this Viking Soldier at Norway Pavilion in Epcot Center in Disney World definitely looks more interesting as a black and white. Now that Lightroom/ACR can do so much, it is easy to isolate the subject to stand out. For a good explanation on how to do this, check Serge Ramelli’s YouTube video called Do Black and White in Lightroom like a Pro. In Photoshop Topaz Sharpen was used and a little dodge and burning to get the final result. Very simple workflow and easy to do!….Digital Lady Syd
Contemplating Life
Still using the Chalk Brush to paint. And Mark English does always inspire me even though my drawing does not look like his work. This image used a Melissa Gallo Pastel Texture for the background. A Pattern Fill Adjustment Layer was applied to create the shirt patterning. My old version of Viveza 2 was added to pop the colors (still my favorite overall filter). PS’s Camera Raw Filter was used to brighten up his face. Enjoying making these little portrait images!….Digital Lady Syd
Looking Forward
No AI – just drawing and painting. Another Mark English inspired image. Love using a Chalk Brush to paint these little portrait images. This one used the same brushes as in my short Tidbits Blog called How I Am Feeling ATM. Used one of my older Melissa Gallo textures – she used to sell the most beautiful textures and this is one of them. The netting and detail on the dress are all brushes by Jessica Johnson (need to get her E-mail as she gives away some really fun brushes). And to get this nice bright color feel, a little tip I learned using the Photo Filter Adjustment Layer. Try setting to Warming Filter 85 to start with and a Density of 85 – change layer blend mode to Multiply and reduce the layer opacity to taste. Instead for this image, the Filter was set to Red, Density to 52 with Preserve Luminosity on, Linear Burn blend mode, and 48% opacity. Can really adjust as you wish! ….. Digital Lady Syd
My Bubble Office with my Creative Assistant
Yes Sophie, my sweet tailless feline, has come to my rescue this time and suggested we create this whimsical office that we both would love as a workspace. Note, she still can’t keep her eyes off the birds! So how was this image created? Using the Photoshop Beta version, an image was created with this text prompt “Office space in an office with windows high up in a building” using Special Effects Sketch and Watercolor. The variations that did not work were deleted keeping just a similar version as above. On a duplicated Smart Object Layer, the Parametric Filter (which are only available in Beta at the moment) Spherify was selected (set to Medium, Close Up, Size 1, Image Scale X:2.69 and Y3, Sphere Scale X:1.9 and Y:1.18, and Background Color White). On separate layers lots of clean up was done. Put some of my cartoon images on the computer screens. Sophie’s image is from a generic cat picture placed in Topaz Studio 2 – used the Impression filter to give her a painterly look. To get the soft sunny background effect, the cleaned up image was taken into Anthropics Smart Photo Editor and settings called Beach by InoculateIT were used. The final step was to add a few birds into the sky with a brush Bert Monroy teaches how to make. This was a lot of fun to do!…..Digital Lady Syd
Lighting up Piccadilly Circus
Very classic view of Piccadilly Circus – added the Milky way to spice it up a bit. Decided to try out the new Lightroom Detail’s AI Noise Reduction Denoise Filter on an older image taken at night. It worked pretty darn good! If you have LR, check it out. It may take a while to process, but it will improve you image! In Photoshop used the Remove Tool to try to get ride of some of the more obvious people in the image and some distracting bright spots – worked fine also. Then added Serge Ramelli‘s Milky Way texture and set it to Color Dodge. By using the Blend If in the Layer Style (Current Layer black tab split and set to 0/96), it looked more natural in a city setting. A Color Lookup Adjustment Layer using Africa from Photo Focus – set to Screen blend mode. Used a Selective Color Adjustment Layer to adjust colors a little and that was it. Totally impressed how well an unusable turned out!…..Digital Lady Syd
Just Enjoying the Day
Just enjoyed posting an image a Bonobo Monkey at the Jacksonville Zoo – needed some wildlife post-processing practice! Used the Remove Tool, Sharpen Tool, a texture, Liquify Filter, layer for filling in hairs by painting using Coyote Mange animal hair brushes (still the best out there for this), Viveza, Lighten and Darken layers, Exposure Adjustment Layer for the eyes, Red Channel Curve Adjustment Layer, Luminar Leo Filter using my favorite Mystical effect, and Color Efex Pro Filter (an oldie but goodie for me). These are all techinques I have discussed on my Fun Photoshop Blog or my Tidbits Blog here at some time or another. As you can see, I still use them a lot. …… Digital Lady Syd
My Stained Glass Birdie!
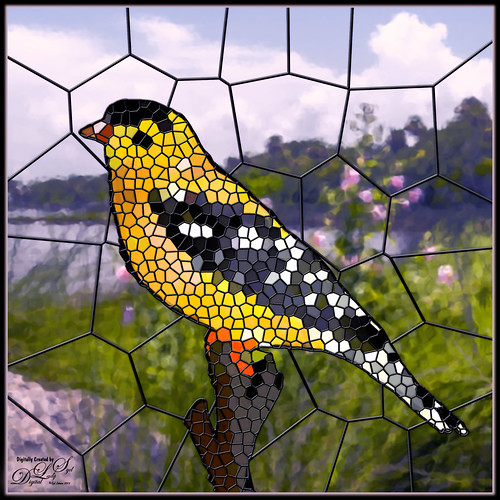
Had fun creating a different type of image. I found a video from Marty at Blue Lightning called How to Transform Photos into Stained Glass Windows in Photoshop! Marty has been doing PS videos for a long time and has some really nice ones. This video has a lot of steps but overall it is pretty easy. The main filter used was PS’s Filter Gallery-Stained Glass filter in the Texture group. I did need to add some clean up layers underneath the stained glass layer where some of the colors were off. Also had to adjust the layer styles to fit the resolution of my image so the stained glass leading looked right. The bird is one I drew (see my Tidbits American Goldfinch blog for how this was done) – just used the drawn bird and not my original background. This background is from a photo taken of the Halifax River (International Coastal Waterway or ICW) in Ormond Beach, Florida (see my Fun Photoshop Painting Effects – Which Ones to Use? blog that used this photo.) PS’s Filter Gallery-Glass filter in the Distort group was used on it. Overall just enjoyed trying a new effect. …..Digital Lady Syd
Sailor Selfie
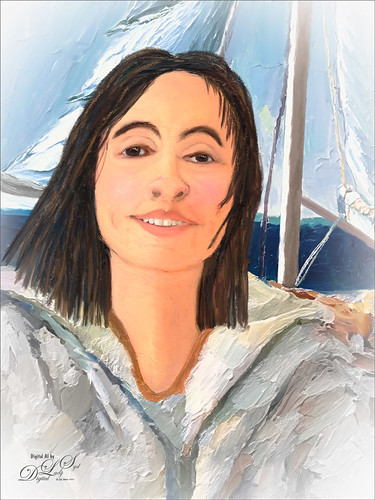
Just a quick blog here to show you how to get more of a realistic AI result as your subject, me in this case, and get a nice interesting background. The original is still the one of me in the car from the other pictures, except this time used both the 65% Brightness for one image, and 55% Brightness for the HSB setting for another image. By stacking the two Apply Images (see my blog Placing Any Photoshop Generative Fill Variation on a Layer Easily) from each Generative Fill layer, I was able to use a layer mask leaving the coat from the 65% layer and painting in the face from the 55% layer. Used an “Oil Painting” prompt for both layers. Created a stamped layer on top and selected the Subject in the Contextual Task Bar, which once the subject is selected turns into the Generative Fill command – must click the inverse icon to run Generative Fill to select the background. In this case the prompt was “Oil Painting small sailboat background” – it did not turn out great – no sails, just the sailboat lines. So had to select certain areas and run Gen Fill two more times for the white sails. Then lots of clean up layers which is what it often takes with the PS AI generation. Also lots of painting layers – had to use my nose, mouth and eyes from the original again – PS just is not doing that great a job with face details in my opinion. (See my blog Being One with Nature on how to do this.) And the Liquify filter and Luminar’s Neo filter were used. This may be the closest I can get to my selfie – hmmm…..Digital Lady Syd
St. Michaels Parish Church in Scotland
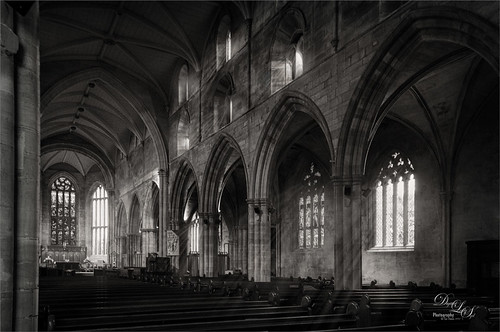
The image above is from the old Parish Church next to Linlithgow Castle, where Mary, Queen of Scotts was born in 1542 and baptized here. Recently I tried out a new technique by Joel Grimes using his YouTube video called How to Use Photoshop Brushes to Build Atmosphere and Drama. The Light Ray brush he used (and can be downloaded there) created the lovely light rays coming through the windows above. To convert to black and white, a stamped layer was taken into my old Nik Silver Efex Pro 2 (here is a link for the newer version) and just applied the Soft Sepia preset. Another stamped layer was added and taken into Luminar Neo (latest Luminar version but the older versions can be used also) using Joel’s settings. Used Kyle’s 100 px Vignette found in Kyle’s Photoshop Action Set for Artists. Last step was to apply Topaz DeNoise as it appeared just a little grainy for my taste (I used an older version and it works fine). Have not done a black and white in a while and it was fun to do…..Digital Lady Syd
My Happy Firecracker Plant
No matter what weather is down here in Florida, this plant is blooming and always healthy. It gets huge every year and needs to be cut back. I paid $.75 for it in the damaged plant section of Lowe’s – now it is repaying me with great health! I guess I wish all my plants were like this. Anyway, this Firecracker Plant macro image was processed pretty much with just the same ole workflow that I always follow. I did use it to try out Blake Rudis’s Video for getting the best detail out of a photo – it is called Don’t Use Clarity – Use This Instead and involves using the High Pass Filter. Actually I felt it did a little better adding detail in this image compared to Topaz Sharpen. A small highlight was added on a few of the blooms where the focal point have been more pronounced. A Color Lookup Adjustment Layer set to the Foggy Night preset at 71% Layer Opacity and Luminosity Blend Mode was added. On a stamped layer The Smart Photo Editor filter was used to add a final effect. Fun to get back to my flower photography again!…..Digital Lady Syd
Masked
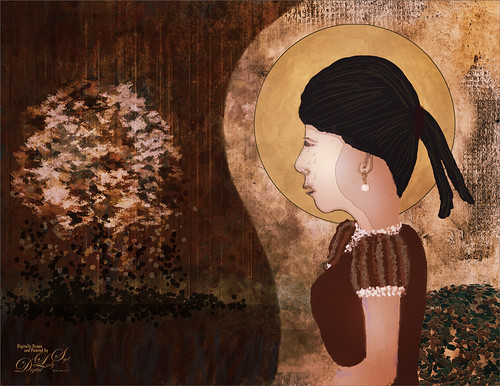
Kyle T. Webster, the Photoshop Evangelist at Adobe, recently did two Masterclass YouTube videos called Learn from Greats – Mark English – Part One and Part Two. In Part One many of the Mark’s various pieces of art and how he created the images were discussed, and in the other Kyle created an image showing how to use some of these same techniques. That is what was attempted with this image, but it is a lot less abstract than most of Mark’s images. 26 different PS brushes were used – some created on the fly. Several layer styles were added and even PS’s Craquelure filter was used (lower right bush). Three Color Lookup Adjustment Layers and three Texture Layers were used. Lots going on here, but it was a lot of fun to try and get some of the expression that Mark English had in his paintings. I am going to try and get a better example using his techniques soon!…..Digital Lady Syd
Raindrops on a Queen
Can’t believe I did not post this image a while back. It is one of my favorites and it was taken using my 60 mm F/2.8 macro lens (with my Bower 0.5 x High Definition Wide Lens attached) right after a heavy rainfall. Lightroom Camera Raw settings were added before opening Photoshop. Topaz Sharpening AI was applied first (I still love this plugin!) and a Color Lookup Adjustment Layer using my preset. On a stamped layer (CTRL+ALT+SHIFT+E), Viveza was opened – the settings made the image pop! A Burn Layer was added above and another darken layer to darken the background more (used a soft round brush to do this). Last step involved adding a Film Grain Layer set to Overlay blend mode. Pretty basic!….Digital Lady Syd
Fog Lifting in the Fall
Had fun with this image of a beautiful backyard in rural Virginia. Tried to copy the effect created by Albert Dros to get a fog lifting feel. The original RAW image was actually quite bright. To get a slight fog feel a short technique sent out by Adobe Creative Cloud recently called Enhance Fog and Haze by Liam Man was used. It is for night scenes, but it turned out fine on this overcast daytime scene. Mainly the Neural Beta Filter Depth Blur was downloaded and the Haze slider was adjusted for the image -the Haze was set to 60, Blur Strength to 11, Saturation to +11, and Brightness -8. The Focal point was placed on the main green leaves in the middle of the image. After outputting as a New Layer and blurred foreground areas that should not be blurred were painted over in an added layer mask. Some clean up was done and a Color Lookup Adjustment Layer added (used Scott Kelby’s Farm preset). Last step involved Opening the Camera Raw Filter and adding a vignette by using Scott’s tip to create a Vignette set to exactly -11 for landscape images – always makes them look good. He is right! …..Digital Lady Syd
The Pirate
Am I the only one who photographs mannequins – yep this guy was in the gift shop at Universal Studios-Orlando. They have some wonderful displays if you look around. Of course, he was not exactly a pirate – I added the hat, hook and map from PixelSquid to make him look authentic. Otherwise pretty normal post-processing. Topaz Sharpen set to Out of Focus was used to really sharpen him up. Sam Peterson Shadows and Highlights layers were used first to even out the lighting (See My Fun Photoshop Blog A Few Photoshop and Lightroom Tips and Tricks, Tip 2 for info on how to do this). Then Viveza was used for adjusting everything. Three textures were added: Kim Klassen’s Pinitonly and Stay textures (not sure these are still available), and 2 Lil’ Owls Workbook texture from forever ago. Some of the texture was masked out using Kyle’s Megapack Drawing Box-Shady Graphite Fat Dry brush – really nice for when you want a little grain. A Color Lookup Adjustment Layer was added using On1’s Urban Explorer preset and set to 83%. PS Camera Raw Filter was used to create a slight vignette effect. The Font is called Fratello Nick. That is about all that was done. I have a couple other images like this one for a set……Digital Lady Syd
Handsome Fellow
Love how this beautiful Iguana looks up close – he lives at the Palm Beach Zoo in Florida and I think it may be a juvenile since it was so colorful. It took a lot of manipulating to get this image post-processed, but I really like the final results. Two images had to be stacked and aligned in Photoshop as some parts were more in focus in one image than the another. A black layer mask was added to the top image and just the parts needing to be sharper were added painted back in. Topaz Sharpen AI was tried on a stamped layer, but some bad haloing appeared so this filter was removed. On a stamped layer the Iguana was selected using a layer mask. On a duplicate stamped layer placed underneath the subject layer, the Tilt Shift Filter in the Blur Gallery was applied to smooth out the background. I had to reload PS2021 as the pins were not showing for these filters on my computer in PS2022. Not sure what the issue is here! Used Viveza to sharpen up photo and the new Spectrum Neo for the lighting-love the relight effect in this filter. Then a Color Lookup Adjustment Layer and two Levels Adjustment Layers (one for a vignette) were used to finish up. It took a while, but well worth effort……Digital Lady Syd
Playing Lionfish
Yes, these two rather vicious looking lionfish are probably friends. I had one for several years that was very tame. He would follow me around the tank when I was in the room. Who knew? (Check out Ray Hunziker’s book on Marine Aquarium Basic Setup and Maintenance on pg. 67 – he had similar experiences!) Had to take some pix of my Leo the Lionfish relatives when I had the chance. Since they were both moving and the tank itself gave some pretty weird shadows, it was a challenge. Using Topaz DeNoise AI and Sharpen AI totally saved the image – that is why it was never post-processed before due to the high level of noise. Many steps were involved, but probably the most important thing was the lighting on the two fish. Overlay and Multiply layers were used to create the shadow and highlight effects…..Digital Lady Syd
The Chocolate Shop
Had fun post-processing this image from Kilwin’s Chocolate Shop in St. Augustine, Florida – excellent chocolate! This image was pretty tricky to do as that little train was moving all over the place and it was in front of the food sign to make it even harder. It really helped to have Topaz Sharpen AI (see sidebar for website link) on this one – use it as a first step almost on every RAW image. The biggest problem was all the spectral reflections on the sign – totally blocked out some of the lettering. Therefore, a lot of clone stamping and painting was done on this image. For cloning, a brush from PS Guru Aaron Nace that is just a 30-pixel round brush set to 25% Spacing and 28% Hardness – the Options Bar was set to 100% Opacity and 80% Flow, Aligned checked and Sample Current & Below. It does a pretty good of job but is a little choppy looking where the strokes stop. To fix that, another clone brush was used – one I call Soft Build up Clone by Pratik Naik, a famous retoucher. It is a very simple brush too – Size 100 pixels, Spacing and Hardness 25% and Build-up checked in the Brush Settings Panel. In the Options Bar, the brush has an Opacity 100% and a Flow of 9% – be sure to turn on the Airbrush – also turn on Aligned and Sample Current & Below. If this does not smooth out the lines enough, just increase the Flow a little. This brush is really fabulous! Just cloned over other lettering to reconstruct the bad letters. Also used Kyle’s Drawing Box-Glide Sketch Pencil/14% (for smoothing) Sm brush and my SJ Pastel3-Painting brush (all over my blogs if you want the settings) for clean up. The font is one I really like – Onamura Thin. That was about it – took some time but overall a good final result!…..Digital Lady Syd
A Duck Enjoying his Habitat
This beautiful and rather friendly male Mallard Duck was swimming all over the place while several people were trying to take his picture at Ames Park, Ormond Beach, Florida. His coloration is what attracted me to this image. Did my basic workflow on this image but thought I would share that Topaz (see sidebar for website link) Sharpen AI was used to really sharpen him up. The Lucis Pro filter was also used – too bad no one has decided to make this great little filter available again. Also Viveza 2 was used – my go to filter to finish up a look. ……. Digital Lady Syd
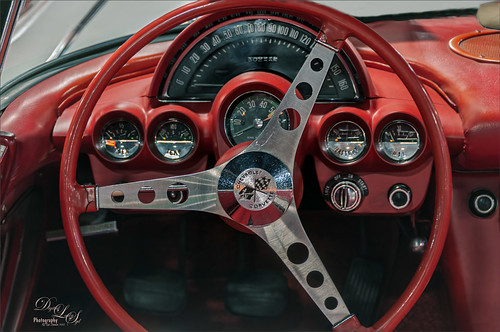
Pretending I’m Driving My Dream Car
This 1961 Chevrolet Corvette was sitting in the Classic Car Museum of St. Augustine just waiting for me to take its picture. I so wanted to take this baby out for a spin! Not much post work was done on this image – just used a couple settings in Lightroom before beginning work in Photoshop. Had to do some cropping and a bit of Clone Stamp work to get it to line up correctly. Then Topaz Denoise AI (see sidebar for website link) Standard effect was applied. To further sharpen those little numbers on the dials, Viveza 2 came to the rescue with just the right amount. A Green Channel Luminosity Curves Adjustment Layer was added to further enhance the instruments. See my How to Use a Red Channel to Create a Nice Blended Image Effect blog – works pretty similar with the Green Channel if the Red Channel does not look that great. Last step was a regular Curves Adjustment Layer to set the Red color just right. That was it. What a great day to see this little beauty!…..Digital Lady Syd
Old Ford with a Fancy Radiator Cap
Recently went to the wonderful Classic Car Museum of St. Augustine with some of my Club buddies. There was so much to see so if you are in the area, be sure to check them out – lots of great old cars and the owners are happy to share information on all them. I forgot to get the information on this particular car, but I believe it is roughly about a 1930-ish Ford Model A Deluxe Sedan from its appearance. What is so interesting is that the hood ornament is a Boyce MotoMeter that is actually a radiator cap indicator and was designed in 1912. From the driver’s side, you can see what the car temperature is while driving. The wings are a separate part added to the cap. I wish I had looked on the other side!
Well just a few comments on the post processing here. Used Topaz Denoise AI (see sidebar for website link) and the Clear version – worked great! Then a stamped layer was created (CTRL+SHIFT+ALT+E) and the Sponge Tool (yep – that’s what I said) was used to desaturate some of the extraneous colors on this layer that appeared on the car because it was so shiny. The Options Bar was set to Mode Desaturate, Flow 100%, Airbrush on and Vibrance unchecked. It does not have a Sample All Layers box so that is why a stamped layer was needed. A little Clone Stamp was used to clean up a few areas and a Color Lookup table was set to a Joel Grimes preset called Detailed Warmth – set it to Overlay blend mode at 47% layer opacity. On another stamped layer Viveza 2 was applied to sharpen the cap detail and darken down the corners a little bit. Last step was to do a Red Channel Luminosity Curve to bring out the cap more. That was it – lots of fun!…..Digital Lady Syd
Happy Lilies
Had a great time with some of my Photo Club buddies photographing Lilies at a small park in Ormond Beach, Florida, called Ames Park. This image was taken while I was lying flat on my stomach shooting as straight out as I could. It was shot using F/8.0 using a 40 mm lens. There was a lot of shine on the flowers so that all needed to be toned down a bit in Photoshop. A lot of clean up had to be done and Viveza 2 was used to help with the overall lighting effect. The last step used was applying an Orton Effect that Mark Denney uses a lot on his image. The steps are in his 6 Things I Never Do Inside Lightroom! video. I thought it added a nice finishing touch for these flowers. …..Digital Lady Syd


