I Didn’t Know That! Use A Pattern Fill Layer to Add a Painted Texture
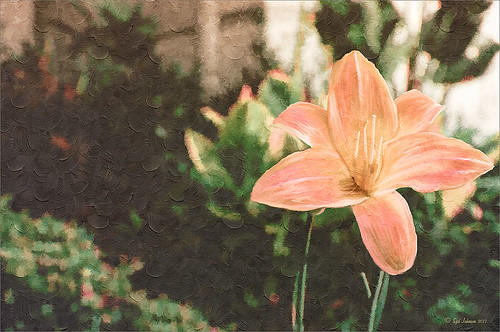
Love my Day Lilies! This was a yellow lily but using Topaz (see sidebar for website link) Clarity, I was able to turn it to this pretty pink color. (My preset I call Crazy Color Palette settings are: Clarity Section – Dynamics: Micro Contrast -0.36, Low Contrast 0.39, Medium Contrast -0.36, and High Contrast -0.39; no Tone Level settings; HSL Filter Section settings: Hue – Red -1.00, Yellow -1.00, Green +1.00, Blue +1.00, and Magenta -0,52; Sat – Red -.50, Yellow 0.27, Green -0.09, Blue -0.03, and Magenta +0.59; and Lum – Red -0.03, Yellow 0.41, Green -0.23, Blue -0.20. All not mentioned are set to 0. Then I changed to Micro Contrast slider to 0.55.) Apply and then go back to Photoshop and opened Topaz Simplify and apply Oil Paint preset. A layer was added on top and Fay Sirkis’s 03 Palette Brush Blender was used to smooth out the flower rough edges from the Simplify. A old Florabella Action (that is no longer for sale) was run on the flower and and Kim Klassen’s Cloth & Paper Prague texture was also applied at 15% opacity. The flower was painted out so the texture did not affect it, only the background. Created a New Layer using the Sponge Tool to saturate more in the flower itself. A little burning and clean up was done on the flower. A Curves Adjustment layer was added to add back a little contrast. Then a Pattern Fill Layer was added with one of the patterns in Jack Davis’s Wow Patterns (see my blog Can You Get a Painting Look With a Photoshop Action? Jack Davis Can! for download link) and set to Soft Light blend mode at 59% opacity. I have never used the Pattern Fill Layer to add a painterly texture to an image, but it turned out really nice……Digital Lady Syd
I Didn’t Know That! Adobe Photoshop CS6 Help and Tutorials Download
If you are like me, I have been frustrated recently with all the software that does not come with a manual. Usually you can find the manual on line and that is OK, but I am a person that likes to have the “book” in my hands. I was lucky enough to find the newest info from Adobe and if you would like to download it like I did, here is the PDF link to the 765 page PDF file called the Adobe Photoshop Help and Tutorials. I have also included the website link for Help documents for Creative Suite CS5, CS5.1, CS5.5, and CS6 applications (PDF and HTML) for all their associated programs. I am hoping this will help when I have a problem in Photoshop. There is also a link to a 66 page reference file on Photoshop CS6 Adobe Bridge, Mini Bridge and Camera Raw specifically. So far I have not found one for Lightroom, but I am still looking. Hope you get some use from it also……Digital Lady Syd
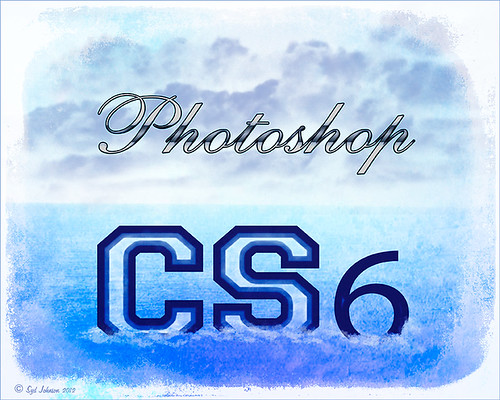
Here is a quick explanation of how I created this image: Created New Document and then added a Color Fill Adjustment Layer and used the a sampled light blue color from the Photoshop logo. Created the Photoshop text using Comsi Script 40 that I have had for ages and added a layer style I created following a tutorial called Elegant Glass-Gorgeous Text Effect. Next I used a different font called Freshman – added my Thin Double Edge Frame Layer Style and used dark blue and light blue for colors. Caleb Kimbrough from Lost & Taken’s Summer 4 texture was applied placing it above the Color Fill Adjustment Layer and setting the layer to Overlay at 100% opacity. On a New Layer above it, using my SJ Cloud 5 brush enlarged to fit, a darkish blue color was brushed once to look nice – the layer was then set to 39% opacity. The CS6 text layer was rasterized and then Free Transformed to make larger – a layer mask was applied and the center of the letters was lightly painted out to show the water inside. A New Layer was created and some white water looking waves were placed along the bottom edge of the type to make it look like it was floating. This layer was set to 56% opacity. The ShadowHouse Creations Mask Overlay MO8-2912-5 was placed on top and set to Overlay blend mode to frame the image.
I Didn’t Know That! Converting Lightroom Preset to Adobe Camera Raw Preset
 |
I occasionally come across a need to take a Lightroom preset and use it as a preset in Adobe Camera Raw. This is not as complicated as it seems. Below are the steps required to accomplish this task.
1. Apply the preset in Lightroom and make sure you know which panels and sliders you used. (If preset not already created, to save preset in Lightroom, on left side of Presets line, click (+) for “Create New Preset.” Name preset.)
2. Right click on image in Lightroom and select Edit in -> Open as Smart Object in Photoshop. The image is opened in Photoshop with the Smart Object icon on bottom right of thumbnail in Layers Panel.
3. Double click on thumbnail and it opens up into Adobe Camera Raw. Go to Presets panel (9th icon over on righthand side under the histogram) and the click folder icon at the bottom of the panel to open the New Preset dialog. Name and click the items you want included in the preset, then click OK. Your new preset shows up in the Presets panel.
You can now use your Lightroom preset anytime you want in Adobe Camera Raw also. I usually start my personal preset names off with an SJ so I know they are mine. It is easy to get presets from many different sources as time goes on so it helps to know which are yours.
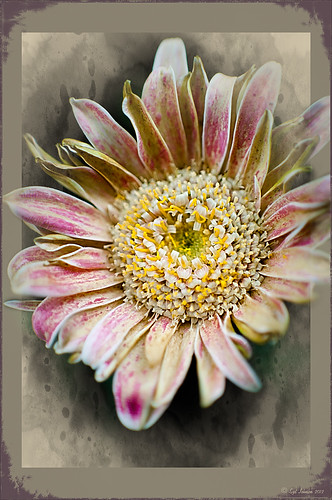
The image above is of a miniature mum in my yard. Hover over the image to see how the image looked with just a Lightroom preset I created called Dark Vignette – it makes the background very dark behind the flower. For information on how to create this preset and how the image was finished, see bottom of blog for details.
Hope this helped you get a little more organized…..Digital Lady Syd
To create this preset, changes were made to: the Tone Curve set to Highlights -24, Lights +41, Darks -56, and Shadows -54; HSL – Luminance sliders set to Red -41, Orange -9, Purple -2, Magenta -50 and all others 0, and Saturation sliders set to Red -2, Purple +32, Magenta +59 and all others set to 0; Effects Post-Crop Vignetting Style set to Highlight Priority with Amount -61, Midpoint 33 Feather 0 and others set to 0. To finish, image was sharpened and OnOne PhotoFrames (see sidebar for website link) acid burn controlled 15 was added and reduced in size in the plug in, and then grunge 12 was added on top – in Photoshop petals were painted over frame edge using a layer mask on first acid burn frame.
Digital Lady Syd Related Blogs:
Colorful Blown Out Look Lightroom and Adobe Camera Raw Preset
Settings for Vivid Drawing Look ACR/Lightroom Preset and NIK Color Efex Pro 4 Pseudo HDR Recipe
I Didn’t Know That! Eyedropper Tool and Magic Wand Tied Together by Sample Size!
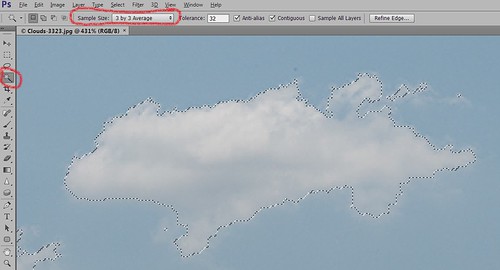
Adobe has come out with a Beta Version of Photoshop CS6 (Adobe download link) that is free to use for a couple months. While watching some of the videos on the new features, I came across an interesting comment by Deke McClelland, another Photoshop guru who does a lot of tutorials at Lynda.com and also does great Photoshop books. He has posted a series of short videos called Free Photoshop CS6 beta training at Lynda.com and in one called “Exploring the Wide World of Layer Enhancements,” he mentions that you can throw off how the Magic Wand Tool uses its Tolerance setting if the Eyedropper Tool is set to a very large Sample Size in its Options Bar – the two Tools are tied together! In previous versions of Photoshop, only in the Eyedropper Tool Options Bar could the Sample Size be set. If you had the Eyedropper Tool Sample Size field set incorrectly, the Magic Wand Tool would not function properly. I have always set mine to 3 pixels for more accurate color correction per Scott Kelby recommendations (head of NAPP and his Photoshop books are must-haves) – he says the larger sampling sizes are for “super-high-resolution” images. Now in the Magic Wand Tool’s Options Bar (see image above), it shows what the Sample Size setting is and now it can be changed without going back into the Eyedropper Tool options. Just remember if you change one tool, the other one automatically changes.
I do not know how important this is but it was a surprise these two tools had anything to do with each other! With higher resolution images now being shot with the new cameras, this might be a bigger issue. Thought I would pass this Tidbit along…..Digital Lady Syd
I Didn’t Know That! Export Layers to Files in Photoshop
 |
Every now and then I run into a situation where I want to take one of the layers I am working on in Photoshop and save it down as a separate file. Now it is possible to delete all the files and rename the file, etc., etc., etc. but this can take a while to do and it could cause you to lose the file you are working on if you get careless. This week I wanted one of the sky images I had imported into my image a while back to use again and to put in my Sky folder since I like it. (Hover over image to see sky image created from layer in psd file.) I found out there is a little known script sitting in Photoshop that will accomplish just what I wanted to do in just seconds.
Steps to Export Layer(s) to Files in Photoshop:
1. In your image, turn off all layers you do not want to create images of by clicking on the eyeballs on the left of the each layer in the Layers Panel. (To do this quickly, you can highlight the layer you want to export to a file and ALT+Click on the eyeball – all the other layers are turned off immediately.)
2. Go to File -> Scripts -> Export Layers to Files.
3. The Export Layers to Files dialog appears. Fill out as shown. Be sure to capture all the check boxes or you will get image files for each layer in your file.
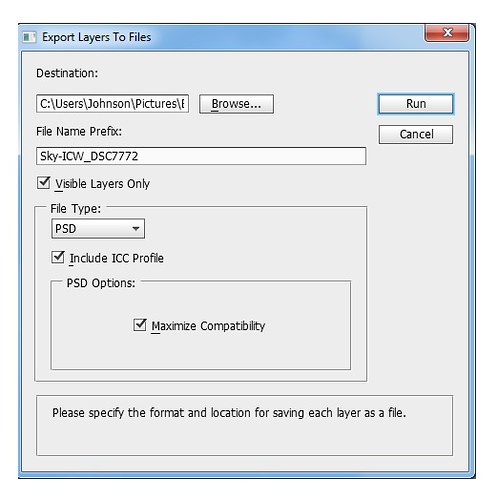
4. Click Run and that’s it – really quick and easy!
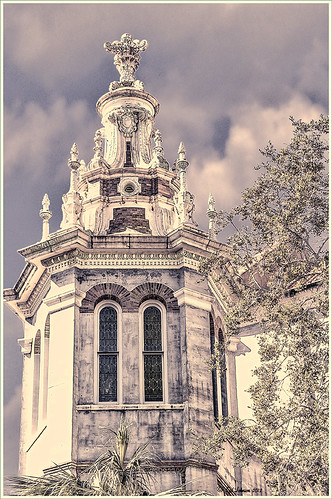
The image is of the Flagler Presbyterian Church in St. Augustine, Florida, where Henry Flagler and his family are buried. Topaz Adjust 5 and Topaz Black and White Effects were used on this image (see sidebar for website link). The sky is the one I moved in from an image I took on the International Coastal Waterway near St. Augustine while sailing.
Give this script a try next time you want to break apart an image…..Digital Lady Syd
I Didn’t Know That! Randomizing Gradients
Once again I stumbled upon another interesting feature in Photoshop. I learned from the new Practical Photoshop Magazine that you can actually generate a randomized gradient when in the Gradient Editor. This is not a feature that pops right out at you when looking for it.
- First click on the Gradient Tool and in the Options Bar, double click on the gradient preview window to bring up the Gradient Editor.
- Set the Gradient Type to Noise, Roughness to 100%, and check the Add Transparency box. If not set to Noise, you will never find the button.
- Click the Randomize button several times until you get the lines you like – then click OK
- Now drag the Gradient Tool on your layer to create the gradient.
Below is an image I used a Randomized Gradient to create a colorful background. I threw in a few of my cloud, a bird, tree and grass brushes from some of the posts I have done on my Fun Photoshop Blog.
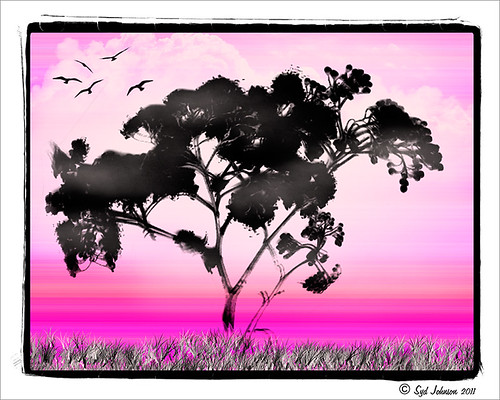
Totally cool and fun! And now you know…..Digital Lady Syd
I Didn’t Know That! Comparing History States
Well once again I learned another little tidbit this week that really surprised me because basically I had never thought about it! Photoshop allows you to create a document from an earlier History State by just clicking a state you want to look at again, and dragging it down to the bottom of the History Panel’s left icon called “Create New Document from current State.” It will open up another window with the image as it appears in the older state. Below is an example of a photo I am currently adjusting where a Topaz Adjust Portrait Drama preset was applied (I know it is a landscape type image but it works!) and then a Nik Color Efex Pro Tonal Contrast filter was applied next. I wanted to compare the later combined filter state to the earlier Topaz Adjust only state. Pretty cool, huh?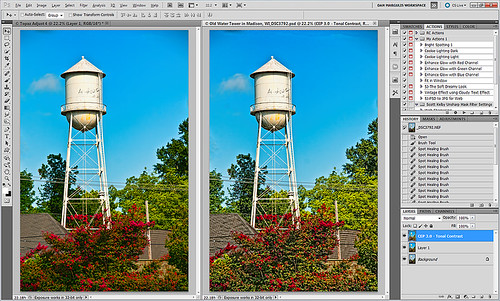
There are those times when you just need to compare something you did before and this is perfect! Remember though, that you lose your History States when you close out of Photoshop so save that extra window if you want to keep the image for comparison. Later….Digital Lady Syd
I Didn’t Know That! Curves Adjustment Layers
Every now and then I find something that makes me go – “Wow – I didn’t know that!” Last week I watched a video by Moose Peterson, one of the very best wildlife photographers, called “Finishing Techniques using Nik Software.” Listen to this video if you have time – some very interesting images and processing tips are included.
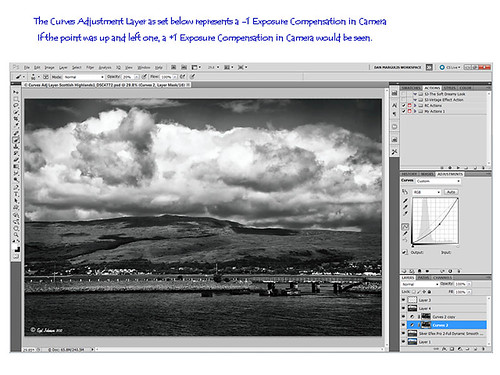
In the image above of the Scottish Highlands, I used the Curves Adjustment Layer set to -1 Exposure Compensation so I could darken the foreground a bit and some parts of the clouds – the image was overall much brighter. The layer mask was then filled with black. With a white soft paintbrush set to 20% opacity, I painted over any areas that needed to be darkened slightly. The Curves Adjustment Layer was duplicated because I liked the vignette effect it was creating.
This tip could become very useful, if for example, you discover an image you really like is just a bit over-exposed. In Photoshop a Curves Adjustment Layer set as shown above could bring just a bit of contrast back into the image, as if you had adjusted the shot when taking the picture. Try using a +1 Exposure Compensation Curves Adjustment Layer if parts of an image need to be lightened a bit.
It had never occurred to me what I was really doing with the Curves Adjustment Layer. Thank you Moose! Hope this tip helped you a bit…..Digital Lady Syd

