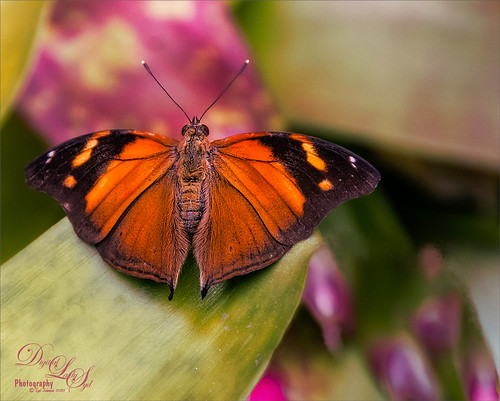
The Beautiful Autumn Leaf Butterfly
Just another one of the beautiful butterflies at the Florida Museum Butterfly Rainforest in Gainesville, Florida. This is a really fun place to visit if you are in the area and it open now. Just did my basic post work – a little Luminar 4 and Viveza, some painting, a Blake Rudis sharpening action, and a Blake Rudis Dodge and Burn action. I really enjoy post processing these butterflies……Digital Lady Syd
Fishing at Flagler Beach

Had some more fun using Sparkle Stock’s free action called Inception. This time used a fishing pier and added some birds from PixelSquid. This image turned out to be a gig in size as the action tends to really make the file large. I just created a stamped layer and used it to start an new document to finish up. To get the yellow color, a Color Lookup Adjustment Layer preset called Edgy Amber was applied at 74% layer opacity. A few of the fishermen had to be adjusted so they did not look exactly the same. Otherwise, pretty easy to do……Digital Lady Syd
Happy New Year

Yes, this same beautiful butterfly (Palamedes Swallowtail) is showing off for New Years. This time she is covered with confetti created by using an old set of brushes from Morgan BW called Confetti and Streamer. The font is called Castile Inline Grunge. The Magnifier effect is from a free action called Adobe Looking Glass Actions – both actions in the set were used to create the effect. Also, the Pattern Stamp Brush was used to get the brightly colored background – I actually created the background pattern for this image using more free Pattern Stamp brushes from Jessica Johnson.
Happy New Years to Everyone! Thank you for following me here on my blog and on my Flickr account. Hope you have a great year ahead of you!…..Digital Lady Syd
Edinburgh Lunch

This image (a favorite of mine taken of a little street in Edinburgh, Scotland) was used to try out a new Photoshop Action downloaded from Adobe Create Magazine. It is called Painterly and is very flexible as to how it can be used to make a very nice artistic effect of an image. The action was created by BlackNull (or Nuwan Panditha) and also included brushes and patterns needed to run the action. There is a very informative 6-page PDF file that explains everything you need to know on how to get good results. It was a lot of fun to do and only took an hour or so to get this final image. A couple of my regular tweaks in Photoshop were done after applying the action, but overall the effect was from the action. One disadvantage is that the image, which was set to 8-bit, became over 1 Gig in size. Since I had turned off many of the layers while adjusting the action, I just right clicked on the Layers Panel upper right pop-out and selected Delete Hidden Layers. Then it became much more manageable. Anyway, thought I would present the action as it was really nice to try out. Enjoy!…..Digital Lady Syd
Vintage Hy-Red Gasoline Station
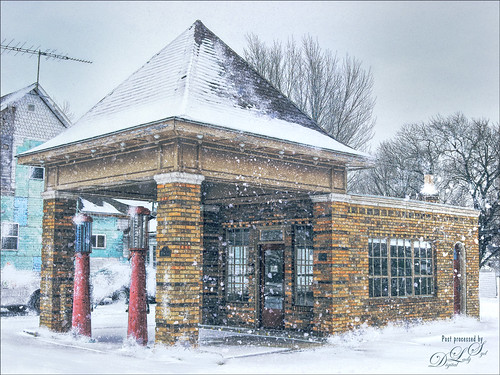
I saw this image posted on Facebook for my hometown and remembered driving by this old 1930 Hy-Red Gas Station in Greentown, Indiana, many times while growing up – apparently it is still standing and is on the National Register of Historic Places. Since Indiana is in the middle of a terrible cold spell right now, I thought I would add some more snow to it to really give this image a major wintry feel. It also gave me a chance to play with the free Snow Brushes that Serge Ramelli offered during the holidays (see under his video called How to Create Snow in Photoshop CC). I used a couple other splatter brushes to add solid snow build ups to the image (one by Melissa Gallo from a long time ago and one from Aaron Blaise). Topaz (see sidebar for website link) Studio’s AI Clear, Precision Detail and Precision Contrast Adjustments were used to really get a nice sharp effect to the image. On a stamped layer in PS, Topaz ReStyle’s Warm Steel Wash preset was applied to the image, then set to 50% layer opacity and Color blend mode – this gives it the vintage feel. Nik Viveza 2 was used to add just a soft blue color to the sky which was a total white – two control points were placed in the upper corners where the Brightness sliders were set to the negative side to add in the wintry sky color. I was really surprised how sharp the image turned out……Digital Lady Syd
A Fuming Old Cannon
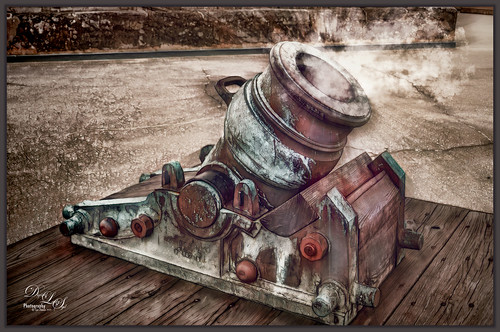
This image was taken on the top side of the Castillo de San Marcos old fort in St. Augustine, Florida. So many things were done in this image that it would take a long blog to explain. Mainly following one of Hazel Meredith’s Topaz Studio (see sidebar for website link) webinar examples from a few days ago and just started playing with all the settings and adding new adjustments like Edges Adjustment, Motion Blurs, and Color Themes. Grut’s Cloud Brushes (none better than these) were used to create the smoke from the cannon – even though they are cloud brushes, the smoke effect is very nice also. Topaz Adjust was added as a last step back in Photoshop. It took a long time to get a result I liked – many attempts to get a good look. I forget about how good Topaz’s original star plugin, Adjust, really is. This plugin gave me the final result that I really liked…..Digital Lady Syd
Blowing a Kiss
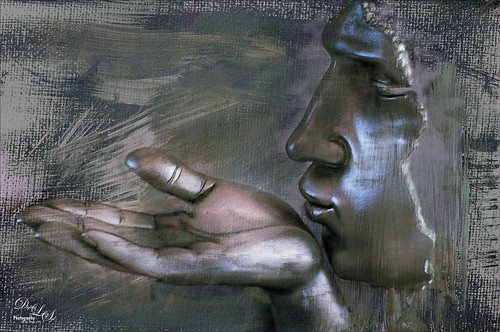
On my Fun Photoshop blog (see my Using a 50 mm Lens as a Macro Lens – Really? blog) recently I had two image taken as macro’s on the face of the above sculptor. Thought I would do another macro image, this time using my regular lens and not a flipped 50 mm lens, and get a little creative with the RAW file. This image was just basically post-processed in Lightroom using mainly the Basic Panel. Then in Photoshop Melissa Gallo’s Taupe Canvas (no longer available) was placed on the bottom, then a black layer mask was placed on the LR image on top. Just painted back in what I wanted to see using a couple different brushes at different brush opacities. Created a Darken Layer to outlines the focal point lines and a New Layer for a white Spotlight Effect on the face and hand. A Black and White Adjustment Layer set to Luminosity blend mode to adjust the colors. Then Blake Rudis’s action called 5 Tone Heat Map was used to add some more subtle color to the image – set to 88% layer opacity. I sort of like the feel of the image…..Digital Lady Syd
Building a Nest for the Future
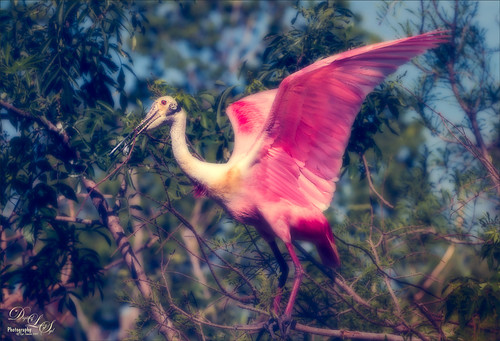
One of my favorite birds to photograph, partly because they are so funny. This Roseate Spoonbill had to work pretty hard to get the branch broken off the tree limb so his mate could add it to the nest at the St. Augustine Alligator Farm Rookery. The couples work very hard together getting it all just right. This guy was in such a busy background that I had to figure out a way to calm it down. Decided to go with a bit of a glamour look to soften the whole image down thanks to Sebastian Michael‘s action. (If you took his course, the link is in a recent e-mail.) I hope I get to find this guys nest and see the chicks that will be hatching soon. ….Digital Lady Syd
Mom and Baby Giraffe Looking for a Snack
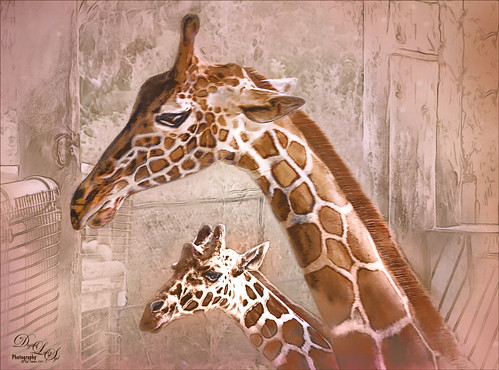
These giraffes are living at the Jacksonville Zoo in Florida. I am a big fan of the sketch effect and this time I added the MixArt – Sketch Photoshop Action to add the sketch effect. (For more info on the action, see my Trying Out the MixArt Action blog.) It is a long action and there are lots of options once it has been run. It is a really nice and inexpensive action which I use quite a bit. Several layers were added on top of the action to give it the look that I like: mainly Topaz (see sidebar for website link) Texture Effects 2 and Nik Viveza 2. Hope you enjoy!…..Digital Lady Syd
Pololu Valley
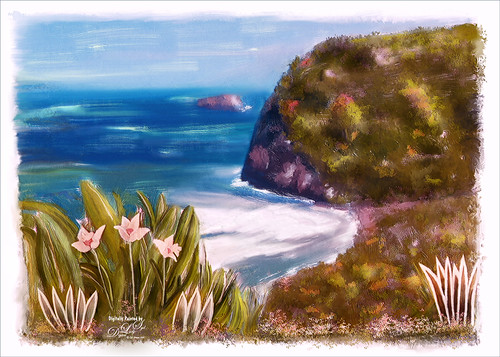
This image was taken a while back on the Big Island in Hawaii of Pololu Valley – I think this shot has been taken a zillion times! Absolutely beautiful place! Thought I would share some of what I am doing with my painting. Still using the Jack Davis Painting Action, this image was painted using all his provided layers and several New Layers with some of my own painting prowess added. I love Henri Rousseau‘s paintings, so I tried to copy some of his painting style in the foreground areas. It was a lot of fun, but took a long time since I am not too good at freehand painting. I figure this is the way you learn how to do it. Several adjustment layers were added on top to try and give an even feel to the image and it was topped off with some of Jack Davis’s gesso textures. If you are interested in painting in Photoshop, check out my More Jack Davis Painting! Fun Photoshop blog for additional info. Lots of fun learning!…..Digital Lady Syd
St. Trinity Church in Mir, Belarus
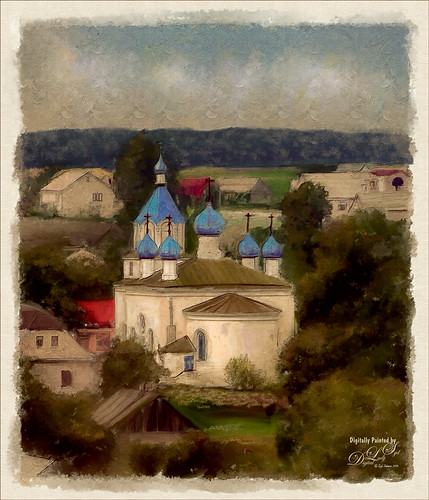
This is an image of the St. Trinity Church as taken from a window at Mir Castle in Belarus. The spire color is fabulous! This image was also painted using Jack Davis’s painting action as discussed in my More Jack Davis Painting! Fun Photoshop Blog last weekend. Very similar steps as the other two images in my original blog. This time I kept the sketch layer turned on and set to Multiply blend mode at 90% layer opacity. Topaz (see sidebar for website link) ReStyle’s Winter Hazel & Wood Bark preset was used to get the vintage effect. I am really starting to enjoy painting using this action…..Digital Lady Syd
My, What Big Eyes You Have!
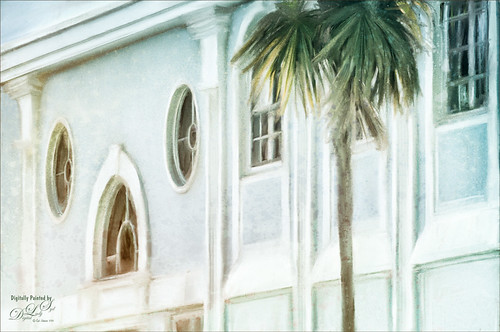
This image was taken from my car – I just loved the color of the building. Who knew it actually looks like a bird face in the windows. I actually thought it would make a nice image to paint, so I did. This time it was painted in Photoshop using Lori Jill’s class called Turn Your Photos Into Paintings Using Photoshop, which uses Photoshop’s default action called Mixer Brush Cloning Paint Setup and her brushes. Lori is the only person I know teaching how to really use this action effectively. For finishing steps, 2 Lil’ Owls (see sidebar for website link) After the Rain texture was applied and Topaz Lens Effects (see sidebar for website link) Gold Reflector filters was added. It was a lot of fun to paint again……Digital Lady Syd
A Pretty Fancy Carousel Horse!
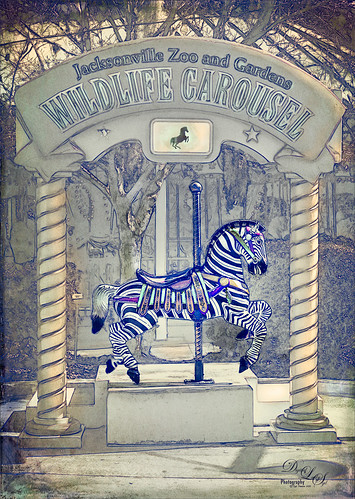
Just another fun pix from the Jacksonville Zoo the Wildlife Carousel photo op area. To get this rather interesting effect, an inexpensive action I purchased a while ago called Mix Art Sketch Painting Photoshop Action was applied to get this nice halftone sketch effect. It has a lot of choices to select when using it. After running the action, Topaz (see sidebar for website link) Texture Effect was opened and the Vibrant Grunge preset was applied. The layer was set to Multiply. Otherwise just some clean up layers and a little Nik Viveza 2 (now free!). Loved the effect. I need to work a little more with this action, but I see lots of possibilities……Digital Lady Syd
The Hidden Boat
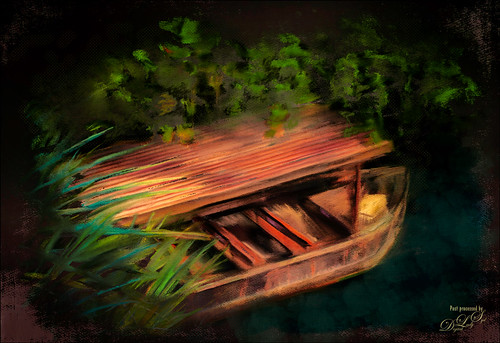
Loved this stock photo I found on pixabay.com of this boat hidden in the shade. Decided it would be a good practice painting so that is what I did. Use Topaz (see sidebar for website link) Simplify’s BuzSim preset to start as an underpainting. Still using Lori Jill’s instructions from her Turn Photographs Into Digital Paintings Using Photoshop videos and using the PS Mixer Brush Cloning Paint Setup action. A lot of painting, 3 textures and some brush clean up layers. Just a lot of fun to paint – very relaxing! …..Digital Lady Syd
An Old Victorian House
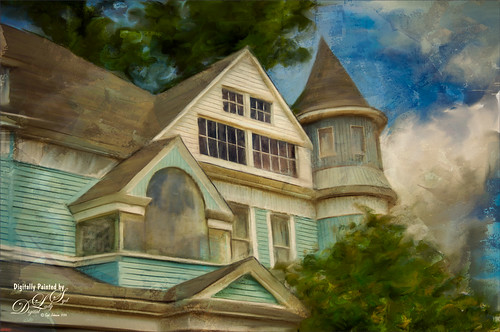
I recently bought a set of videos from Udemy called “Turn Photographs Into Digital Paintings Using Photoshop” by Lori Jill. If you watch their sales, you can get all kinds of videos on photography for a very reasonable amount. The above is my first image created following her instructions – she instructs on how to create Mixer (cloner) brushes to get effects you like. She also uses the Photoshop action called Mixer Brush Cloning Paint Setup. This appears to be very similar to the original Dr. Brown’s Painting Assistant Extension for CS5 and CS6. Anyway, I was very pleased with my first attempt. I also used one of Melissa Gallo’s beautiful textures, Pilgrims Journey, twice to get the vintage feel to the strokes. I still have a few lessons to go, so hopefully I will post a new image soon using this technique……Digital Lady Syd
Digital Lady Syd’s Related Blogs:
Dr. Brown’s Painting Assistant Panel for CS6 and CS5!
Jack Davis Painting Action Really Works!
Where Am I?
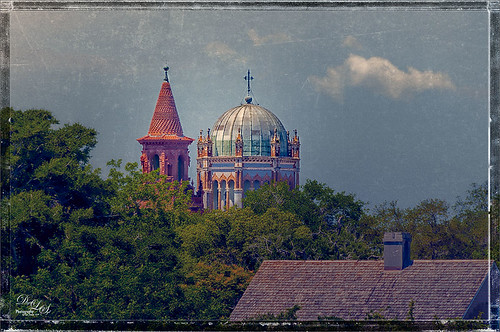
This beautiful skyline image was taken from the Castillo de San Marcos National Monument in St. Augustine, Florida. This is a spire from Flagler College (the old Ponce de Leon Hotel) and the cupola on the Flagler Memorial Presbyterian Church. In Lightroom did just basic changes and sharpened up the spire and cupola slightly. In Photoshop the first thing I did, and do a lot, is go into Topaz (see sidebar for website link) Detail 3- this time applied the Soft and Dreamy III preset to smooth out the leaves that were overly sharp and to reduce the detail in the close up roof. I changed the Cyan-Red, Magenta-Green and Yellow-Blue sliders (similar to the Color Balance Adjustment Layer) to get better colors. Some of my clouds (see my free Cloud Brushes) were added softly in the sky at 69% layer opacity. Kim Klassen Cloth & Paper Reign texture was used to add interest in the sky. Next Topaz ReStyle’s Warm Sand Dune Wash preset was applied to pop the colors a little. On a stamped layer (CTLR+ALT+SHIFT+E) the Camera Raw filter ‘s Radial Filter was applied to focus in on the spire and cupola. On another stamped layer OnOne (see sidebar for website link) Perfect Effects 8 was opened and a Blue-Yellow Split Tone set to a Balance of 81 was added, some detail painted back on the spire and cupola, and the Martha Border was the last step before saving back in Photoshop. I love beautiful St. Augustine!…..Digital Lady Syd
Digital Lady Syd Related Blogs:
OnOne’s Perfect Mask Works Great!
Some of My Favorite Plug-Ins
Loving Both Filters!
A Little Painting Action
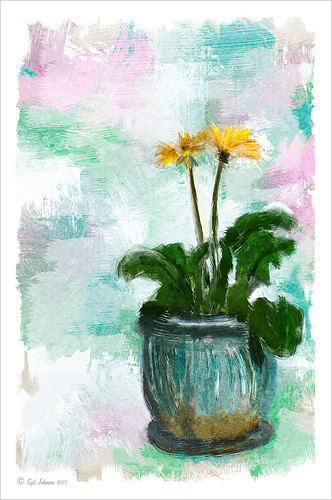
Here is another example of Jack Davis’s Mixer Painting SetUp-BETA action. Just a lot of fun to do. It is not as clear a result as with Alien Skin’s Snap Art 3, but there is more individual interpretation when creating the painterly look. Check out my Can You Get a Painting Look With a Photoshop Action? Jack Davis Can! blog to learn how to do each of the steps and for info on how to download the action. What made this image look nice was adding Painted Textures Parisian Pool to the image just above Pattern Fill 1. In the Layer Style dialog, the This Layer black tab was split and set to 108/155 (ALT+click on tab and drag to split) and the white tab set to 139/209. I would encourage to download this action and give it a go!…..Digital Lady Syd
From Discumbuberated to Extraordinary!

This is the same Discumberated Gerbera from the previous blog (see my Discumberated! blog). Now it has popped all the way up and looks like a delicate dancer! I love the pinks! This time a very different process was used to get this effect. I actually did 4 totally different renditions of this image so you may see it again. Very little was done in Lightroom other than the zoomed in square crop and some Basic Panel adjustments. I added four separate layers with Kim Klassen‘s youareextraordinary brush set to 1272 pixels, setting the layer opacities to 100%, 70%, 50% and 30%. By choosing the Move Tool and holding down the SHIFT key, just drag each brush down stroke down and line up under the one above. While watching Jack Davis teaching Adobe Camera Raw Optimizing, Enhancing & Retouching on Creative Live, he demonstrated one of his actions (located in Wow-Photo Enhance Actions Set -> Wow Filtered Watercolor + Linework action) that gave a really nice finished look. So I ran this action on my image, and then adjusted the resulting layer blend modes and layer opacities. A peach Solid Color Fill layer set to 22% layer opacity was added and a Curves Adjustment Layer. This is the final result – I really like the almost illustrative result. It is a lot of fun to play with Jack’s actions, layer styles, and Lightroom presets – they are all really great!…..Digital Lady Syd
Digital Lady Syd Related Blogs:
Can You Get a Painting Look With a Photoshop Action? Jack Davis Can!
Jack Davis Painting Action Really Works!
Painting a Dragon
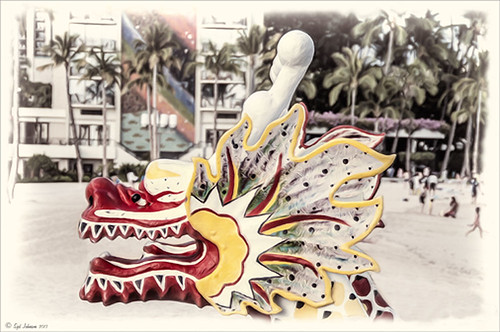
This was the head on a wood boat pulled up on the sand in front of the Rainbow Tower at the Hilton Waikoloa Village on Waikiki Beach in Oahu, Hawaii. Recently I did a blog called Can You Get a Painting Look With a Photoshop Action? Jack Davis Can! where his Wow Smart Object Painting1 Action was applied to several images. This image uses the same action to create a nice basic painting. A darken layer was added above to show emphasize the edges for the dragon from the background image (see my The Best Dodging and Burning Technique blog). At this point I thought it looked pretty good, but the background was competing with the dragon in color, so I decided it needed to be pulled back some. Topaz (see sidebar for website link) Black and White Effects was used to soften the background. Several of the presets created really interesting looks due to the canvas effect being applied in the action first. I settled on an old wedding preset I had created back in version 1. (If you are interested, here they are: Conversion – Basic Exposure: Contrast 0.04, Brightness 0.10, Boost Blacks 0.35, and Boost Whites 0.01; and Finishing Touches – Silver and Paper Tones: Tonal Strength 0.44, Balance 0.96, Silver Hue 5.81, Silver Tone Strength 0.85, Paper Hue 77.42, and Paper Tone Strength 0.38; Transparency – Overall Transparency 0.80. A white border was then created around edge using Right Edge Size 0.11/Edge Exposure -1.00/Edge Transition 0.09; Left Edge Size 0.14/-1.00/0.08; Top 0.20/-1.00/0.09; and Bottom 0.09/-1.00/0.16.) Back in Photoshop a New Layer was created and the Clone Stamp was used to even out the border just a little around the image. A Curves Adjustment Layer was added to add contrast to the dragon and further separate it from the background – then the layer mask was filled with black (CTRL+I in mask) and just the dragon was painted back in white to reveal it (see my Using Curves Adjustment Layers to Get Rid of Shadows and Highlights blog). The last step was to add a Hue/Saturation Adjustment Layer to further adjust the background saturation (Saturation was set to -41 in Master) – but this time the dragon was painted in black to hide adjustment on it. This really turned out how I remember this image……Digital Lady Syd
Digital Lady Syd Related Blogs:
Digital Lady Syd Reviews Topaz Black & White Effects 2.1
Got That Rainy Day Feeling!
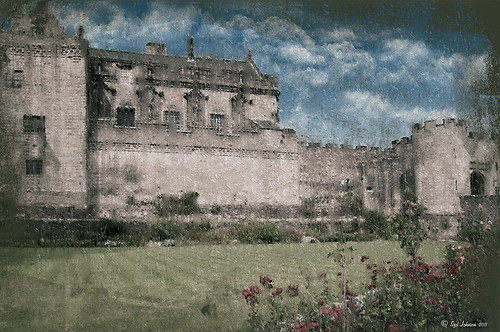 |
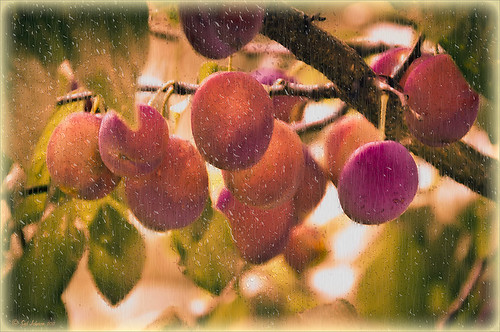
This week I found this really nice action called “Rainy Day Photoshop Action” whose link I thought I would share with you. I have never seen one that looks this realistic. There are three actions that you run one after the other to get the final cool effect: The Main Action, Little Drops, and Condensation (to give the water on the window feel). Hover over the image above to see the original image. (I will show you how to adjust the perspective with another blog shortly.) You can add layer masks and adjust opacity of each of the major elements to get the look you want.
Here is a little different look using the same action. (Hover over image for original also.)
 |
Try it out and see what effect you can get!…..Digital Lady Syd

