A Leopard Thinking

Just thought I would post my Leopard drawing – it looks a lot like the one Aaron Blaise teaches you how to draw in his Wildlife Painting Bundle – Leopard Painting Tutorial. (See my Got Some Free Time! Try Drawing! blog for the Elephant drawing I did from the same bundle.) Since being stuck at home so much, it was the perfect opportunity to work some more on my drawing skills. This image took a very long time to finish (yes many hours went into this), but overall it was a lot of fun to do. For me that is the name of the game! If you want to learn some of Aaron’s techniques, check out the link above for some super inexpensive offers or check out Aaron’s fabulous YouTube channel. And lots of great animal brushes are at his website also. ….. Digital Lady Syd
Looking for his Valentine
My Valentine Jaguar buddy from the Jacksonville Zoo was caught looking into what looked like a little window is all dressed up in his holiday pajamas. I thought this image would make a nice Valentine’s Day card so that is what I did. He was actually turned into a sketch using a tutorial called 5 Easy Steps to Create a Realistic Little Drawing from a Photo in Photoshop by Jesus Ramirez. Just followed the steps and painted in some heart shapes on the rocks using a Color blend mode to give the painted effect. Painted the heart pattern out of his spots using an 8-pixel soft round brush and Gruts H Hatch Wren brush (if you have not checked out Gruts brush website, take a look-it’s great). It took awhile but was lots of fun to do. Happy Valentine’s Day!…..Digital Lady Syd
Butterflies

Ended 2019 with a butterfly graphic image. Had fun just trying some of the new techniques from this year. Mainly trying out a little blend if technique to remove the backgrounds from the butterflies. A couple Color Lookup Adjustments Layers and a Gradient Map Adjustment Layer were used to add in a little more effect. The original background texture is called Butterfly Flutters by French Kiss and the font is one of my favorites, Argentina Script. There is so much that can be practiced with Photoshop……Digital Lady Syd
Enjoying the Holidays!

My image of this beautiful Palamedes Swallowtail Butterfly was converted to a wintry scene and put in holiday apparel. Butterflies like to dress up. To get her to this point, Perfectly Clear was used to do an overall exposure and sharpening effect. The background had a chain-link fence that looked terrible and a couple extra flowers on the left side. To get rid of all this distraction? Just select an 80% hard round brush set to 5% Flow and paint ed it away. If you accidentally paint over the edges, can either choose a small eraser or add layer mask to remove it. This is how the butterfly lines could be shown so clearly. It is amazing how easy a clean color can be achieved. Elements were added on each side to give a nice frosty look. For the right plant, used Sweet Floral Watercolor Bundle by Mnuk with a clipped Curves Adjustment Layer using the color channels to get the colors needed. The left element is Watercolor Leaves by Sunny Illustrations with a clipped Curves Adjustment Layer with both the RGB and Color channel color changes. Foreground leaf was covered up with a leaf by Sweet Floral using a Selective Color Adjustment Layer clipped to get the correct color. The font is called Alberobello Script and the free snow brushes were from Serge Ramelli (the best out there). It did take some time to do, but it was a lot of fun……Digital Lady Syd
Happy Halloween!

I wasn’t going to do one this year, but I just love make Halloween pix so here it. These are the resources used in case you want to make one next year. Thanks to PixelSquid who has such fabulous objects to using for compositing on their site – the tomb, skeleton and both trees are from the site. Just used mainly a little Layer Style wizardry on them. The Cat and Bats from Deviant Arts mutato-nomine were custom shapes loaded into Photoshop. The Milky Way was from a Serge Ramelli video download and the moon from a free set called from Design Cuts called Planet Space Explosion Background and Ancient Texture. The text is called East Liberty Signature. Totally fun to do!…..Digital Lady Syd
Quietly Reflecting

Just a quick blog – was practicing my photography today and got an image of a beautiful orange Bird of Paradise bloom in my yard. Had some creative fun by adding a Flaming Pear’s Flood Filter effect. It still has the best reflection effects of any Photoshop plug-in around. The free font is one called East Liberty Signature. Very little was done to this image other than the background was darkened down and a few old leaves were removed. Overall a pretty simple image. …..Digital Lady Syd
Swimming in My Secret Pool

This image was just a lot of fun to do. It was actually taken from the Harry P. Leu Gardens of the edge of large Lake Rowena. I just had to give this a fairy tale look. To achieve this effect, a Midnightstouch Swan Lake brush was used to place the swan in the scene. Luminar (see sidebar for website link) Flex was opened and on its bottom layer used these filters: Details Enhancer (be sure to check this fabulous filter out), Foliage Enhancer, Image Radiance, and Dramatic. On a layer on top, Joel Grimes Soft and Desaturated preset was applied and set to 76%. Viveza was used to sharpen up the swan. A Color Lookup Adjustment Layer used On1 Vintage Chrome preset at 60% Layer opacity. A Gradient Map using a Gray, Blue and Beige map was set to Soft Light blend mode and 46% layer opacity. Darken and Lighten Curves Adjustment Layers were added to dodge and burn and a Highlights Curves Adjustment Layer was the last step. This was a lot of fun to create this quiet looking spot. ….. Digital Lady Syd
Mars from Above

I follow a blog that sends out B&W images from the HiRISE Camera (link shows original image) on board the Mars Reconnaissance Orbiter. Every now and then a really interesting one shows up with lots of detail and depth like in the image above that shows Recurring Slope Lineae (dark markings on steep slopes). The image needed to be sharpened so Topaz’s (see sidebar for website link) new Sharpen AI was used. Then several adjustments layers were added: Channel Mixer set to Hard Mix blend mode at 36% opacity and 6% Fill, Gradient Map set to Vivid Light at 36% opacity, another Gradient Map set to Overlay, Hue/Saturation where the Greens were adjusted, and Curves set to Darken. Several Spotlight Effect layers in different colors were used to further direct attention to certain areas. Nik Viveza 2 was used to even out the tones and sharpen the focal points, and the font is called Abraham Lincoln. This was a lot of fun to do and it is hard to believe the image is from Mars!…..Digital Lady Syd
Another “Uptown Girl”
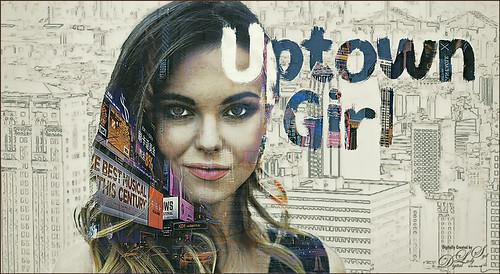
Enjoyed creating this double exposure in Photoshop – had not done a lot of this so it was fun to try out a new tutorial to see how it went. This time a video called How to Combine Double Exposure and Selective Color Design in Photoshop by Ahmad Salahuddin was followed. (No voice so you have to watch carefully, but he has provided resources to download to follow along – very helpful.) To get the effect, the text (the font is called Adrenaline Brush) has to be set to white and clipped to the selected portrait layer (Unsplash-Portrait of a Young Woman, Florina, Greece by Pete Bellis) and then duplicated, set to black, and moved under the image. Then the image to fill up the portrait is placed on top and set to Lighten blend mode – duplicated and flipped so the words all fill up with the image. Finally the NYC image (from 20 Free New York Photos Deeezy image 05) was placed underneath – it was reduced to a sketch by using Topaz (see sidebar for website link) Studio’s Black Only II preset set to 48%. A Hue/Saturation Adjustment Layer was clipped to the NYC image and the lines were set to brownish color. The last step involved taking a Composite (stamped) layer into Topaz ReStyle and applying the Surf and Tallow preset. I was surprised how nice the final image came out. Lots of fun!…..Digital Lady Syd
I Am Feeling So Sleepy!

This beautiful Caribbean (or American) Flamingo was just an example of the many beautiful flamingoes strutting around the enclosure – it looks like he had a very busy evening the night before. It was a lot of fun to post process this guy but it was a bit of a challenge. The behind of another bird was in the image so I decided to just pull the bird head out of the image and start from scratch. No filters were used this time – and only a little sharpening and noise removal was done in Lightroom. Then I just painted around the bird and added in the grass and plants from PixelSquid. Put a sky background in as a texture taken from the Fantasy Text Effect file, and just added in some spotlight effects, a Color Lookup Adjustment layer, a French Kiss Pencil Frame (not sure it is still available), Curves and Levels Adjustments Layers, and some text (Zing Rust Line Horizontals and Vild Scrapes fonts). That was it but it took awhile to get this all looking right. ….. Digital Lady Syd
How Did This Happen?
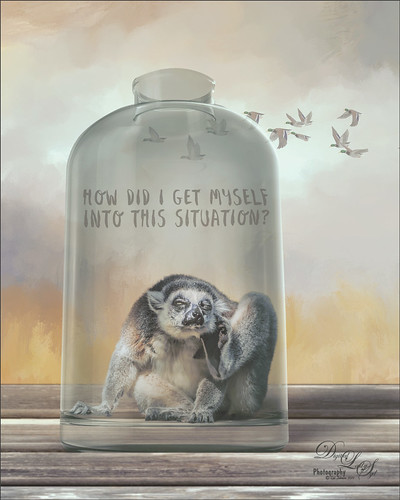
I had initially post-processed the Lemur as its own image. Then I ran across a nice video by Jesus Ramirez called The Best Way to Select and Mask Glass (or Transparent Objects in Photoshop. I had to try it and that is how my Lemur buddy ended up in a bottle. The original Ring-Tailed Lemur image was taken at the St. Augustine Alligator Farm in Florida. This image used a Noise Gradient Map Adjustment Layer (see my How to Randomize Some Color with the Gradient Map Adjustment Layer blog). The Lemur was selected out of my original image that I may post sometime and was run through the Select and Mask command before moving him into a glass bottle from Pixel Squid. The flying Canadian Geese are also from Pixel Squid. The background is one I painted in Corel Painter and the wood is a texture from Kelby One. Just a lot of fun to put together!…..Digital Lady Syd
Old Scotland
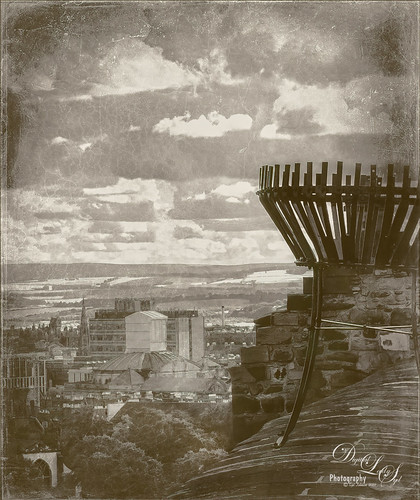
Decided to do something different today. This image of Scotland taken from Edinburgh Castle was created using a pretty cool template to get this vintage effect. This is a Wet Plate Template file by Photo Spirit. The file comes in as a PSD file and one of your images is inserted in the Smart Object layer provided. There are then all kinds of groups provided that can be adjusted to get the final effect you want. In this case the Light Textures group and the Dark Textures group were used. Lots of fun here and I think it gave a pretty realistic old image effect…..Digital Lady Syd
Twirling Out of Control
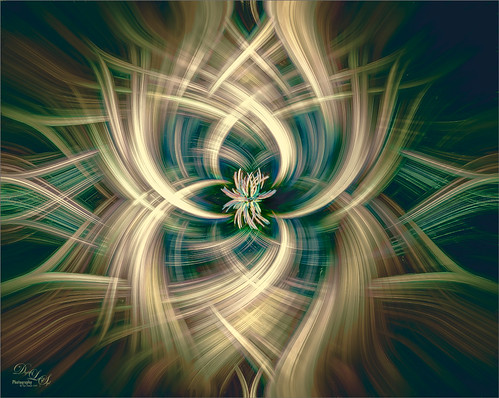
Just had some fun trying out a technique shared by one of my Photo Club friend Joe. Apparently this twirling technique was quite popular several years ago and it creates some really interesting results. This image started out as a macro image of purple and white pentas growing in my front yard. By adding several Radial Blur, Twirl, and Mezzotint filters, this interesting combination of lines and swirls is created. Here are links to two short and interesting videos on how to create this effect if you would like to try it yourself: The first by Steve Patterson is very well done and is called How to Create Abstract Twirl Effects in Photoshop, and the next one by Jay adds some more ideas to enhance the effect and is called The Twirl Effect Using Photoshop. I found several color schemes that worked really good with this result and finally ended up with a light more muted effect. Try Topaz (see sidebar for website link) ReStyle for some interesting results. Guess I had better get back to really post-processing some of my images. …..Digital Lady Syd
Bonobo Monkeys on the Way to the Kapok Tree
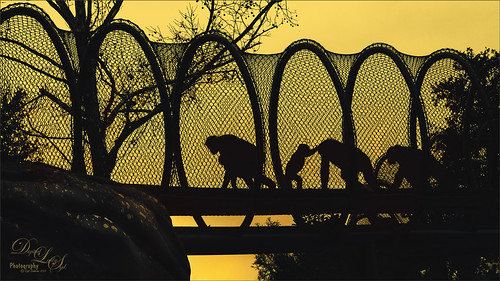
Above is an image of a group of Bonobo Monkeys heading over to the Kapok tree for a day of fun. The Jacksonville Zoo recently upgraded to include this wonderful feature for various species to give them a chance to spend some time in a different environment. I was lucky enough to catch a pretty nice silhouette of the group. Not much was done to the image in PS. Two Curves Adjustment Layer were added. The background color was created by using a Selective Color Adjustment Layer and adding to the Whites Cyan (-15), Magenta (-5), Yellow (-39), and Black +3); and to the Neutrals Yellow (+16) and Blacks (+17) – it gives this beautiful yellow background coloration. A Levels Adjustment Layer was applied with the Output set to 9/255 and the Black regular tab set to 230 to slightly flatten out the black tones. And a couple clean up layers were needed for some of the tree branches. That was about it. I really like the final result…..Digital Lady Syd
My Bird Buddies
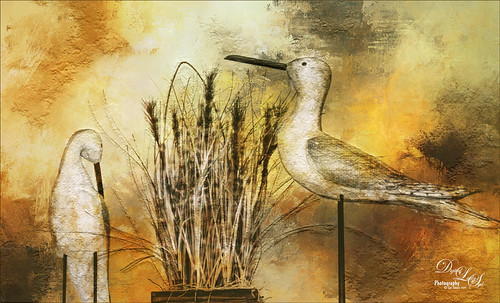
Had some fun with a shot of my birds that sit on top of my kitchen cabinets. Apparently one of the guys is a little shy. (How did that happen?) This image started off Lightroom with an old preset of mine called Kuboto Warm & Tasty B&W – it gave a little bit of brown and gray tones to the image. In Photoshop Topaz (see sidebar for website link) Studio’s AI Clear Adjustment was applied. I do this on every image now. Next an AI ReMix Adjustment was added using a preset I had created called SJ Illustrated Effect (uses Ink Blog style set to Medium, Brightness -0.24, Contrast 0.57, Sat 0.75, Smooth Edge 0.21, Sharpness 0.50). Then the Radiance Adjustment was set to Light, Strength 0.50, Width 0.73, Length -0.17, and Sat 0.44 – the mask was inverted so only the thick leaves and stems were affected by this adjustment. Back in PS a Jai Johnson texture called Explorations (7) was applied and set to Hard Light blend mode. This added the beautiful golden colors. Then a second texture called Texture 01 1920 X 1080 by Frostbo at Deviant Art set to Linear Burn at 52% opacity was applied. On a New Layer Kyle Webster Impasto Kit for Photoshop (not sure it is still available) from a long time ago was set to a Subtle Touch, and a second New Layer set to Medium was added. Both were set to 0 Fill Layer – a splatter brush was used to add in the texture. This is the same effect shown in my Fun Photoshop blog called How to Create an Impasto Texture Layer Style. Last step was to add a Color Lookup table using my SJ Sharply Dark LUT (created in my Fun Photoshop blog and video called How to Create Profiles in ACR from LR Presets and Some PS LUT Files). This impasto look can really add character to an image!…..Digital Lady Syd
Tomorrowland Comic Book Drawing
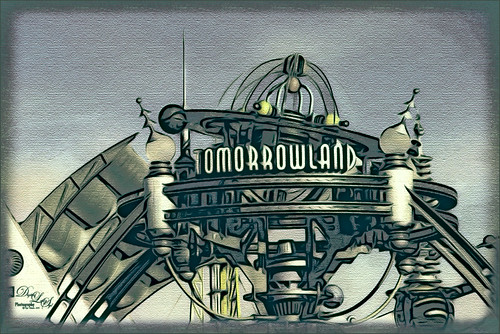
Just had some fun creating a bit of a drawing look by following Jesus Remirez’s video called Smart Way to Quickly Make Comic Book Drawings from Your Photos. For my image the Texturizer Filter was also added – it gave it a little different look. Topaz Studio was used to add the border and – used a Texture Effect called Dahlia Dreams preset. Topaz ReStyle’s Tradewind and Tana preset gives it the metallic effect which I thought looked appropriate for this image. That was about it……Digital Lady Syd
Posing for the Family Christmas Picture
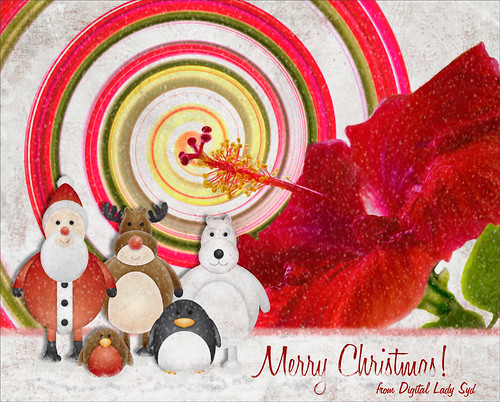
Merry Christmas to everyone! Enjoyed making my annual Christmas images – this one was particularly fun since I really like the free funny vector characters in the image from Spoon Graphics. The really cool spiral was created using the Hibiscus flower in Topaz (see sidebar for website link) Studio using the Motion Blurs Swirl set to an angle of -1.00. Back in Photoshop, the Hibiscus flower was selected and taken back into Studio where the Impression Adjustment was using Jai Johnson Oil Glaze Light preset (see her In the Digital Studio January 6 2017 video for the settings). Then some snow was added on the ground and a white texture added and set to Multiply blend mode. My free SJ Snow 2 Overlay slight blur PNG was placed on top at 54% (I still think mine is the best out there since it is a png – no blend modes needed to use it). The font is Honey Script. Maybe you can download or use some of these resources. Anyway, have a very Happy Holiday!…..Digital Lady Syd
Mockupped Sailboats
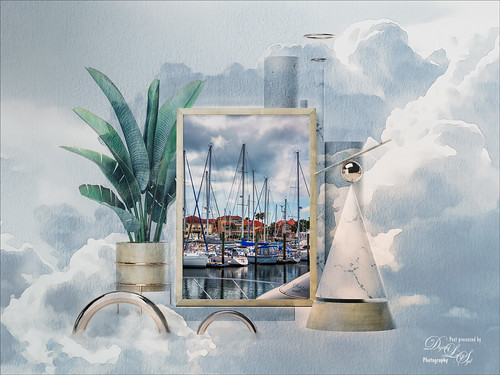
I have never used a Mockup File before to show off my images, but this one sort of seemed to fit this image since there is a strong triangle effect. First a free Abstract Mockup file by Best Pixels was opened up in Photoshop. The top layer is a Smart Object layer which must be opened by double-clicking on the thumbnail icon and then your own image can be placed in and aligned with a Free Transform (CTRL+T) if needed to fit the frame opening – must Save this image when warning comes up (the file does not appear anywhere in your folders but you still have to save to add in your image). This is where my Sailboat image from Camachee Cove was added into the image. On top of the bottom layer a Solid Color Fill Adjustment Layer was added using a light blue sky color. Next one of several free beautiful Watercolor Clouds Textures by Presets Galore was placed under the Smart Object ans set to 45% layer opacity. In a layer mask, the picture frame areas and few other places were masked out with a black brush. On top a Curves Adjustment Layer was added. Nik Viveza 2 was added on top where a little warmth was added into parts of the mockup. That was it. I love the dreamy feel this created…..Digital Lady Syd
A Little Wintry Guitar Playing
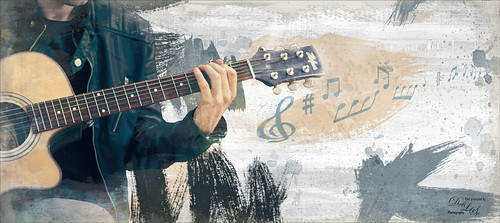
Well here is one of my favorite ISORepublic images called Guitar Man that I often choose when trying out a new technique. I used to play guitar and I think that is why I like it. This time I liked the result so well I decided to post it. I spent a lot of today watching a video (unfortunately it was not a talky), but it was so good I took notes and worked along with the basic steps anyway. The video is on You Tube and called Technical Dost/Digital Painting/Smudge Painting/Photoshop Tutorial by Nikhil Shirkar – some of the technique just did not work for this image like a lot of the smudging, which seems to apply to portraits more than this type of image. What I did like were the brushes he linked for the download. I especially liked the Danger Pig Strokes 01 free brush set and there was also a nice white watercolor grunge texture to use. I decided to use my own background texture, but his is quite nice. Otherwise it is just adding in elements and strokes to get a nice grunge feel. I used a watercolor border at low opacity to give a little vignette effect. The notes were created from some sheet that was downloaded and made them into brushes – I use them all the time. Overall just a lot of fun to do and the only filter used was Topaz (see sidebar for website link) AI Clear to sharpen the image. And also beware that when using some free images (including this image), the resolution is set to 72 dpi. Need to adjust this by going to Image -> Image Size and setting the Resolution to 300, then uncheck the Resample – the Width and Height will readjust – and recheck. That will give you a normal size image with the correct Resolution. ….. Digital Lady Syd
First Snow of the Season
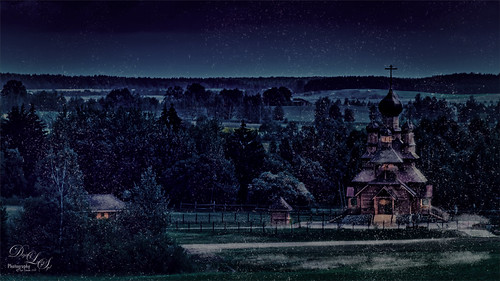
Decided to try using Serge Ramelli tutorial in KelbyOne’s Lightroom 30 Magazine on how to “Transform a Day Photo into a Night Photo.” It would probably be better if a street scene was chosen, but after fiddling around with the Radial Filters in Lightroom a bit, the results turned out pretty nice. Then the image was taken into Photoshop and I decided to add this wonderful, fairly new plug-in for us Windows users, called Luminar 2018 (see sidebar for website link). Several filters were added to get just the correct light to dark ratio (Accent AI Filter, Saturation/Vibrance, Dehaze, Brilliance/Warmth, and LUT Mapping using Color Punch Hot preset). On a second layer in the plugin Joel Grimes Indian Summer preset was applied which really sharpened up the church details. Then I decided I wanted a little snow effect so a couple layers were created using Glyn Dewis’s Dirt Debris Snow brush (created in his How to make a Dirt, Debris and Snow Brush in Photoshop video). A little snow was piled up on the sidewalk and roofs with a few specialty brushes I had created. I really liked the overall effect using a really bright image……Digital Lady Syd
Color of the Wind
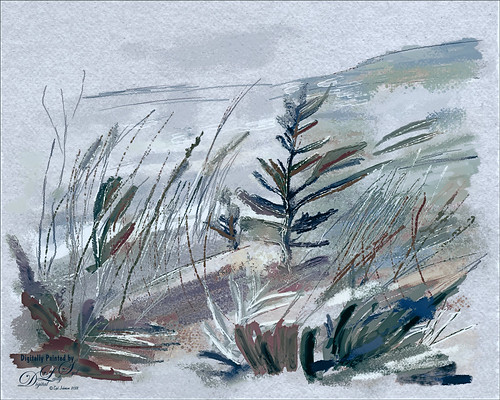
Once again just had some fun – this time painting with Grut’s Ink Brushes and paper. Decided to try and create an image somewhat like an Andrew Wyeth. (Right, like I could paint like Andrew Wyeth – I would be in heaven!) He is one of my favorite painters. It also gave me a chance to go through all the wonderful Ink Brush Nicolai has created at his Grut Brush site. There were so many I wanted to use but stayed instead to these brushes: Gone Coral, Coven Sloth, Pensive Linny, Bed Kelp, Bone Soak, Holy Slips, Go Folly, Raggedy Tag, and Wain Pip. (These were all placed into a brush Group named SJ Grut Ink Brush Favs – and backed up in the Preset Manager.) I also used his Oil Impasto Chip Gimble brush for ground cover. All these were used on separate layers so they could be adjusted and the opacity set correctly. Nicolai also has some marvelous papers – this one started with SP Espaloaf which gave the beautiful overall texture. To finish up, Topaz ReStyle was opened up and the Peppermint Gray preset applied for a very cool feeling to the image. Last step was to use Nik Viveza 2 to bring in the focus to the main tree. If you like ink brushes I suggest you check the Grut Brush Site – lots to choose from and for a low price, you can get all his brushes including these ink brushes. And the best deal is he gives away a free brush each week under his Freebies tab – all different kinds. I can’t tell you how many brushes I have gotten from this free downloads. …..Digital Lady Syd
Happy Halloween!
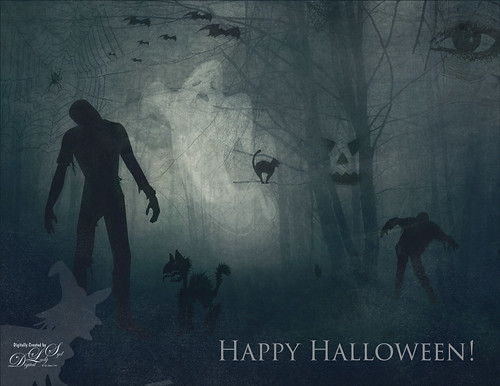
Happy Halloween! Had to do my annual post – they are so much fun to create! And had to do a post to thank all the various people who take the effort to create these wonderful Halloween objects. I would never be able to do these images without them!
So the create this image the base image is from a Creative Market Mysterious Forest Halloween Pack-01. The zombies are vector elements from Ben Blogged Zombieai – even though they are vectors, they will opened in PS – were copied over into the image on their own layers. The cats are all different: I love the foreground scary cat – he is a Halloween_Cat__s_Brush_by_altergromit, the cat in the tree is from a shape set of Halloween items, and the little cat way in the background is a brush from pureanodyne halloween-ciruelo cabral blackcat. Several cobweb and bat layers from the same set were also created. More spider and web layers, and a witch layer, were created using Obsidian Dawn’s Halloween brushes. The ghost was from Creative Market’s Halloween Illustrations – an Inner Glow layer style was used to give the transparent look. Two 2 Lil’ Owls Studio (see sidebar for website link) textures were used: Crackle 13 set to Hard Light at 81% layer opacity and texture 4 from the Artisan Collection Big Set 2, which was set to Linear Burn blend mode and 23% layer opacity. PS’s Foggy Night Color Lookup preset was set to 74% layer opacity to further darken down the image. The eye is one of I created in Photoshop. On another layer Function Subtle Grunge 6 brush by Liam McKay was added. The font is Trajan Pro 3, always a favorite. That was it. Lots of fun and lots of references – thanks creators for sharing!…..Digital Lady Syd
The Beautiful Comet 67P
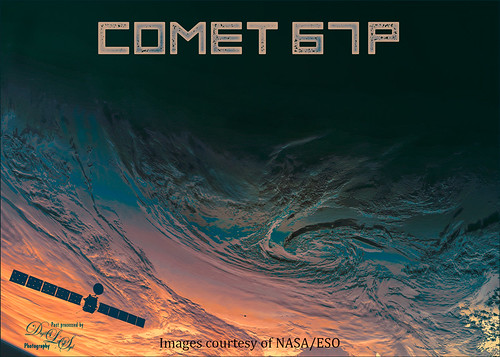
Totally enjoy downloading different images from the NASA and ESO websites and trying out different colors on them. (See my Colorizing NASA Photos Using Topaz Studio (And Check Out Updated Detail) blog for one with Saturn’s rings.) This is not a recent image (from November 13, 2009 and posted July 29, 2015) on the ESA’s website – check out all their images that can be downloaded. Added an image of the Rosetta Spacecraft Model from Wikipedia. Just played around with different fonts and colors and this is what I got!…..Digital Lady Syd
Viewing the Moon from a Scary Place
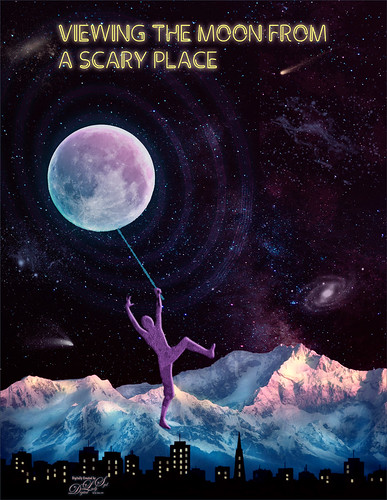
Just having fun with this crazy image of a guy hanging from the moon. Got part of the idea from Chris Spooner’s tutorial called How to Create 80’s Style Retrowave in Adobe Photoshop. Added several objects and blended in them using blend modes and opacity. Items included: Milky Way background image, White and Black Mountain image, Wireframe Vectors 30 by Designer Candies, Valentine by Julie Mead Valentine Gift6 to add some background fog, Wikimedia Commons Full Moon 2010, LifeLine by Gamarai Urb Brushes for the person and cityscape, Obsidian Dawn’s Space brushes for the comets, galaxy, and dust. The font is called Clip. After this just added a few adjustment layers: Darken Curve, Lighten Curve, and Color Balance. That was it. Sometimes it is just fun to create something different!…..Digital Lady Syd


