How I Am Feeling ATM
I like Mark English‘s work a lot and decided to try it again to get my creative vibe flowing. Not sure this is exactly a “self-portrait,” but I do think it represents my recent feelings. For info on how I discovered his art, check out my Masked Tidbits Blog with more info on this. No AI was used in this image – all digitally drawn and painted in Adobe Photoshop 2024. Just a couple things make this image unique for me – I created a brush to give a really heavy texture feel to the image. In a 50-pixel Chalk brush, I added a texture pattern from Jessica Johnson – she uses this pattern (TM-6) a lot in her brushes (see Texture section of brush to download-check the little + sign on right of pattern), but I did not use her Pattern Stamp brushes, just the texture. Since Transfer’s Flow Control Panel was set to Pen Pressure only, it can be painted over to get a more dense effect if needed. Used the same texture pattern in a layer style for the hair with the Pattern Overlay set to Opacity 17 and Scale 93 – layer was set to 46 Opacity and Fill 0, and just the hair was painted over on the layer. Otherwise just the same workflow for drawing. Lots of fun to create this…..Digital Lady Syd
The Tiger
Watched the Kyle T. Webster (the Adobe Brush Evangelist) video called Brush Hour: Digital Pastels. I thought he would go over his various pastel brushes he has created for Adobe Photoshop, but instead he demonstrated how to create a relatively interesting pastel painting using just a few. This was my first attempt at trying a pastel painting, but it was a lot of fun – and a little bit challenging. The tiger is the actual sketch created using an Aaron Blaise tutorial (see my A Little Aaron Blaise Digital Drawing Practice Fun Photoshop Blog). I also adjusted one of my own pastel brushes to get the nice pastel background effect as I had trouble getting the correct pressure with Kyle’s brush. It has been a long time since I used traditional pastels and doing this digitally is definitely a lot less messy!…..Digital Lady Syd
Statue Beauty

This beautiful image of a Buddha statue from Thailand was taken at the Hilton Waikoloa Village on the Big Island in Hawaii. It was a much larger picture that was cropped in close to the sculpture to make a much more interesting image. The original large image was a 3-shot HDR first processed in CS6’s Merge to HDR as a 32-bit tiff file and then it was brought back into Lightroom for Basic slider adjustments. Back in CS6, I decided to crop. Next it was processed using Topaz photoFXLab (see sidebar for website link) – one of my favorite new plug-ins. It has a Dynamic slider in the Adjustments tab that really gives great detail without being over-the-top. The Contrast and Exposure were also adjusted. Sharpening and a Curves Adjustment Layer finished up the image……Digital Lady Syd
Digital Lady Syd Related Blogs:
Digital Lady Syd’s Review of Topaz photoFXlab v1.1
Using photoFXlab v1.1
Unknown Little Girl Statue
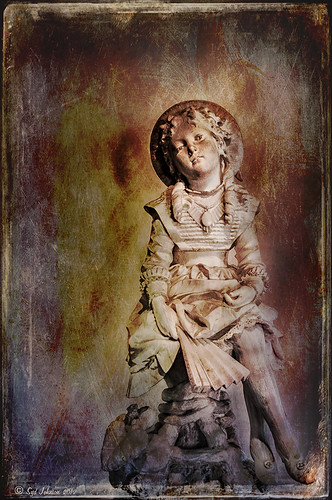
Here is another beautiful little girl statue from an unknown sculptor at the Lightner Museum (old Hotel Alcazar) in St. Augustine, Florida. I decided to use several of my own textures on this image. First it was cropped, processed a little in Lightroom, brought into Photoshop CS6 where Nik Viveza 2 was used to sharpen only the statue. Nik Color Efex Pro was opened and Dark Contrast Filter and Glamour Glow filters were stacked. I then used four layers of my own textures that I created (two were made by painting on a white background with soft colors using a large Mixer Brush and one is of my lace curtains) and finally finished off with ShadowHouse Creations Old Photo 6 texture used twice – once as a Color Dodge layer at 43% and one as a Linear Burn at 88% on the background only. I loved the way it has an old Western look – she reminds me of Rebecca of Sunnybrook Farm. Textures are so much fun!…..Digital Lady Syd
Little Girl Statue at Lightner Museum
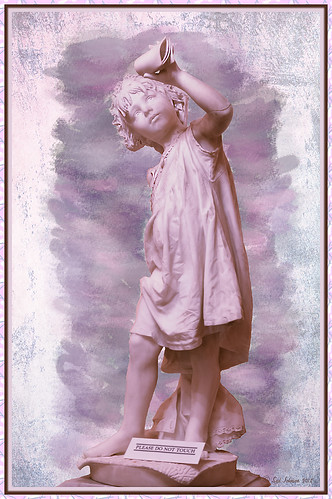
If you follow my blog much, you know I am a big fan of the Lightner Museum. It is not that fancy and not that big, but totally interesting with their wide range of the late 18th and early 19th century items – lots of fun to just drop-in for an afternoon. And of course St. Augustine is a great city to visit as there is a lot to do, even just walking around is fun! This little girl is one of the beautiful statues that is located in the museum – I have no information on who created her but she has a wonderful expression. (To see a different view of this statue, see my Fun Photoshop Blog Getting that High-Fashion Desaturated Look.)
I initially was going to give a the whole image a painterly effect. I decided I liked just having the background with the artistic feel and keeping the actual statue very detailed but with a softer color. I was trying to follow the Photoshop Workbench – Watercolor Composite by Mark Johnson (his tutorials are great!) but I changed a lot of the steps for this image as I did not like the way it was turning out. Textures were added using using Russell Brown’s Texture Panel (see Russell Brown’s Paper Texture Panel Updated!) – Sarah Gardner’s Blush Cherry set to Overlay Blend Mode at 100% Opacity, Princess of Shadow Texture 3 Hard Light at 43% Opacity, and Shadowhouse Creations Oil Painting-2 set to Overlay at 49% Opacity. Then painting was done above for them to get the colorful background using Mark’s tutorial.
Just goes to show that Photoshop is so much fun! And it is fun to remember the beautiful art that I run across……Digital Lady Syd
Digital Lady Syd Related Blogs (all links related to Lightner Museum)
Lidden Urn from Carl Thieme
The Art Corner: Little Girl Knitting – A Mystery Sculpture!
Black and White Photo or Not? Give It a Try on That Difficult Image
Cafe Alcazar and Vintage Topaz Adjust
Photoshop’s CS6 (and Pixel Bender’s) Oil Paint Filter
Where Am I?
Enhancing Works of Art with Nik Color Efex Pro 4
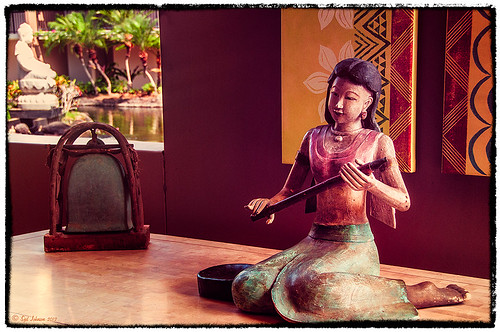
I really loved how this image captured the Buddha statue through the window with the musical sculpture and bell that is protected in the the 1-mile walkway that goes between the hotel buildings at the Hilton Waikoloa Village on the Big Island in Hawaii. I do not have any information on these pieces of art, but they are very interesting. Nik Color Efex Pro basically brought this image to life with four filters stacked: Film Efex Nostalgic using Film Type 4; Pro Contrast to brighten it up a little; Darken/Lighten Center placing the center towards the window; and Image Borders Type 12. A Curves Adjustment Layer was added back in Photoshop and that was it. The texture in the girl’s skirt is beautiful and the wall art was nice too!…..Digital Lady Syd
The Art Corner: Poetry and Music by Clodion
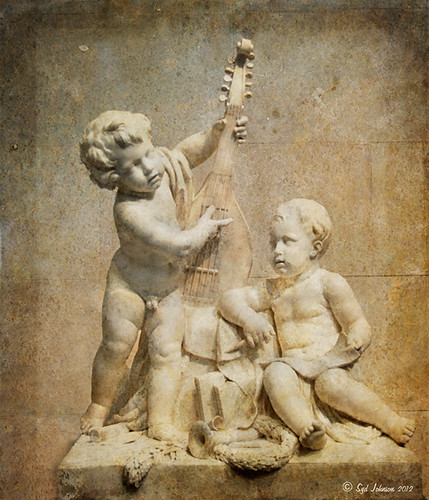
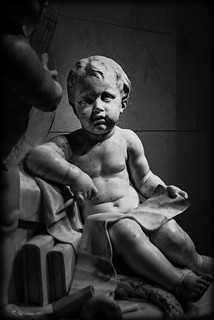
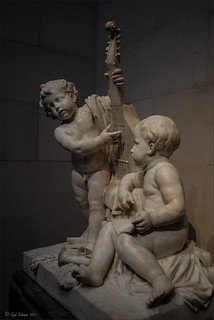
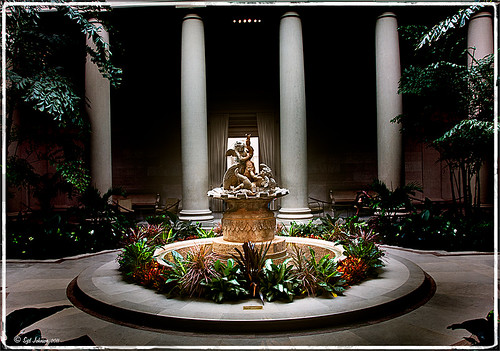
This Carrara marble artwork is found in the East Sculpture Hall of the National Gallery of Art in Washington, DC, and was sculpted in 1774-1778 in Paris by Clodion. Metal Chris, a great local DC concert photographer and founder of the DC Heavy Metal website, took all these these images for me recently as I missed it on my last trip to the National Gallery. What I love about this sculpture is that by viewing it from the different angles, which Chris did, you get a very different expression and feel of the art. Poetry definitely takes on a very different look depending on the view.
The Gallery’s site says “Clodion prepared a terracotta model for Poetry and Music, which is in the National Gallery and frequently on view in the ground-floor sculpture galleries. It provides a rare chance to compare an artist’s model with the final version in stone. In this case, Clodion modified the figure of poetry, “correcting” it to adhere to traditional representations: the terracotta figure had rested his head in his hand, but here he holds a writing stylus.” I will try to find this on my next trip to the Gallery – I think it would be fun to see. This is one of four sculptures that were meant to bring to life the abstract concepts of the arts and sciences. I did a previous blog called The Art Corner: Painting and Sculpture by Tassaert if you are interested in more information on both sculpture pieces. The last two pieces, Geometry and Architecture by Jean-Jacques Caffieri created in 1776 and Astronomy and Geography by Felix Lecomte created in 1778 are located at the National Trust, Waddesdon Manor, Buckinghamshire, England.
The first image was processed using Russell Brown’s Paper Texture Panel (see Russell Brown’s Paper Texture Panel Updated! blog to download) and Flypaper Textures Creme Anglais Taster set to Overlay Blend Mode at 93% Opacity and Touchstone Taster set to Overlay Blend Mode at 100% Opacity. Layer masks were added to clean up the faces and shadows a little and a large shadow on the wall was removed as it was very distracting. What really made this image so beautiful was OnOne PhotoFrame (see sidebar for website link) Maivre Background set to Overlay Blend Mode at 80% Opacity while still in the plug-in. It was actually just like adding another layer of texture. Once back in Photoshop, a layer mask was added to softly clear the face area of the texture. The left image of Poetry was converted to a black and white using Nik’s Silver Efex Pro 2 starting with the High Contrast preset. A little localized sharpening was done to the his face using the LAB sharpening method (see my Fun Photoshop blog Unsharp Mask Filter in LAB Mode) and some noise was removed from his body using Imagenomics Noiseware that I am trying out. The right image was hardly touched (only slight noise removal due to the dark lighting effect) – just a beautiful image and very much how the sculpture looks at the Gallery.
If you get a chance to go to this wonderful Art Gallery in DC, you will should try to see one of these beautiful sculptures…..Digital Lady Syd
Lidden Urn from Carl Thieme
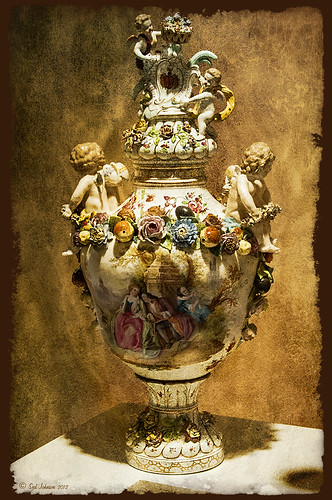
The above image is of a beautiful porcelain Lidden Urn by Carl Thieme of Potschappel, Saxony in Germany from the late 19th century. It is on display at the Lightner Museum in St. Augustine, Florida. I have to be honest and say I did not have a good appreciation for this type of art, but after researching a little on the internet, I am fascinated by the history. If you have an interest, here is a link on the interesting history of the area called Antique Lamps-Dresden, A History Lost, and links to Live Auctioneer showing two similar pieces: piece one and piece two. I am actually very glad to have learned something different in the art world! Actually, I guess that is what a museum is all about – introducing people to new things!
To process this image, I did not do that much to it. ShadowHouse Creations has issued a new free painterly pack of textures and I had to try them out! I put them in a folder and used them with Russell Brown’s Paper Texture Panel (see my blog Russell Brown’s Paper Texture Panel Updated! to download). This effect was created by stacking Painterly-6 (Overlay Blend Mode at 60%) and Painterly-1 (set to Overlay Blend Mode at 100%). I painted out the texture from the painting on the lower part of the urn using a white layer mask and soft black brush at a low opacity so it shows up very clearly. OnOne PhotoFrame (see sidebar for website link) acid burn 12 was added using a color sampled from the image.
Try shooting images in museums, you might get something really interesting. And be sure to shoot any information about the piece too!…..Digital Lady Syd
Digital Lady Syd’s Related Blogs: (All related Lightner Museum links)
The Art Corner: Little Girl Knitting – A Mystery Sculpture!
Black and White Photo or Not? Give It a Try on That Difficult Image
Where Am I?
Digital Lady Syd’s Rule No. 6: Try Something New!
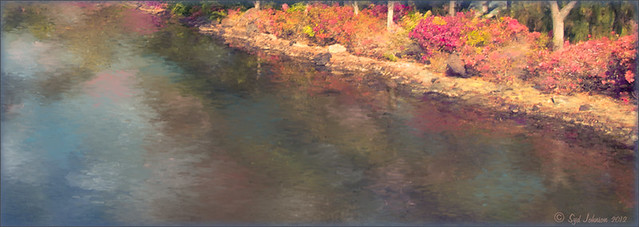
I have not done a Digital Lady Syd’s Rule recently so here is one – Try something new! This is my first attempt at creating a Monet impressionistic type painting. I used a photo from my trip to the Big Island and really cropped it down since I am still learning all the strokes and blending needed for a larger image. I followed a couple tutorials by Fay Sirkis that are now available on the NAPP website (see Painting With Your Camera and A Stroke of Genius-Photoshop Art Studio with Fay Sirkis under the Webinar link). If you want to try to paint like the famous painters of past generations, Fay Sirkis is the one who teaches it best. Can’t say enough good things about Fay – she is a great teacher, fun to listen to, and very knowledgeable about all the techniques of many famous artists. The nice thing about Fay is she provides you with all the Photoshop brushes, mainly Mixer brushes, to create the painter’s style you want to try. Therefore, when trying to do a Monet painting, you have Monet Impressionist brushes for blending, adding highlights, underpainting, etc., at your disposal, and she teaches you how she made them and how to use them. This article from Professional Photographer is a good example of her teaching method – Fay Sirkis: Painting Magic, Adobe Photoshop CS5. She also teaches classes at Photoshop World and on Kelby Training, and is one of the Corel Painter Masters.
I may not be Monet but this image was definitely a lot of fun to do – I have never tried anything like this, and it has given me a new appreciation for the type of art that Monet and the Impressionists created. I hope to try some other Master’s styles and brushes from Fay soon. So do like me and try something new!…..Digital Lady Syd
For my other Rules, click on sidebar entry called Digital Lady Syd’s Photoshop Rules.
Black and White Effects on Outside Art
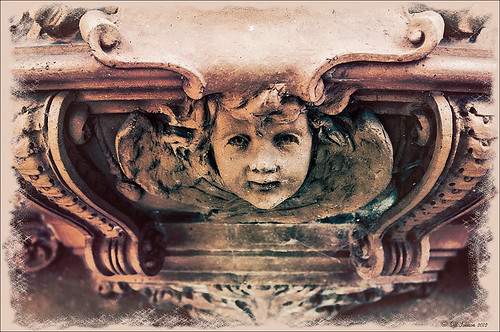
I call this image “Who’s Looking at You?” I almost fell down taking this image and everybody at the Flagler College (old Ponce de Leon Hotel in St. Augustine, Florida) thought it was funny as the tour guide just said one of her rules was no one was allowed to fall down! Oh my! Anyway, I was totally struck by the beautiful face on this figure which is part of the Ladies Side Courtyard Entrance. I do not know who actually created the figure but it appears to be similar to the Lion Statues outside the entranceway (see my Tidbits Blog Loving Both Filters!) Used Topaz Black and White Effects on image selecting the Cyanatype Collection -> Cerulean Dynamic preset to get the color effect started. Also used a Gradient Fill Adjustment Layer using a Gorgeous Gradient Royal set to Linear Style, 90 degrees, and Reverse with layer set to Overlay blend mode and 62% opacity – painted out the face a little using a white layer mask and low opacity black brush. Sharpened the face and that was it. I loved the final result!…..Digital Lady Syd
Farewell to Helen Frankenthaler

Helen Frankenthaler died December 27th, 2011 at age 83 in Connecticut. The above painting titled “Mountains and Sea” is considered her most famous piece painted in 1952, oil and charcoal on canvas. 86 5/8 x 117 1/4 in. (220 x 297.8 cm). It is on extended loan to the National Gallery of Art, Washington, D.C. The Daytona Beach News-Journal stated she was “an abstract painter known for her bold, lyrical use of color who led a postwar art movement that would later be termed Color Field Painting…” The National Gallery of Art has another beautiful example of her art titled “Nature Abhors a Vacuum” from 1973. The New York Times has a nice image and write up about this wonderful painter. She will be missed in the painter community……Digital Lady Syd
The Art Corner: Little Girl Knitting – A Mystery Sculpture!
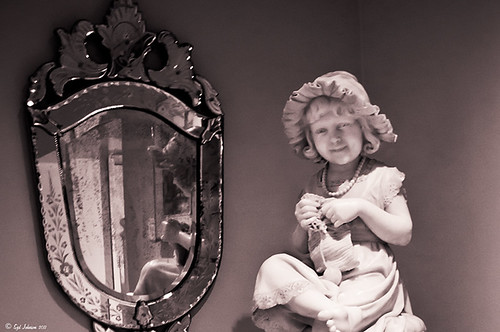
I recently was visiting the Lightner Museum located in the old Alcazar Hotel in St. Augustine, Florida, and found this beautiful sculpture of a little girl sitting on a big pedestal in the corner. I think it turned out to be my favorite piece in the museum and the gorgeous antique mirror next to her is perfect for the setting. The sculpture is by Ella Pollock Bidwell of which very little known. The art was signed by the artist with Florence 1889, Carrera Marble was the medium used, and listed on a separate line “American(?).”
The Museum’s information sign by the work states “Despite the fact that this is a highly executed work of are, no concrete information has come to light on Ella Pollock Bidwell. Whether she actually sculpted this from marble herself or only did a clay maquette to be copied by others is left for us to speculate. There is some possibility that Ella Pollock Bidwell may have been an American working in Italy as many American Artists of the 19th Century were want to do. Alas we have no proof to offer of this either. Although the Artist is unknown to us today, her legacy remains with us in this charming and beautifully crafted work of art.” While searching on-line, the Bidwell Family Crest and History came up and listed that in 1892, a woman by the name of Ella P. Bidwell came through Ellis Island from London at the age of 30. Can’t help but wonder if this is the same woman who did this beautiful sculpture. You also have to wonder if this woman made more beautiful sculptures during her lifetime – what a shame we do not know!
The image was processed mainly in Lightroom. I created the tinted preset from reading David duChemin’s book “Vision & Voice – Refining Your Vision in Adobe Photoshop Lightroom.” See my blog “Inexpensive Gifts for the Photoshop Lover on Your List” No. 2. This book is a great read if you use Lightroom – he teaches you how to make some very beautiful presets. I use them all the time. The one applied to this image I named Maasai Chocolate split-tone & vignette to use as a starting point, but ended up changing several of the settings in the Black & White Mix. The image was also cropped to bring the mirror and the girl into closer view. In Photoshop a Curves Adjustment Layer was added and the Sharpen Tool was used on its own layer to locally sharpen parts of her features. Finally her face was Dodged just a small amount. I really loved the results of this preset on the sculpture…..Digital Lady Syd
Loving Both Filters!
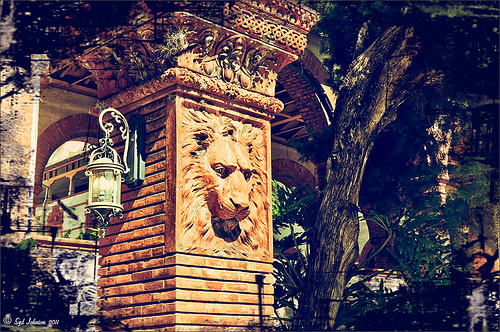 |
The above image is one of the beautiful Lion Posts outside Flagler College in St. Augustine, Florida, which used to be the Ponce de Leon Hotel built in 1887. Absolutely beautiful building. Cannot miss it if you go to this wonderful historic city.
Wow – all I can say is that I cannot decide which program I like best – NIK Color Efex 4 or Topaz Black and White Effects. So different and so much alike! I keep trying the same image in each program and get totally different looks but both are really nice! What to do, what to do!
The top image was processed with NIK Color Efex Pro 4 using the Film Efex: Vintage filter on Film Type 14; Detail Extractor filter; and Brilliance/Warmth filter. I used the Sharpening Tool in Photoshop to sharpen the eyes and mane of the Lion. Then Grunge 03 OnOne PhotoFrame was applied in a dark navy. I loved how it became very artsy and colorful. And the background detail is incredible!
Topaz Black and White Effect produced a very different feel that can be seen by hovering over the image. Same exact image from Lightroom except this time I wanted to see what how this image would look as a black and white. I used the new Platinum Collection – Platinum VI as a starting point. What really improved this image was using the Local Adjustment Dodge brush and Detail brush on the shadows in the face and the lamp. This really brought the eyes out very clearly. Using the Color brush, the lights was added back into the lamp. A black border, dark edge exposure, and dark vignette was added. In Photoshop the Sharpen Tool was used on the eyes a little more and the mane. Overall a very different feel to the same image.
I really love both filters and I do not believe I can recommend one over the other. Both totally great. Give the trials a try and see what you think!…..Digital Lady Syd
Related Digital Lady Syd Blog Links:
Topaz B&W Effects Plug-in – A Real Winner!
NIK Color Efex Pro 4.0 – First Try!
The New Film Efex-Vintage Filter from NIK CEP 4
Quad Tones in Topaz Black and White Effects Plug-in
Sunny Preset for Topaz Black and White Effects
NIK Color Efex Pro 4 – Digital Lady Syd’s Review!
The Art Corner: Painting and Sculpture by Tassaert
Pseudo HDR Using NIK Color Efex Pro 4
The Art Corner: Painting and Sculpture by Tassaert
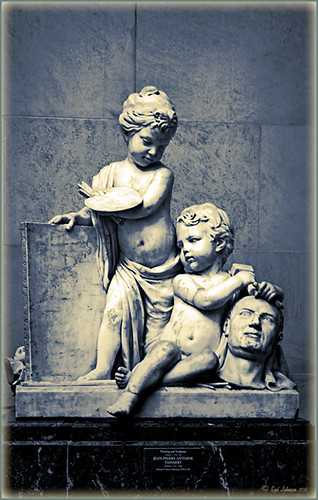
The above piece of artwork is found in the East Sculpture Hall of the National Gallery of Art in Washington, DC, and was sculpted in 1774-1778 in Paris by Jean-Pierre-Antoine Tassaert, a lesser-know Flemish sculptor who lived from 1727 to 1788. I found this piece to be very charming once you understand what the head in the artwork represents. The children are so detailed and sweet looking. From the National Gallery of Art’s website: “With Clodion’s Poetry and Music (also located in the same area of the Gallery), this allegory was one of four that were meant to bring to life the abstract concepts of the arts and sciences. They were commissioned by Louis XV’s finance minister Abbé (Joseph-Marie) Terray for his elaborate Paris residence (to decorate the dining room of his Parisian mansion). The subject was an appropriate one for Terray, since he also served briefly as the director of the king’s buildings with overall responsibility for the state of the arts in France. Painting, sculpture, music, and literature are celebrated by the young cupidlike figures in the two works here; other children carved by two other artists represented geometry, geography, architecture, and astronomy.” The last two pieces, Geometry and Architecture by Jean-Jacques Caffieri created in 1776 and Astronomy and Geometry by Felix Lecomte created in 1778 are located at the National Trust, Waddesdon Manor, Buckinghamshire, England. I think Tassaert’s sculpture is the best of the four in the series.
I processed this piece in the Photoshop plug-in Topaz’s Black and White Effects (see sidebar for link) using the Warm Tone I preset as a starting point, then adding a Quad Tone Effect (Color 1 Region was set to black with slider set to 0.oo, Color 2 Region set to R75/G78/B96 with slider at 142.5; Color 3 Region set to R222/G220/B172 with slider at 228.9 and Color 4 Region set to White with slider at 255.0 – these tones made a very nice soft contrast for this type of image). Some Local Adjustments using the Details and Burn Brushes were used on the sculpture itself. Finally a vignette was added and centered on the children to make them appear spotlighted. Be sure to create a preset if you like the results.
If you get a chance, try to go to one of the two places showing the sculptures discussed. They are very interesting pieces. I did not get an image of Poetry and Music so that is on my list for my next trip to the National Gallery of Art!…..Digital Lady Syd


