Castillo de San Marcos
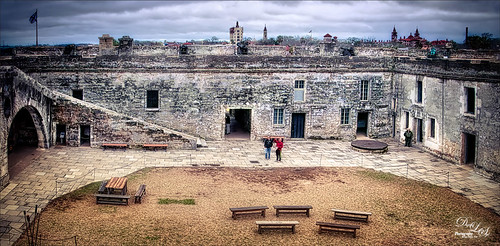
This image of Castillo de San Marcos, the old fort in St. Augustine, Florida, was built in 1672. The weather was a little overcast but many famous building spires can still be seen in the background. A lot was done to this image, mainly starting the HDR process in Aurora 2018 (see sidebar for website link) using three-images, and then in Photoshop, On1 Photo Raw 2018 Develop module was opened to increase Detail. The PS Adaptive Wide Angle filter had to be used to straighten the walls of the structure. (See my How to use the Adaptive wide Angle Filter blog on how to do this.) What a wonderful historic place to explore in the US…..Digital Lady Syd
Flowers on an Old Spanish Home
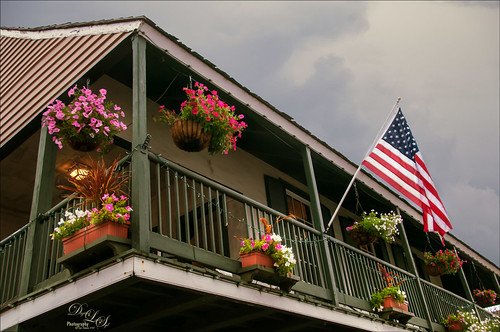
This is the Arrivas House located at 46 St. George Street in St. Augustine, Florida and was built cc 1760. (Click on link for some interesting history on this site). It is now home of the Panama Hat Company store. Used the HDR command in Lightroom to create an image from three images exposed at -1 1/2, -1/2, and +1/2. The sky was totally washed out so had to bring in a sky image taken from my backyard – it was so overcast a sky with similar attributes had to be selected. Then two Curves Adjustment layers were added, one for tone and one for color. A Dodge & Burn layer using a 50% gray layer was created – painted with white and black at low opacity to sharpen up the blues in the flag and color on the flowers. A New Layer set to Overlay blend mode was used for a little spotlight effect placed on the little flowers to brighten them up a bit more. Last step was using Nik Viveza 2 to pull the whole image together. St. Augustine is a great place to visit if you get a chance…..Digital Lady Syd
Sunrays At the Beach
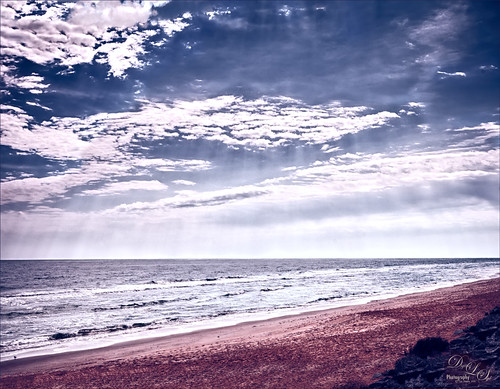
This is an HDR image of Flagler Beach, Florida, taken with 3 bracketed images. The images were taken into the now free HDR Efex Pro 2 plug-in from Photoshop (see my How to Use Google (Nik) HDR Efex Pro 2 blog for instructions on how to do this). The Bright preset was used with some minor changes. Nik Silver Efex Pro 2 (also part of the free Nik Collection) was then used to give a different feel to the image – High Contrast (Harsh) preset was used and the layer was set to Luminosity blend mode at 78% layer opacity. On a stamped layer, Topaz (see sidebar for website link) ReStyle was used to give the beautiful color palette – used my favorite Cream and Plum preset and just adjusted the Color Temperature and Tones a little. That was it. This is really how I see this beach on a beautiful day!…..Digital Lady Syd
Abstract Wetlands
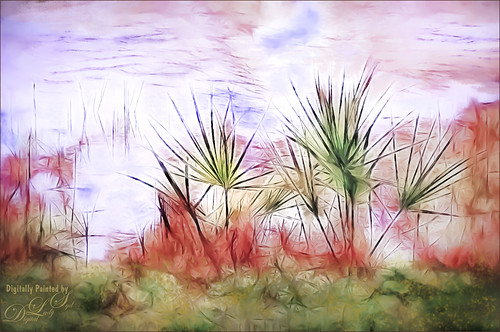
Felt like doing something a little different with a rather ordinary image. This was another shot from the Ritch Grissom Memorial Wetlands in Brevard County, Florida (also known as the Viera Wetlands). This image was first Merged to HDR in Adobe Camera Raw 9.0 – thought I would put it through its paces and it worked really well. I have a lot of HDR programs, but it is so nice to have all the ACR tools available to clean up the result.
Once the HDR file was created in ACR, the image was opened as a Smart Object in Photoshop CC2015 to add a few filter effects. Topaz (see sidebar for website link) Glow was using my Inter Web Variation preset set to Hard Light blend mode. (Here are the settings: Primary Glow Type Dark, Glow Strength 1.00, Effect Sharpness 0.12, Electify 1.00, Simplify Details 0.06, Edge Color 0, Detail Strength 1.00, Detail Size 0.42, Brightness 0.16, Contrast 0.18, Saturation 0.08, Line Rotation 0, and Glow Spread 0; Secondary Glow Glow Type Light, Glow Strength 0, Effect Sharpness 0.54, Electrify 0.11, Simplify Details 0, Brightness 0, and Contrast 0; Color Overall Saturation to 0.62, Red Sat to 0.44, Yellow Sat to 1.00 Yellow Lightness -0.36, Green Sat 1.00 and Lightness -0.51, Aqua Lightness -0.36, Purple Sat 1.00, and Magenta Sat 1.00 and Lightness 0.50. Set to Screen blend mode at 66% Strength; and no Finishing Touches.) On a stamped layer (CTRL+ALT+SHIFT+E), Topaz Impression’s Turner Storms II was added. It was turned into a Smart Object and Photoshop’s Camera Raw filter was opened – used Photoshop Cafe’s PS Cafe-euro model preset with some Basic adjustments and color changes. I really liked the fantasy feel I was getting. Some clean up on a New Layer was done. On another New Layer Kyle’s Real Watercolor Spatter Mixed brush was used on the foreground, a gradient overlay layer style added, and then a Guassian Blur filter set to 2.0 radius was applied to this layer. The last step was using Nik Viveza 2 to draw attention to the focal point. I really liked the results of this image….Digital Lady Syd
HDR Tree
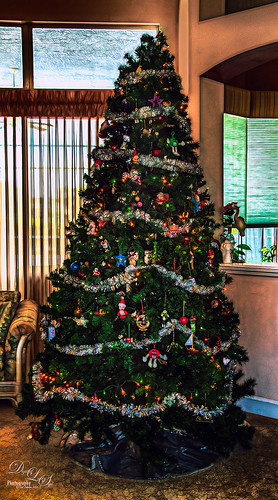
One last Christmas post this year. Someone said to take some HDR bracketed shots of your Christmas Tree and it will look really good – so that is what I tried here. As usual I get carried away with my favorite filters and started adding in some things, but I did process the three bracketed images in Nik HDR Efex Pro 2 using its Dark preset. Then in Lightroom Seims PW4 (see sidebar for website link) Super HDR and his Tint Warming 81A presets were applied before opening in Photoshop. Duplicated the Background layer and opened it up Topaz (see sidebar for website link) Glow – applied my SJ GrapIII Beach preset (settings listed at bottom) – this plug-in really added to the overall tone and color of the image, then set the blend mode to Color Dodge in Photoshop and the Fill to 74%. (Note: With Color Dodge blend mode, adjusting the Fill slider keeps the effect more pronounced than adjusting Opacity slider, which creates a more dull look). Did some clean up and applied Viveza 2 to add a slight vignette feel to the corners (could have used the Radial Filter in ACR). Next Topaz ReStyle was opened and the Dark Ecru preset was applied (these changes were done: ReStyle Opacity 73% and Texture Strength 0.44; Basic Color -0.31; Tone Black Level 0.11, Midtones -0.25, and White Level 0.08; Detail Structure -0.37 and Sharpness 0.56.). A Curves Adjustment Layer was used to add back a little contrast as the last step. It was a lot of fun to do an HDR – have not done this in a while…..Digital Lady Syd
(My SJ GrapIII Beach Topaz Glow settings: Primary Glow: Glow Type Dark, Glow Strength 0.17, Effect Sharpness 0.09, Electrify 0.23, Simplify Details 0.25, Edge Color 0.20, Detail Strength 18, Detail Size 0.24, Brightness 0.23, Contrast 0.17, Sat 0.01, Line Rotation 0.09, and Glow Spread 0.20; Secondary Glow: Glow Type Light, Glow Strength 0, Effect Sharpness 0.47, Electrify 0.17, Simplify Details 0, Brightness 0.36, and Contrast 0.62; Color Red Sat 1.00; Orange Sat 0.27; Yellow Sat 0.20 and Lightness 0.09; Aqua Sat 0.78 and Lightness -0.26; and Blue Sat 0.49; Finishing Touches: Effect Coverage 0, Smudge 0.00, Sharpness 0.25, Sharp Radius 0 and Vignette Size 0. For this image these changes were made to this preset: Changed Secondary Glow to Dark. Changed Red Sat to 0, Orange Sat to 0.79, Aqua Sat 0; and Green Hue 0.32, Sat 0.45, and Lightness -0.27.)
Feeling Peachy!
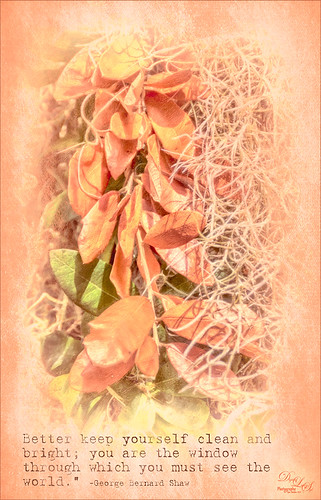
This image was taken at the Ormond Memorial Art Museum and Gardens in Ormond Beach, Florida. Very small park-like area with lots of little spots to take pictures – one of my favorite local places to practice a little photography. This is a 3-shot HDR tone-mapped image using Photomatix Pro’s Merge to 32 bit HDR so I could use the sliders in Lightroom to process the resulting TIFF file. Topaz (see sidebar for website link) Black & White Effects and Alien Skin’s Snap Art 3 were applied. An overlay I had created from Kim Klassen’s Cloth & Paper Touch 1 texture was placed on top and changed to a tangerine color. The text uses my favorite type text, Batik Regular. It was really just playing with the things I already had. I just love the warm tones in the image……Digital Lady Syd
Digital Lady Syd Related Blogs:
How to Create an Overlay Out of a Texture
Loving SeaWorld!
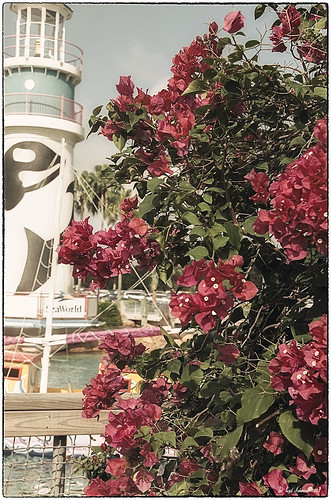
Just a great start to a fun day at SeaWorld-Orlando. This is what you see right after entering the theme park. The lovely red flowers are red Bougainvilleas. In Lightroom three images were used in PhotoMatix’s Merge to 32-bit HDR program. Then the resulting TIFF image also was processed in Lightroom 4.2 before it was opened up in Photoshop CS6. Nik Color Efex Pro 4 plug-in was applied stacking these filters: Film Efex: Vintage using Film Type 4, Glamour Glow, Midnight using an overall Opacity of 40%, and Image Border Type 4. A Curves Adjustment Layer was added to adjust contrast and the Sharpen Tool was used on the blooms. I really love the lighthouse with the whale image……Digital Lady Syd
Digital Lady Syd Related Blogs:
Digital Lady Syd Reviews Topaz DeNoise 5
Statue Beauty

This beautiful image of a Buddha statue from Thailand was taken at the Hilton Waikoloa Village on the Big Island in Hawaii. It was a much larger picture that was cropped in close to the sculpture to make a much more interesting image. The original large image was a 3-shot HDR first processed in CS6’s Merge to HDR as a 32-bit tiff file and then it was brought back into Lightroom for Basic slider adjustments. Back in CS6, I decided to crop. Next it was processed using Topaz photoFXLab (see sidebar for website link) – one of my favorite new plug-ins. It has a Dynamic slider in the Adjustments tab that really gives great detail without being over-the-top. The Contrast and Exposure were also adjusted. Sharpening and a Curves Adjustment Layer finished up the image……Digital Lady Syd
Digital Lady Syd Related Blogs:
Digital Lady Syd’s Review of Topaz photoFXlab v1.1
Using photoFXlab v1.1
Soft and Sharp Image at the Same Time!
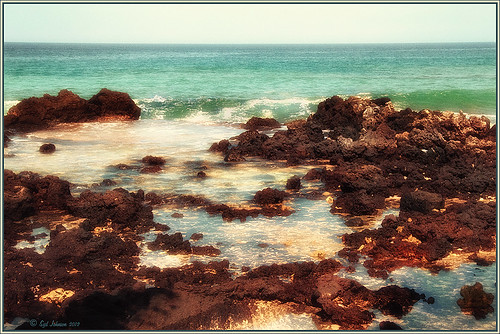
Holoholkai Beach, a lava filled beach, on the Big Island in Hawaii. I just really like this image. It was a 3-shot HDR image processed in Photoshop CS6 Merge to HDR. This was done before the Lightroom upgrade to allow 32-bit processed Tiff images for processing. This image actually has 13 control points in my favorite plug-in ever, Nik’s Viveza 2, that sharpened some of the Lava rock and smoothed out the rough water to lead the eye through the image. Next Nik’s Color Efex Pro 4 was used stacking Film Efex: Nostalgic filter using Film Type 4, Brilliance and Warmth using 34% warmth to warm up the image, and Glamour Glow which gives the image that soft look – a control point was placed at the focus point of the image to keep it sharp in that area. A Curves Adjustment Layer was used to for contrast and my Thin Layer Frame was applied (see DLS Free Layer Style Frames). Love the final result!…..Digital Lady Syd
32-Bit HDR Using Lightroom and CS6
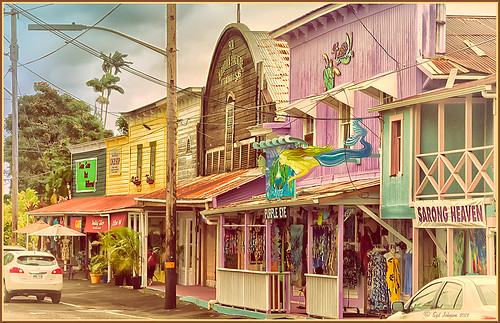
This is a beautiful little town called Honomu is on the road to Akaka Falls on the Hilo side of the Big Island. I love how this image turned out – the original tonemapped file was totally flat. This image was processed as a 32-bit HDR image in Photoshop CS6’s Merge to HDR program, then brought back into Lightroom 4.1 as a TIFF file where it was adjusted using mainly the Basic sliders, then edited back in Photoshop CS6 as a 16-bit PSD file. From there, Nik’s Color Efex Pro 4‘s was opened and these filters stacked: Detail Extractor at 68%, Graduated Filters using Blue No.1 as the sky was an ugly gray color, and finally the Film Efex Vintage set to Film Type 21. Next Nik’s Viveza 2 was added and that is what really made the difference in this image – the detail was popped in the signage areas but smoothed in the sky. Imagenomics Noiseware was added to smooth out the roughness of the whole image. The frame I used is called SJ Thin Double Edge Frame and can be downloaded at my Tidbits Blog DLS Free Layer Style Frames. The colors for frame were sampled from the image. Once again an image that did not have too much going for it turned out really nice……Digital Lady Syd
Digital Lady Syd Related Blogs:
New Lightroom and Photoshop 32-bit Processing Capability
Hawaiian Bliss!
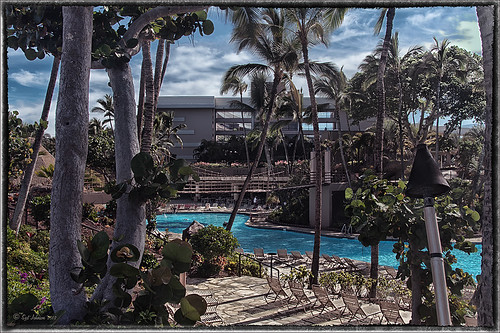
Every now and then I have to post another image from this wonderful resort! I know, a lot of people may consider it a little touristy, but I guess I am just a big tourist at heart and totally loved it!. This of course is the Hilton Waikoloa Village on the Big Island in Hawaii. A three shot HDR image was taken, processed in Photoshop’s Merge to HDR with no changes – just Remove Ghosting checked, then Nik’s Color Efex Pro 4 (stacked these filters: Film Efex Vintage – Film Type 11, Detail Extractor using overall strength of filter to 86%, and Image Border – Type 11), and Nik’s Viveza to darken the corners a little and bring out the detail in the center of the image. Not very difficult but then when it is as beautiful as Hawaii, it is pretty easy to get great pictures!…..Digital Lady Syd
Digital Lady Syd’s Related Blogs:
Nik’s Viveza 2 Plug-In – A Hidden Gem!
Whale Watching with Nik’s Color Efex Pro 4 & Viveza 2
Using NIK’s Color Efex Pro 4 and Viveza Together
Topaz Adjust’s French Countryside Preset – Beautiful!
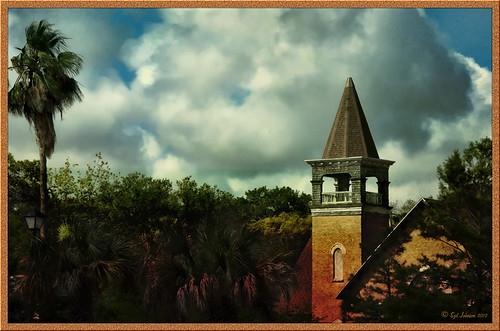 |
Thought I would do another Before and After where I show what one of my favorite presets in Topaz Adjust 5 (see sidebar for website link) looks like when applied. This image was taken in full light and I really took the image as a test shot before visiting some of the wonderful historic sites in St. Augustine, Florida. I really love steeples and cupolas on buildings. I had a hard time deciding what to do with it – it was a hand-held three HDR image. I processed it in Photoshop’s Merge to HDR Pro, only checking the Remove ghosts box before exiting to Photoshop (hover over image to see the tone-mapped image). Some image clean up was done, and two curves adjustment layers, one for contrast and one for color tone, were added since the image was not processed in Lightroom or Camera Raw. After much experimentation, I finally settled on using Topaz Adjust 5 and the French Countryside preset. It seems to soften the image just enough, yet retains some detail in the image – the trick is to adjust the Detail tab’s Threshold slider to bring back some of the details. Then I added Caleb Kimbrough Summer 4 Texture – one of my favorite textures to add the red and green tones into the image for that warm feel. (Also check out his site for many other wonderful textures.) The image took on a totally different feel. Try this preset if you have Adjust…..Digital Lady Syd
Digital Lady Syd Related Blogs:
Why I Love Topaz Adjust!
Topaz Adjust 5 Is Here! First Look!
Making An Ordinary Image Your Own
Nik HDR Efex Pro Example

The above image was taken at the Hilton Waikoloa Village on the Big Island in Hawaii. They have a lot of unusual sculptures located throughout the whole resort and this one is full sized. I used Katrin Eisman’s workflow to process this image without using Silver Efex Pro (see my blog HDR Using Photoshop Merge to HDR and Nik HDR Efex Pro and Silver Efex Pro? Wow!). This image used five images stacked in Merge to HDR in Photoshop. Then it was taken into Nik HDR Efex Pro and the Grannys Attic preset was used that gives a more cross processed vintage look. Viveza 2 was applied, then clean up and selective sharpening was done. I am starting to like this workflow a lot!
If you are interested in using HDR programs, check out RC Concepcion’s book called “The HDR Book: Unlocking the Pros’ Hottest Post-Processing Techniques” that covers them all and shows you how to get a similar look from each. I have found it to be the most helpful of all the books out there when it comes to understanding what each slider is doing – and he gives you some presets that are pretty nice too!
Digital Lady Syd Related Blogs:
Palace Tower Art at Hilton Waikoloa Village
Different Images – Same Look Using HDR!
Where Am I?
Another Pseudo HDR from Me!
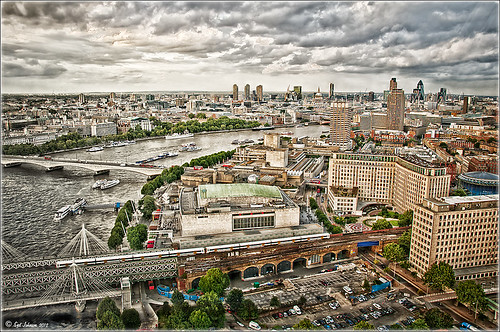 |
I love these photos I got from the London Eye a few years ago – they really look good with the pseudo-HDR look. Here I have applied my SJ-Vivid Drawing Look preset in Lightroom (for here for Adobe Camera Raw preset – note: change file extension to .xmp in zip folder to get file to work). I had to adjust the Exposure a bit after applying the preset. Then it was processed in Nik Color Efex Pro 4 using my SJ-Pseudo HDR1 recipe. NOTE: This download link is broken if you click the Download button, but by right clicking on the button and choosing “Save Link As,” the file will download correctly.” Usually the Detail Extractor slider needs to be adjusted so the image is not overdone. Next it was taken into Viveza 2 to get rid of the muddy color water that is so common in the Thames River pictures. By setting control points in the water areas and adjusting the Hue and Brightness sliders, the color could be changed to more of a blue tone. There was distortion from the movement and the glass of The Eye so I added a layer set to Overlay blend mode and painted with a black brush at 10% opacity over these areas to get it evened out. (Click on the image to see the original – most of the distortion was in the lower front and on the train bridge in the middle.) Finally the Sharpen tool was used on a separate layer along with Curves Adjustment for contrast and Hue/Saturation Adjustment Layers to desaturate a little. Loved the final result. This is very similar to what you would get with the Lucis Arts filter. Overall, loved the results! …..Digital Lady Syd
Digital Lady Syd Related Blogs:
Pseudo HDR Using NIK Color Efex Pro 4
Another Pseudo HDR Image with NIK CEP4 – Got to Love the Effect!
Settings for Vivid Drawing Look ACR/Lightroom Preset and NIK Color Efex Pro 4 Pseudo HDR Recipe
Where Am I?
Problems for Big Ben
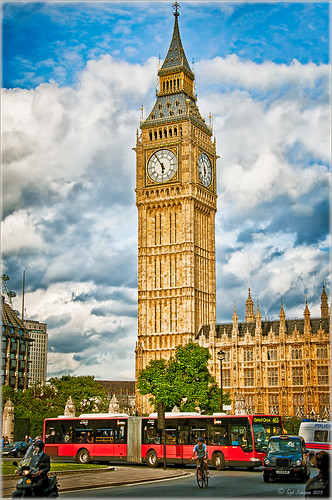 |
It is funny that I had just completed this image of Big Ben a few days ago and then it comes out that is has some tilting issues, 0.26 degrees NW or 18 inches off center at the top of the 314-foot tower. It will be thousands of years before Britain’s iconic landmark that houses the clock gets as bad as the Leaning Tower of Pisa in Italy. The rumor is Members of Parliament are meeting to discuss what to do including these two options: 1) Do costly repairs to both the Parliament Building and Big Ben, or 2) sell the entire complex to a rich foreign developer. Hum! For more information on this, check out The National Post article.
I tried to find an old famous painting of Big Ben but could not find one – can’t believe no one painted this gorgeous landmark in the 1800’s so my search is still on. In the meantime, I did find a site selling some very interesting Big Ben posters at Art.Com that I found very inspirational – give it a look to see some of the creative work others are doing (and for profit!).
How I processed this image? Believe it or not, this is just another pseudo HDR processed just like I do all my pseudo HDR’s. Used my SJ-Vivid Drawing Look preset in Lightroom 3 (download here if using Adobe Camera Raw) (note: change file extension to .xmp in zip folder to get file to work) and adjusted the Exposure, Blacks, Red Saturation (-45), Blue Saturation (+61), and Green Luminance (+3) sliders to make the image colors pop correctly. In fact the red bus was overpowering the image so the red saturation had to be reduced quite a bit. (Hover over image to see how it looked coming out of Lightroom.) I must say there was an amazing sky that day! Some clean up in Photoshop was done and the image was taken into Nik Color Efex Pro 4. All I did was add the SJ Pseudo HDR1 recipe (NOTE: This download link is broken if you click the Download button, but by right clicking on the button and choosing “Save Link As,” the file will download correctly.”) – I had to tone down the Detail Extractor and Contrast a little and change the Effect Radius to Large to get rid of the over-exaggerated HDR look. In Nik’s Viveza 2 I added a point on the clockface to make it really sharp but this could easily have been done with the Sharpen Tool in Photoshop. The last step was to add a Curves Adjustment Layer to brighten the whole image just a little. I was surprised how much detail came in from only applying the Lightroom preset without the Photoshop plug-ins. You could actually see the people riding inside the bus! It’s great when it all comes together with the light and composition to create a great shot!…..Digital Lady Syd
Digital Lady Syd Related Blogs:
Pseudo HDR Using NIK Color Efex Pro 4
Another Pseudo HDR Image with NIK CEP4 – Got to Love the Effect!
Where Am I?
Getting That Vintage Look!

I had not done an HDR image or post in a long time so I pulled out NIK’s HDR Efex Pro, which usually gives me the look I want. Personally, I think it is a little harder to use than Photomatix Pro and Photoshop CS5’s Merge to HDR, but the results can be spectacular if done correctly. This image is of an Ice Cream Shop on St. George Street in St. Augustine, Florida. This is a great example of the typical Spanish home that was built back in the early 1800’s. The texture in the building came out really nice. What I like about this program is on the right side of the program, there is a drop-down menu called HDR Method where a lot of different looks can be tried out. The basic global adjustment sliders and the U-Point controls are still available so control points can be placed where needed and the strength adjusted to fit the location. In this case, the Fresco method was chosen at 70% strength. I did bring the image into Photoshop to clean up some of the distracting items and to sharpen the lettering in the signage with the Sharpen Tool. The edges were treated with OnOne’s PhotoFrame Taufer Texture 12 in dark black (see sidebar for link to website). Overall it gives a pretty convincing vintage look.
Another great program from NIK!…..Digital Lady Syd
Digital Lady Syd Related Posts:
Different Images-Same Look Using HDR!
Where Am I?
Topaz Adjust 5 Is Here! First Look!
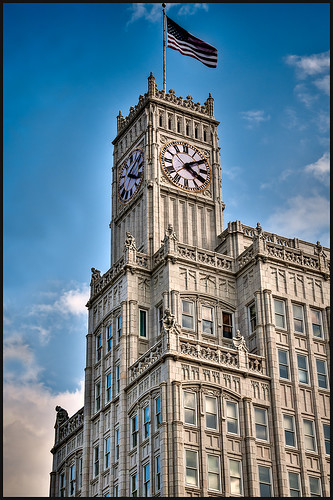 |
Topaz Adjust 5 was just released and here is my first attempt at using it. Hover over the image to see the original HDR image. (Click on sidebar Topaz 4 to go to website.) The interface has been greatly expanded to look like their very popular new plug-in Topaz Black and White Effects. This is a big improvement and I really enjoyed working with the new version of the plug-in. If you own an earlier version of Topaz Adjust, you are entitled to a free upgrade. If not, try out the trial and see what you think. They have added over 100 new presets and also included all of the ones from Topaz Adjust 4. A histogram has been added along with a really nice new Local Adjustment brush called Brush Out where the effect can be removed and a small mask shows how much is being removed (similar to Adobe Camera Raw or Lightroom’s Adjustment Brush). In the image above, it was created as a Photomatix 4 HDR using 3 images, then brought into Photoshop and processed in Topaz Adjust 5. Just a subtle sunlight feel was placed on the building. (See my blog “Quad Tones in Topaz Black and White Effects Plug-in” for colors used to create the soft sunlight effect in the Tone section.) There are so many choices and the image could be made to look more vivid and moody.
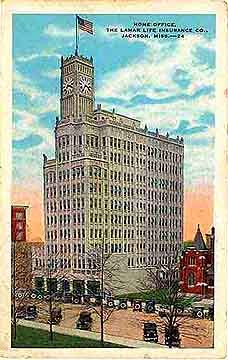
The image above is of the Lamar Life Insurance Building tower with beautiful gargoyles all around it in Jackson, Mississippi. It is a very striking looking building even in this day and age and the clock tower can be seen almost everywhere in the city. Below is a copy of a postcard from 1924 when it was built showing this beautiful building, thanks to Bill Badzo’s Flickr site. He states this about the building “…a close observation reveals it as nothing less than a scaled-down version of New York City’s Woolworth Building.” Interesting observation!
Give this new plug-in a try when you get a chance – you will not be disappointed. Lots of fun ahead of you…..Digital Lady Syd
Digital Lady Syd’s Related Blogs:
Digital Lady Syd’s Review of Topaz Adjust 5!
Little Nighttime Fun from Topaz!
Why I Love Topaz Adjust!
Combining Plug-ins – Double the Effect!
Where Am I?
The above image was processed using the my regular Vivid Drawing Look Lightroom preset and my HDR Recipe for NIK Color Efex Pro 4. (See Fun Photoshop Blog “Pseudo HDR in NIK Color Efex Pro 4” and “Settings for Vivid Drawing Look ACR and Lightroom Preset and NIK Color Efex Pro 4 Pseudo HDR Recipe.”) The pseudo HDR treatment worked very well since the lighting was all over the place.
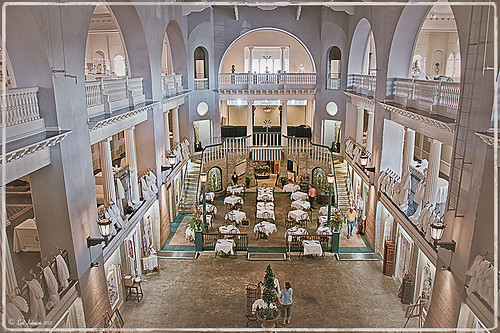
This is one of the most unusual places I have ever seen – it is in St. Augustine, Florida, and used to be part of the Hotel Alcazar, a Henry Flagler hotel opened in 1887, that was built across the street from the more famous and elegant Ponce de Leon Hotel (now Flagler College). This old hotel currently houses the City Hall, several businesses and shops, and the Lightner Museum. The above image is of the Cafe Alcazar that is located on the floor of the old hotel’s Casino Swimming Pool and gets very good food reviews. The top balcony level is the Old Ballroom that runs around the edge of the hotel and in the warm evenings, the roof was removed to see the night sky for the dancers.
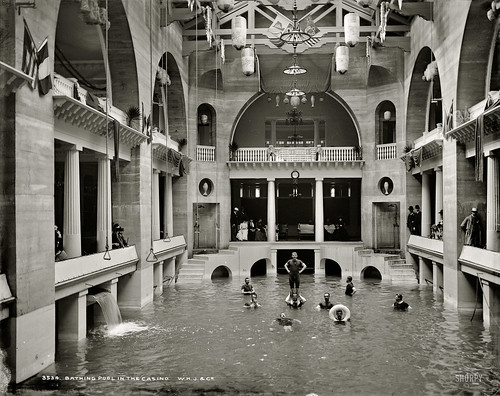
This image shows how the Casino Swimming Pool looked in a by photo by William Henry Jackson in 1889 and is from Shorpy Historical Photo Archive site, a really interesting blog on old images. The water stayed at a steady 80 degrees because it was spring fed but it smelled like rotten eggs due to the sulfur in the water. The pool was 120 feet long and 50 feet wide and was from 3.5 feet to 6 feet deep. The National Women’s Swimming Championship was held here in 1925, and there was evening “pool entertainment” such as high diving, trapeze shows, water polo and swim racing.
To see this restaurant view, you need to pay to enter the Lightner Museum, that contains a very nice collection of paintings, glassware, and other collectibles – mostly from the Victorian era along with the views of the ballroom and pool area. Also there is a Russian steamroom that patrons used when it was still a hotel. Very interesting place to visit and definitely worth the small amount to enter. Check it out if you are in the area!…..Digital Lady Syd
Settings for Vivid Drawing Look ACR/Lightroom Preset and NIK Color Efex Pro 4 Pseudo HDR Recipe
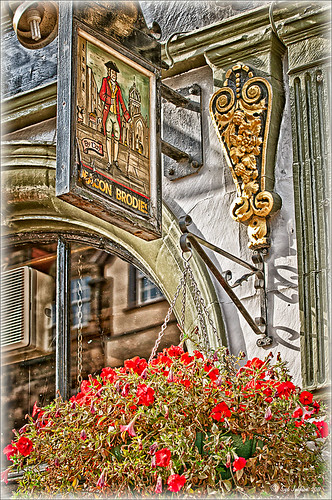 |
The image is from The Royal Mile in Edinburgh, Scotland. Deacon Bodie has a very colorful history and this sign locates a pub named in his honor.
The above image used SJ-Vivid Drawing Look preset as a starting point in Adobe Camera Raw (note: change file extension to .xmp in zip folder to get file to work) and Lightroom. In my Fun Photoshop Blog “Pseudo HDR Using NIK Color Efex Pro 4“, I created a recipe for NIK Color Efex Pro called SJ-Pseudo HDR1. This recipe was applied without any changes to it. Back in Photoshop a Curves Adjustment Layer was added, and a High Pass Filter (radius 9.1) applied to a duplicate layer (set to Soft Blend Mode) was used to sharpen the image. That is it. Hoover over the image to see how it looks with just the Vivid Drawing Look preset applied.
Settings for Presets
For those of you who do not like to download files or might want to tweak what I have created, here are the settings for my favorite HDR feel ACR and Lightroom preset. Also the recipe I put together for NIK Color Efex Pro4 has been provided.
SJ Vivid Drawing Look settings: To make this preset in either Lightroom Develop Panel or Adobe Camera Raw, use these settings: Basic section: Exposure -o.32, Recovery +38, Fill Light +72, Blacks +12, Brightness +52, Contrast +55, Clarity +54, Vibrance 0 and Saturation 0; Tone Curve section: Highlights -30, Lights +16, Darks +23, Shadows -23, and Point Curve Linear; Split Toning Section: Highlights – Hue 50, Saturation 11, Balance 0, Shadows – Hue 50, and Saturation 34; Sharpening section: Amount 48, Radius 1.0, Detail 35, and Masking 69; Noise Reduction section: Luminance 82, Detail 95, Contrast 44, Color 20, and Detail 50; and Post-Crop Vignetting section: Style – Highlight Priority, Amount -18; Midpoint +47, Roundness 0; Feather +57, and Highlights 0.
SJ Pseudo HDR 1: To make this recipe, the filters and settings are as follows: Tonal Contrast (Highlights -37%; Midtones -30%; Shadows -12%; Saturation +5%; Contrast Type set to Standard; and Shadows +58%; Darken/Lighten Center (Use#2 for lighten area; Center Luminosity -10%; Border Luminosity -64%; and Center Size +30%; Place Center in image); and Detail Extractor (Detail Extractor +69%; Contrast +56%; Saturation +16%; Effect Radius – Fine; and Shadows +14%.
I hope you put these presets to good use. I think they are both good starting points to creating that great pseudo HDR effect. Have fun. Have trying these out…..Digital Lady Syd
Where Am I?
This image was processed as an HDR image in Photoshop CS5 using five images. I used Scott 5 preset (see my Fun Photoshop Blog “With One Good Photo – Try the Pseudo HDR Effect“) as a starting point and adjusted to my taste. I also changed out the sky as the day was very overcast when this image was taken and the HDR effect looked terrible in this area. The Puppet Warp Tool was used to straighten the left tower (see my Tidbits Blog “Straightening with Puppet Warp“).
So where am I?
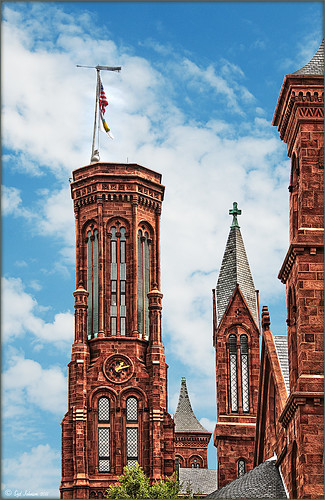
If you have been to Washington, DC and spent any time on The Mall, you would have seen this very distinctive building called the Smithsonian Castle. I was interested in checking it out as the DC area experienced a 5.8 magnitude earthquake on August 23, 2011 and five decorative turrets on the east side of the Castle sustained damage. I did not take pictures on the east side of the building, but as far as I could tell, the building looked in good shape. The Castle was built and finished in 1855 by Mr. James Renwick, Jr. Apparently the museum did not expand beyond this building until the 1960s. I wish I could go back a 100 years in time for a few hours and see what was going on in this building. If you get a chance to visit this area, go check it out…..Digital Lady Syd
Pseudo HDR in the Works
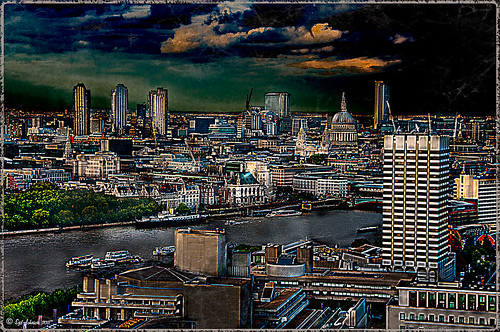
I am working on a new technique for the Pseudo HDR look I wrote about last week. (See my blog post called “With One Good Photo – Try the Pseudo HDR Effect“) that I will be posting on my Fun Photoshop Blog soon. Here is a preview of what I am working on – hover over image to see original image with just ACR adjustments made.
 |
Check out my Fun Photoshop Blog shortly for more examples and instructions on how to do this….Digital Lady Syd
Like a Chameleon – The Color Replacement Tool!
Below is a 7-image Camera Raw HDR file (using Merge to Photoshop Pro in CS5) where just one color was changed very quickly but created a big impact. Hover over the image to see the original image.
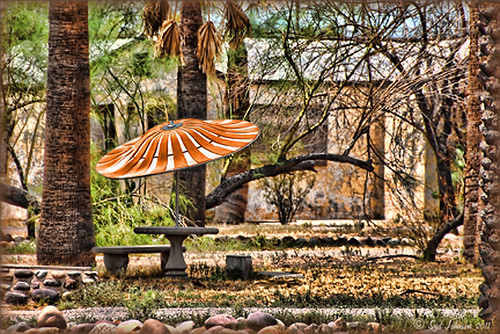 |
I used a little known tool, the Color Replacement Tool, which is hidden in the toolbox with the Brush Tool. It has been in Photoshop since CS but over the different versions, it has been placed with different tools. Not sure why it is not used more as I found it very easy to make this change.
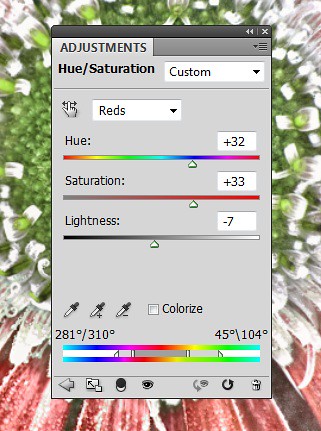
Do your original clean up to the image. The last thing to do is use the Color Replacement Tool on the umbrella. Using the Color Replacement Tool, create a brush in the drop-down box. My settings were: Brush size 33 pixels, Hardness 0, Spacing 1%, Angle 0, Roundness 100%, and since I use a Wacom tablet, I set Size and Tolerance to pen pressure. Other settings in the Options Bar were Mode – Color, Sampling – Continuous icon pressed, Limits – Find Edges, Tolerance 30% and Anti-alias checked. Set Foreground color in the color picker to the new color and drag/paint away. Remember the brush only changes the pixels you drag over – try using a selection of the area you are changing to keep the brush from spilling over into other parts of the image if adjusting the Tolerance does notwork. It is amazing how it turns out!
I saved the brush settings as a Tool Preset (upper left icon on Options Bar) for the next time I want to replace a color quickly. (It is saved as a Tool Preset because of all the changes to be saved from the Options Bar that saving as a Brush preset will not retain.)
Try experimenting with some of the other settings. It is also used to get rid of red eye in images. I love it when I learn something new in Photoshop!…..Digital Lady Syd

