Painting The Lost Continent
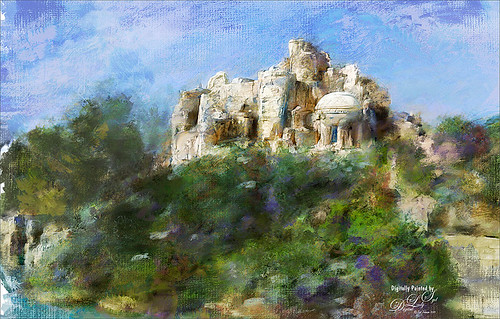
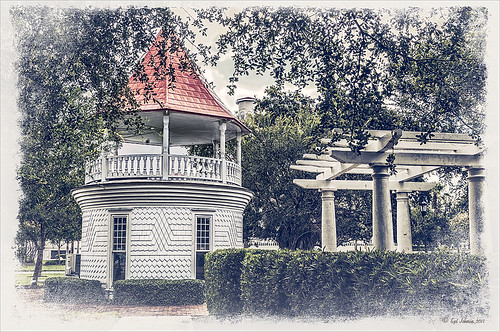
This painted image was taken at Universal Studios of The Lost Continent. It looks like it is a really cool place, which is was, but it was all fake! The building is where The Eighth Voyage of Sinbad Stunt Show is presented. Just thought everyone would like to see something other than birds!
Well, not much was done in Lightroom, just added some contrast. Took image into Corel Painter. Three sources were used to draw color into the image. The new Particle Spring Worm Hole Cloner brush was used to create a very interesting flora effect along with several other brushes. In Photoshop more clean up was done with Photoshop’s Round Blunt Mixer Brush with a texture added. Two copies of Painted Texture’s October Paint texture were added and set to Vivid Light at 19% layer opacity and Color Dodge at 37% layer opacity. Last step, Nik Viveza 2 of course. That was it!…..Digital Lady Syd
Digital Lady Syd Related Blogs:
Texturizing at The Lost Continent
Where Am I?
Where Am I?
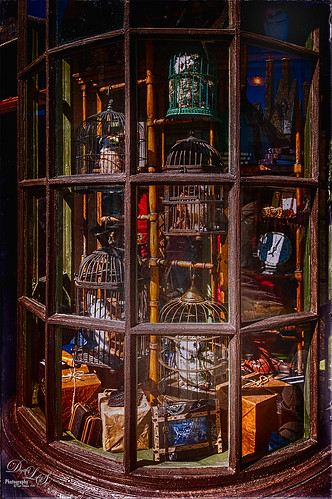
OK – the owls in the birdcages should be the big clue if you are a Harry Potter fan! Just another shot taken at the Wizarding World of Harry Potter in Universal Studios Orlando, Florida. Even though this window shot of the owl and school supply store was not the greatest, I really liked it. Some of the reflections in the panes actually show the high tops of the buildings on the other side of the street – so Harry Potterish! Felt this image needed a quick fix with the newly updated Nik Analog Efex Pro 2 since the whole Harry Potter feel is rather dark and vintage. In Lightroom just some basic adjustments and Seim Effects PW4 (see sidebar for website link) Sampler Magic Shade Fixer preset – a free download of some marvelous presets. Since I was going to use the Adaptive Wide Angle Filter in Photoshop, the Lens Profile was turned off. In Photoshop my go-to filter, Topaz (see sidebar for website link) Detail 3 was used and then the Adaptive Wide Angle filter was opened to straighten up all the unsquare window panes – did a pretty good job I think. Next Nik’s Analog Efex Pro 2 was applied using Basic Adjustments, Light Leaks, Lens Vignette, Film Type, Frames, and Levels & Curves which really gave the image the real vintage feel. Back in Photoshop a vignette was created by using a Curves Adjustment Layer to darken the image overall and then paint back with a large soft white brush the lower center focal point to direct the eye. The last step involved using the Sharpen Tool on a New Layer to sharpen up the owls just a little. Done! Love this new update from Nik!…..Digital Lady Syd
Digital Lady Syd Related Blogs:
How to Use the Adaptive Wide Angle Filter
How About That Update to Nik Analog Efex Pro 2?
Where Am I?
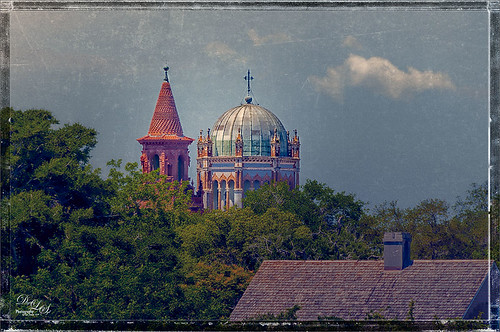
This beautiful skyline image was taken from the Castillo de San Marcos National Monument in St. Augustine, Florida. This is a spire from Flagler College (the old Ponce de Leon Hotel) and the cupola on the Flagler Memorial Presbyterian Church. In Lightroom did just basic changes and sharpened up the spire and cupola slightly. In Photoshop the first thing I did, and do a lot, is go into Topaz (see sidebar for website link) Detail 3- this time applied the Soft and Dreamy III preset to smooth out the leaves that were overly sharp and to reduce the detail in the close up roof. I changed the Cyan-Red, Magenta-Green and Yellow-Blue sliders (similar to the Color Balance Adjustment Layer) to get better colors. Some of my clouds (see my free Cloud Brushes) were added softly in the sky at 69% layer opacity. Kim Klassen Cloth & Paper Reign texture was used to add interest in the sky. Next Topaz ReStyle’s Warm Sand Dune Wash preset was applied to pop the colors a little. On a stamped layer (CTLR+ALT+SHIFT+E) the Camera Raw filter ‘s Radial Filter was applied to focus in on the spire and cupola. On another stamped layer OnOne (see sidebar for website link) Perfect Effects 8 was opened and a Blue-Yellow Split Tone set to a Balance of 81 was added, some detail painted back on the spire and cupola, and the Martha Border was the last step before saving back in Photoshop. I love beautiful St. Augustine!…..Digital Lady Syd
Digital Lady Syd Related Blogs:
OnOne’s Perfect Mask Works Great!
Some of My Favorite Plug-Ins
Loving Both Filters!
Where Am I?
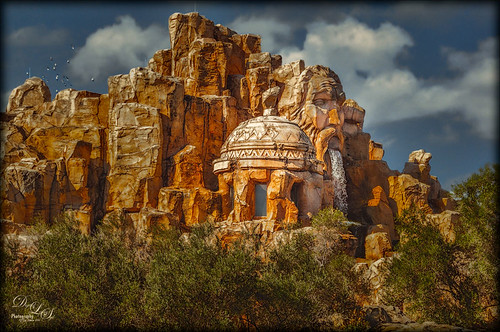
Loved the result of this interesting structure taken at Universal Studios in Orlando, Florida, that houses a The Eighth Voyage of Sindbad Stunt Show. This image originally had a really ugly sky in it, so I added one of my skies I took over the Intracoastal Waterway when sailing – much nicer looking with clouds! The birds were actually in the photo. Refine Edge was used to get a nice demarcation between the new sky and the rocks. Topaz (see sidebar for website) Detail 3, Topaz ReStyle using Orange Orchard preset, and Topaz Adjust using French Countryside preset were all applied. In Photoshop the Camera Raw Radial Filter was used to direct to the dome as the focal point. That was it. One of my favorite images from the day!…..Digital Lady Syd
Where Am I?
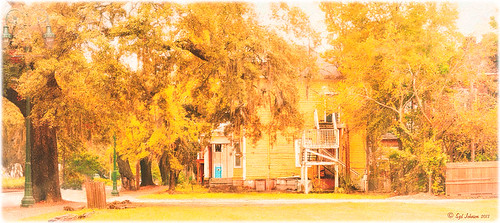
Had the opportunity to visit the beautiful historic city of Savannah in Georgia, USA. This image of an older house is enhanced, but I just felt like adding some yellow and fall colors to a rather overwhelmingly green and boring image in the original. Everything but the kitchen sink went into this image (it felt that way) but finally I got the look I really liked. So here were the steps in a nutshell:
1. Applied Richard Hale’s Sunnyday preset in Lightroom (see A Summery Lightroom Preset for more info on creating it and free download link).
2. Opened Topaz (see sidebar for website link) Clarity’s Landscape Beach Shore I preset and used as is.
3. Back in Photoshop the ACR filter was opened and just the HSL sliders adjusted to get more of a yellow feel.
4. Used Color Range (How To Use the Color Range Command with CS4 Through CC 14.1 blog) to select the sky and added a small amount of aqua color to it.
5. Added Alien Skin’s Snap Art 3.0 using just the Factory Default setting and Photorealism slider set to 100%.
6. Cropped to straighten a little more.
7. Added Levels to enhance the contrast a little.
It took a long time to post-process this image and get it tweaked the way I liked it, but I love the final product. Lots of fun here!…..Digital Lady Syd
Where Am I?
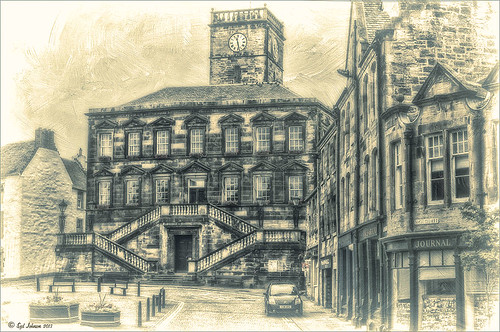
This is a tough one since this image is not of the main attraction in the area. This is the Burgh Hall Tourist Information Center (check out link for live webcams of area) that resides in the center of the town of Linlithgow, Scotland, just outside of Edinburgh. Linlithgow Palace (the birthplace of Mary Queen of Scots) ruins are just behind this building along with a beautiful old church, St. Michael’s Parish Church, next to it. If you are in Edinburgh, it is a wonderful day trip as it is only a half-hour train ride to get there.
The image was processed using Topaz (see sidebar for website link) Black and White Effects 2 three times! The first application used just the Traditional Collection Warm Tone preset set to an Overall Transparency of .90. Next, the same preset was selected, but the Diffusion Section with Softness slider set to .85, Diffusion to .65, and Diffusion Transition to .50, and the Overall Transparency set to 1.00 was applied. The the windows, steps and clock face were painted out using the Localized Adjustments section. The third time a Quad Tone preset I made was applied using Navy Blue, Green, Yellow and White tones . (Quad Tone settings are: Color 1 Region set to Red 1/Green 1/Blue 12 and slider set to 15.08, Color 2 Region Red 63/Green 78/Blue 84 and slider set to 143.9, Color 3 Region set to Red 216/Green 211/Blue 129 and slider set to 227.5, and Color 4 Region was set to white with slider set to 255.0.) Some Border Edging in white was added. French Kiss L’Artiste Dove Wings texture was added and the center of the image was lightly painted back in a white layer mask using a soft low opacity black brush. A Curves Adjustment Layer was added for contrast. Puppet Warp was used to slightly straighten out the buildings – this old building just did not have any straight lines! I totally love the slight diffused look on this image – definitely getting to be a favorite effect for me and I am seeing it a lot more in images now……Digital Lady Syd
Digital Lady Syd Related Blogs:
Straightening with Puppet Warp!
Where Am I?

I have not posted a Where Am I in a while, so here goes. This weekend while watching the Scottish Open at Castle Stuart Golf Links, I started reminiscing about my trip to Scotland a few years ago and what a beautiful county it is. This particular day it was raining, rather typical late summer weather in this region. I am standing at the top of the beautiful Urquhart Castle which overlooks Loch Ness. We were on a tour that arrived by boat and it was beautiful in spite of the ugly weather. This is a great castle to visit and explore if you get in this part of the world.
This image was processed in Lightroom on two different virtual copies – one to bring the sky in nicely, and one for the castle and surrounding grounds. The copies were selected and opened in Photoshop by going to Edit In -> Open as Layers in Photoshop so they were in one file. The castle layer was placed on the bottom and the sky layer on top. Added a layer mask to the sky layer and used a Black to Transparent linear gradient so only the sky still showed from the top layer. A composite was made and in Nik’s Color Efex Pro 4, the Detail Extractor filter was applied using the Detail slider at 42% and (-) control points applied to the sky and water, a Darken/Lighten Center filter was applied, and a dark Vignette filter. There was quite a bit of noise in the sky so Imagenomics Noiseware was applied at Stronger Luma Noise (I recently bought this plug-in as I found it to be very good.) The Sharpen Tool was used to bring back a little detail in the hillside foliage and the people after applying the noiseware – very subtle change here. A Curves Adjustment Layer was added and Nik’s Viveza 2 – just added that pop in parts of the castle stonework with layer set to 63%.
The results came out very nice and how I remember it – to be honest I think it really was a lot drearier than it appears here but this is how I want to remember it!…..Digital Lady Syd
Digital Lady Syd Related Blogs:
Can a Pseudo HDR Image be as Good as the Real Thing? (Part Two)
Where Am I?
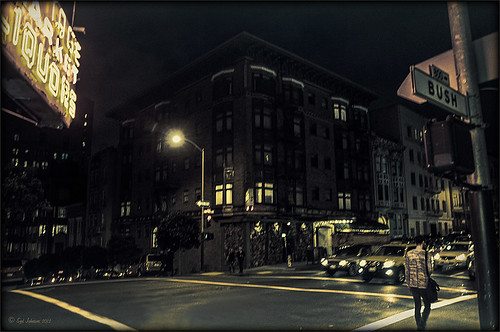
This is an image of San Francisco taken at night in February in a brisk and cold breeze. I just listened to another interesting webinar by Nichole Paschale from Topaz (see sidebar for website link) called Night Photography Enhanced with Adjust, Black and White Effects and Star Effects. I am always surprised how much I learn from these short videos – there were several good tips in this one, even though I know these programs pretty well. My image was not that great, but I needed a nighttime image to try some of the techniques on. Now I rather like the effect. Of course it uses one of my favorite plug-ins, Black and White Effects, so I am not surprised I like the results. The preset was set to my Old Vintage Effect (see Quad Tones in Topaz Black and White Effects Plug-in to create), one I use on a lot of my images. Next the Star Effects plug-in was used to enhance the streetlight using Sun Flare 1 preset. A Flypaper Texture Lemoncello Taster texture layer was added using the Multiply blend mode at 35% opacity. It still did not have the feel I wanted, so I added a Black and White Adjustment layer and mainly lowered the yellow and added some reds and greens and blues. The opacity was set to 26%. A layer style was added to frame the image. I can honestly say this is exactly how the street looked to me as I was walking to dinner on that cold dark night. If you have not tried out some of Topaz’s videos, give them a listen. Lots of cool things to try in them!…..Digital Lady Syd
Where Am I?

Believe it or not, this is an image of Haleakala volcano popping through the clouds, which is on the Hawaiian Island of Maui approximately 30 miles away, but I am standing at the summit of Mauna Kea volcano on the Big Island. Two dozen telescopes including the large Keck Telescope are located to the right of this shot. The height is at 13,796 feet and the air is a little thin – had to take a 4-wheel drive jeep on a very bumpy and steep gravel road to get to the top. There is also snow on the banks behind me. I loved the way the clouds look so fluffy and light.
Very little processing was done with this image other than a Curves Adjustment Layer and the Nik Color Efex Pro 4 Diamond Head recipe downloaded from Nik Presets and Recipes page.
Definitely try to get to this site if you are on the Big Island – the views are breathtaking and sometimes you do not have the cloud cover as shown above…..Digital Lady Syd
Where Am I?
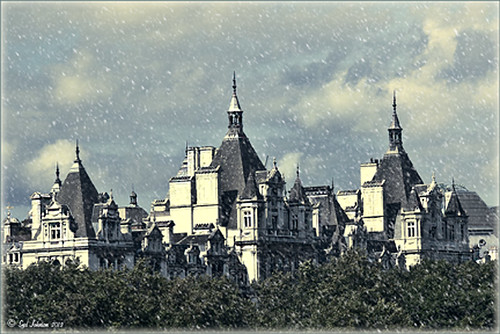
This image was taken in London a few years back of The Royal Horseguards Hotel, a 5 star hotel that overlooks the River Thames near the London Eye. It is a beautiful old building that stands out from the treetops. Check out this virtual tour of the outside to see the size of the immense building!
The image was processed using OnOne’s Perfect Effects plug-in (see sidebar for website link) where a light blue-dark blue cross-processed layer was created. Next Nik’s Viveza was added to add more detail to the buildings since I cropped in pretty close from a much larger image. In Photoshop a Selective Color Adjustment Layer was next using only the Whites and adjusting the Yellow to +21 and the Black to -5 – this adds the sunny feel to the image. The Sharpen Tool was applied to the building tops and Curves Adjustment Layer to add contrast. Finally, one Florabella’s Snow Texture 3 (the link is to her Facebook page with the free download on the left side) was applied on top – the layer was set to Screen at 73% opacity. I am having so much fun playing with all the different looks you can get with the different plug-ins applied together. Try combining some of your plug-ins and see what great results you can get!…..Digital Lady Syd
Digital Lady Syd Related Blogs:
Digital Lady Syd’s Review of OnOne Perfect Effects
Another OnOne Perfect Effects Pix – Got To Love It!
Pseudo HDR in OnOne Perfect Effects
Using Nik’s Color Efex Pro 4 and Viveza Together
Digital Landscape Effects with Nik Software
Where Am I?
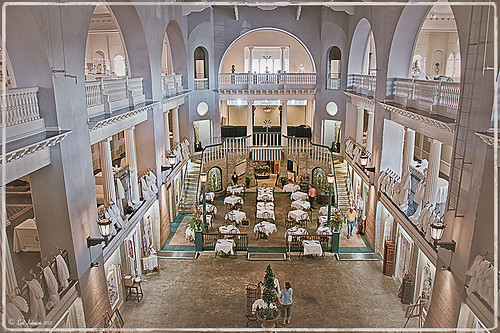
The above image was processed using the my regular Vivid Drawing Look Lightroom preset and my HDR Recipe for NIK Color Efex Pro 4. (See Fun Photoshop Blog “Pseudo HDR in NIK Color Efex Pro 4” and “Settings for Vivid Drawing Look ACR and Lightroom Preset and NIK Color Efex Pro 4 Pseudo HDR Recipe.”) The pseudo HDR treatment worked very well since the lighting was all over the place.
This is one of the most unusual places I have ever seen – it is in St. Augustine, Florida, and used to be part of the Hotel Alcazar, a Henry Flagler hotel opened in 1887, that was built across the street from the more famous and elegant Ponce de Leon Hotel (now Flagler College). This old hotel currently houses the City Hall, several businesses and shops, and the Lightner Museum. The above image is of the Cafe Alcazar that is located on the floor of the old hotel’s Casino Swimming Pool and gets very good food reviews. The top balcony level is the Old Ballroom that runs around the edge of the hotel and in the warm evenings, the roof was removed to see the night sky for the dancers.
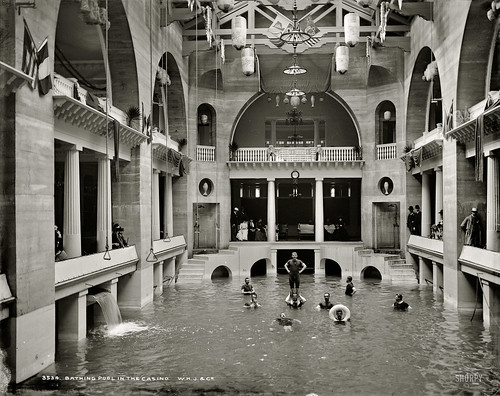
This image shows how the Casino Swimming Pool looked in a by photo by William Henry Jackson in 1889 and is from Shorpy Historical Photo Archive site, a really interesting blog on old images. The water stayed at a steady 80 degrees because it was spring fed but it smelled like rotten eggs due to the sulfur in the water. The pool was 120 feet long and 50 feet wide and was from 3.5 feet to 6 feet deep. The National Women’s Swimming Championship was held here in 1925, and there was evening “pool entertainment” such as high diving, trapeze shows, water polo and swim racing.
To see this restaurant view, you need to pay to enter the Lightner Museum, that contains a very nice collection of paintings, glassware, and other collectibles – mostly from the Victorian era along with the views of the ballroom and pool area. Also there is a Russian steamroom that patrons used when it was still a hotel. Very interesting place to visit and definitely worth the small amount to enter. Check it out if you are in the area!…..Digital Lady Syd
Where Am I?
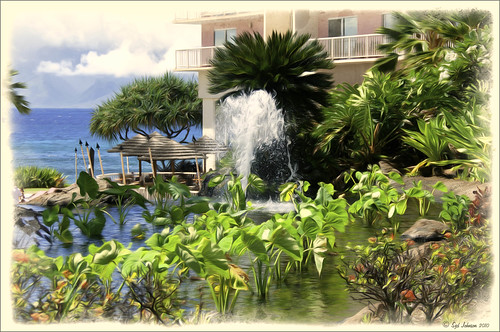
What I think turned out kind of nice is the application of the free Adobe Pixel Bender plug-in using the favorite Oil Paint effect. It is very easy to figure out the 5 sliders. I did this awhile ago and thought it shows one of my best results. A layer mask was used to remove the effect from certain parts of the image.
Okay – guess you could tell this was in a beautiful tropical place. This is an image of the Ka’anapali Beach Club in Maui, Hawaii.
Go ahead and download Pixel Bender if you have not tried it already and take a whirl at something quite different and fun to do!…..Digital Lady Syd.
Where Am I?
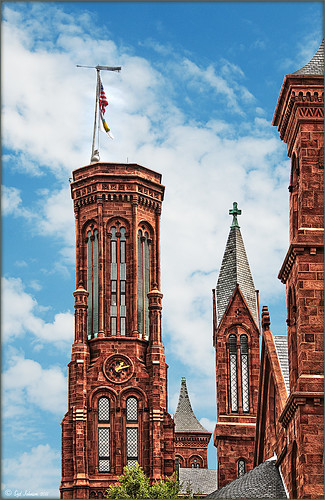
This image was processed as an HDR image in Photoshop CS5 using five images. I used Scott 5 preset (see my Fun Photoshop Blog “With One Good Photo – Try the Pseudo HDR Effect“) as a starting point and adjusted to my taste. I also changed out the sky as the day was very overcast when this image was taken and the HDR effect looked terrible in this area. The Puppet Warp Tool was used to straighten the left tower (see my Tidbits Blog “Straightening with Puppet Warp“).
So where am I?
If you have been to Washington, DC and spent any time on The Mall, you would have seen this very distinctive building called the Smithsonian Castle. I was interested in checking it out as the DC area experienced a 5.8 magnitude earthquake on August 23, 2011 and five decorative turrets on the east side of the Castle sustained damage. I did not take pictures on the east side of the building, but as far as I could tell, the building looked in good shape. The Castle was built and finished in 1855 by Mr. James Renwick, Jr. Apparently the museum did not expand beyond this building until the 1960s. I wish I could go back a 100 years in time for a few hours and see what was going on in this building. If you get a chance to visit this area, go check it out…..Digital Lady Syd
Where Am I?
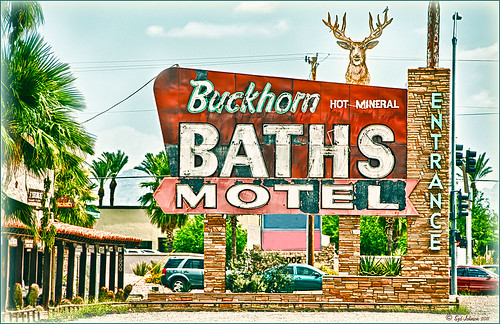
Have you ever been driving around and found a place that was begging to have it’s picture taken? This happened to me last week. I love that HDR look anyway, and am still struggling with which software to use. I tried Photoshop CS5’s Merge to HDR, Photomatix Pro, and Nik HDR Efex Pro before settling on the NIK HDR Efex Pro version. I wish someone would put all the good stuff together so I do not have to keep going through several iterations to get the best look.
All right, so where was I when I took this image? Right in the middle of Mesa, Arizona at Main Street and Recker Road. (Click image to see location at my Flickr account.) It is an old mineral spring motel (circa. 1930’s) whose owner died a few months ago and it is in a bit of disrepair. I loved the sign and got several other shots you will probably be seeing eventually. If you are in the area, it is really easy to find and will give you a great HDR opportunity.
To quote an article called the National Organization Announces Ten Most Endangered Roadside Places, “…..in the 1930s, the owners discovered a mineral well on the property, and constructed Roman-style bathhouses and guesthouses for visitors. In the 1940s the baths played a role in bringing the New York Giants spring training camp to Mesa, leading to the eventual establishment of Mesa as a center for baseball spring training. The resort remained open and operated by its original owner until 1999.” Here is a link on the efforts to preserve this interesting motel …..Digital Lady Syd

