Believe!
Just enjoyed doing Christmas Cards this year. This ornament is one I bought years ago at a Cracker Barrel restaurant and I have always loved it! Thought I would share. The image was not real sharp, but I used an older version of Topaz Sharpen AI and it still does a fantastic job! Used an Iridescent Pattern Stamp Brush from Jessica Johnson (she is a Photoshop Pattern Stamp Guru!) and a silver glitter pattern from Chris Spooner ages ago to create the garland. (The patterns can easily be made by following my Fun Photoshop How to Create a Glitter Texture blog from a while ago.) Added some more greenery around Santa using the brushes made by following Jessica Johnson’s Behance video called Creating a Stylized Holiday Holly Illustration in Photoshop & New Brushes. The Merry Christmas font used is called Baroque Script. That was about it! Happy Holidays to everyone!…..Digital Lady Syd
Classic Florida
Had an HDR image that I took a while ago and decided to convert it to a black and white HDR image by following some of the advice from a YouTube video by Joel Grimes called How to Edit a Picture of a City – Cityscape vs. Urban Landscape Tutorial. Since this is not exactly a building type image, a few different setting were used in Lightroom before opening the document into PS. One of the things I did do in PS was apply Luminar Neo (apparently this is using more AI than their other programs) using the Enhance Accent AI slider and Mystical tools only. I have always enjoyed the Mystical effect that Skylum has had for years. Ran Blake Rudis’s High Pass Sharpen Action on the image (this puts the layer set to Linear Gradient mode and a Fill of 30%) – it ends up with a black layer mask so only the building was painted back to apply the sharpening. A couple parked cars were removed and that was it. I love how the clouds look with the Mystical effect applied. It was fun to do a black and white image for a change……Digital Lady Syd
Ice Princess
Just a quick blog to give some credit here. Loved how this wintry effect turned out thanks to a really fun video by Paul Trani called Photoshop Masterclass: Surreal Winter Poster at Adobe Creative Cloud. He did his image really fast, but it took me a while to get my image looking right. This beautiful model image is by Jerzy Gorecki at Pixabay (check out this his other model images – really fabulous!). The background is a Laura Kuhn image from Pixabay that was deeply blurred and desaturated using Gaussian Blur and Hue Saturation Adjustment. Otherwise lots of “hand painting” to get the total effect wanted. Paul gives you a lot of information on how to get this effect, but lots of my own brushes and adjustments were used since this is a very different picture from his. Overall, lots of fun for this wintry season…..Digital Lady Syd
Red Hot Music!
Had some fun today working with the wonderful violin image from Pixabay which I use a lot for practicing. Created the lines on the violin by following a YouTube video from Unmesh Dinda called Turn Yourself into Line Man with Photoshop. Once the lines were made, a layer style was added to the stripes layer with Bevel and Emboss, Pattern Overlay and Outer Glow. Pretty simple and just followed his tips and tricks in the video. Above the black background, just used Kyle’s Brix Brush (found in Kyle’s Summer 2020 set) with a bright orange red to add the texture. Used the Notes brushes made from Adobe Creative Live’s Paul Trani’s video called Create a Custom Brush with Music Notes. On this layer another layer style was added using Bevel and Emboss and Color Overlay. Next Shadows and Highlights layers were added using Sam Peterson’s tip (see my A Few Photoshop and Lightroom Tips and Tricks blog – tip number #2) – lowered the opacity on these layers. The last step was a Color Lookup Adjustment Layer using a film look to give a sort of poster feel to the image. Lots of fun to do and enjoyed trying some new things…..Digital Lady Syd
Butterflies Posing in Abstract
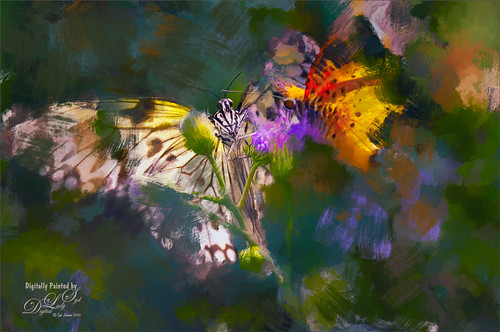
Continued having some fun with the Art History Tool in Photoshop (see my Creating an Art History Action blog for more info on this). Just added a few clean up layers after running the action and then used Viveza to direct the eye to the butterfly. This was a lot of fun to do as I really love these bright colors!…..Digital Lady Syd
Fisherman’s Cabin

This image was created using one of Shorpy.com’s great images called Fisherman’s Cabin-Shore Road-Magnolia-Cloucester-Massachusetts, cc1905. This image was run through the Image Colorizer (see my How to Colorize Using Image Colorizer blog for info on this) first, then after some clean up in PS before taking the image into Topaz Studio 2 where Impression, Edges, and Color Theme filters were applied. Then the image was taken into Corel Painter and the image was painted over where the canned Impression program left stroke I did not like. Back in PS, the Mixer brushes were used to do the final clean up on the image. Lots of fun to do!…..Digital Lady Syd
The Ferocious Mastodon
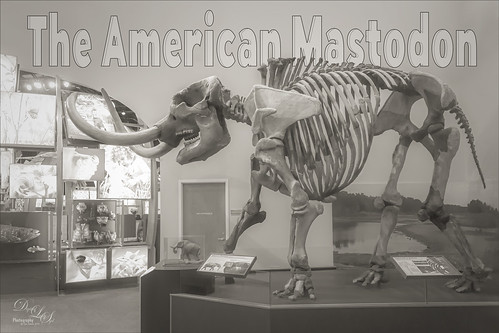
I had such a good time at the Butterfly Rainforest at the Florida Museum of Natural History in Gainesville that it would have been easy to overlook the terrific exhibits this museum has inside. It was hard not to notice this huge American Mastodon. I decided to try a different type of treatment – followed an article in Kelby One‘s Lightroom Magazine No. 52 last year by Martin Evening (this guy is a terrific PS guru with some great books on it). He showed how to create an infrared preset in Lightroom so that is what is used on this image. It does not look like an infrared particularly, but it has a really nice effect to it. In Photoshop Topaz (see sidebar for website link) Sharpen’s plugin was applied, a little dodge and burning was done using two Curves Adjustment Layers, and some text using the Hillray font was added. It was really fun to try out a new technique. ….. Digital Lady Syd
Little House on Green Turtle Cay

This is an older image taken before Hurricane Dorian decimated Green Turtle Cay last year – I have not idea if this home is still standing. I remember seeing these types of clouds everywhere around the Bahamas. To create this effect, Jimmy McIntyre’s How to Use Luminosity Masks and Single Exposure video was followed. I could not be happier how it turned out! This guy is the best when it comes to luminosity masking! The technique separates the highlights from the rest of the image on three different layers. He is using the Apply Image command to create this effect. It takes several steps to do, but the results are spectacular and no noise was or haloing was visible. If you do landscape photography, I would definitely check out this video……Digital Lady Syd
One of My Zoo Buddies

This is a Black and White Ruffed Lemur that is one of several types of Lemurs located in the exhibit at the Jacksonville Zoo. He was much shyer than the friendly Gulliver (see my Just Gulliver Saying High Tidbits Blog) , but he definitely was interested in checking you out. I was surprised how much his face looks like some breeds of dogs. In Lightroom he was put into black and white using the B&W 02 profile at 51%, and then the other sliders were adjusted slightly. Also the Adjustment Brush was used to slightly lighten up his very dark fur. The image was taken into Photoshop and Luminar Flex (precursor to Luminar 4 – see sidebar for website link) was used – I love the way Luminar’s AI Enhance, Structure and Detail filters (now Looks) really brought out the expression of the monkey. Otherwise just some dodge and burning and eye sharpening to finish him up. What a beautiful monkey!…..Digital Lady Syd
More Guitar Man
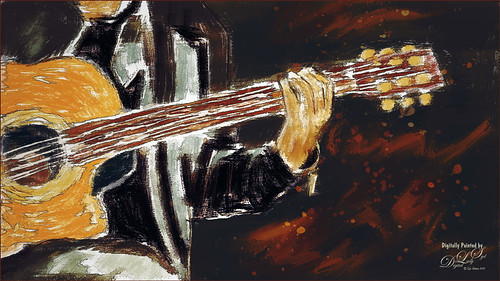
The above is a bit of an abstract painted image using Corel Painter 2019 and a few new brushes. This image is one of my favorites to just try different effects on and I have used it several times. (For image link, see ISO Republic called Guitar Man.) In Corel Painter George Ireland’s Flat Drip Lucious Bristle brush was used (can download the category of brushes at his website, which is in both Germain and English – his images are fabulous). Added a few sketch lines and some oily squiggles in the background. Then took image into Photoshop and totally changed the colors. This was done by using a custom Gradient Map Adjustment Layer – used Gradient Editor, selected Gradient Type Noise, Roughness 12, Color Mode LAB with Restrict Colors checked – kept pressing randomize button until I got this purplish/orange effect. The layer was set to Soft Light blend mode and 83% layer opacity. Then on a stamped layer, Topaz (see sidebar for website link) Simplify was opened up and a cartoon preset was applied (see Serge Ramelli’s How to Turn a Photo into a Cartoon or Painting with Topaz video to create preset that was used). Back in PS it was the layer was set to Linear Burn at 66% layer opacity. On a New Layer the splotches were from Kyle Webster’s Summer 2019 collection which included the Pollock brush (download from inside PS – open Brushes Panel pop out in upper right and select Get More Brushes) and set too63% layer opacity. That was it. Just a lot of fun to paint again!…..Digital Lady Syd
Sparkling in the Sun
This image was taken a while ago during a KelbyOne Photoshop World held at the Mandalay Bay Hotel in Las Vegas. Did basic changed in Lightroom and in Photoshop applied Luminar (see sidebar for website link) Flex using the Accent AI Filter 2.0, Structure, Dehaze, Microstructure, Clarity, and HSL filter. Three Color Lookup Adjustment Layers were added: Denny Tang’s Yashica F521 Action preset, PhotoFocus B&W Contrast 01 preset (found in their Toolkit) set to Luminosity blend mode , and PS Foggy Night preset at 43% layer opacity. The last step was to add a Red Channel Curves Adjustment Layer (see my How to Use a Red Channel to Create a Nice Blended Image Effect blog) so just the lighter colors were affected. No other changes were done to this image. …… Digital Lady Syd
Buildings and Buildings
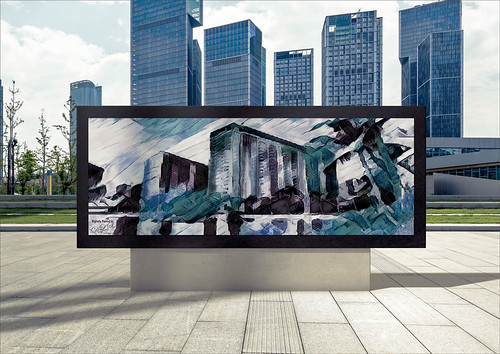
Had a lot of fun creating this image. Actually I had created the rather abstract image of a hotel on Oahu in Hawaii. The Free Modern City Advertisement Billboard Mockup was by freemockupzone.com. The painting effect was created using Topaz (see sidebar for website link) Studio 2’s AI ReMix filter (Fraying Shadows preset), then another AI ReMix filter (Neon Feather preset), Motions Blur Filter twice, and Edges. Colors were changed using a Hue/Sat Adjustment Layer back in PS. Several layers of painting and a Curves Adjustment Layer to finish up. By adding my painted image into the Smart Object of the mockup, the above image was created. Finished up using the Late Sunset Color Lookup Adjustment Layer at 24% layer opacity and a Levels Adjustment Layer to blend the two images together nicely. This actually turned out pretty nice!…..Digital Lady Syd
Along the Road to Hilo
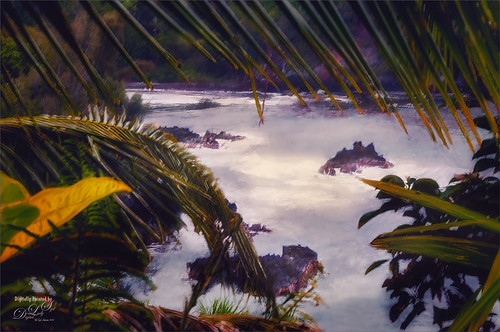
Hawaii – what can you say – total eye candy for a camera. Had fun painting and playing with this image. It was not one of my better images but with a little persistence (almost stopped working on it twice), I am pretty happy with it. Yep, this image used Topaz (see sidebar for website link) Sharpen AI, Luminar (see sidebar for website link) Flex, Color Efex Pro, and Topaz ReStyle – hard to believe, but each filter had something special to add. That is an important point – sometimes only one filter in a program is needed combined with several other different types of filters. And with this image, the final was painted using a brush by G. Rutkowski called SB-9 Texture. Several other adjustment layers were added – just lots of fun to do!…..Digital Lady Syd
Just Saying Hello

This beautiful Sumatran Tiger was enjoying his afternoon in the shade and greeting everyone who came by at the Smithsonian National Zoo in Washington, DC. He was so much fun to photograph – a real photo cat! In Lightroom used Serge Ramelli’s Animal Safari Vignette Cold Strong preset as a starting point and did a lot of sharpening in his face with an Adjustment Brush. Used Photoshop’s Blur Gallery Tilt-Shift twice at diagonals to each other and Blur 15 to soften the background naturally. On a New Layer the Spot Healing Brush was used to remove extraneous grass and a Color Lookup Adjustment Layer set to the Edgy Amber preset at 23% opacity was applied. An Exposure Adjustment Layer was used on the eyes and a Curves Adjustment Layer was used to add contrast. No other changes were done. He had such a wonderful natural color!…..Digital Lady Syd
Queen Emma Lily Bulbs
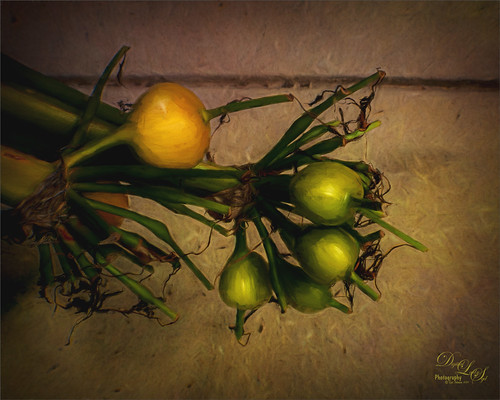
The image above is an image taken of the large seeds from my large Queen Emma Crinum Lily plant. They are laying on my sidewalk which gave a great background texture for the image. Very little was done to this image in Lightroom. In PS an Adobe Paper Texture Pro texture called Brushed Rose was added and set to Multiply blend mode at 70% layer opacity. Then the image was taken into Topaz Studio 2 and Impression was applied. I used settings by Shannon Rose in her blog called Created Imagery Driven by Imagination with Topaz Studio a while back which gave an acrylic effect (these settings were saved as a preset with the Impression filter). The only change made was to increase the Yellow Saturation a little more to 0.62. Back in Photoshop a Color Lookup Adjustment Layer using the Crisp Warm Look at 62% opacity was added. Finished off with both a Levels and a Curves Adjustment Layers. Not a whole lot here but the Impression gave a great painterly feel!…..Digital Lady Syd
Can You Spot the Photo Bombing Kids?
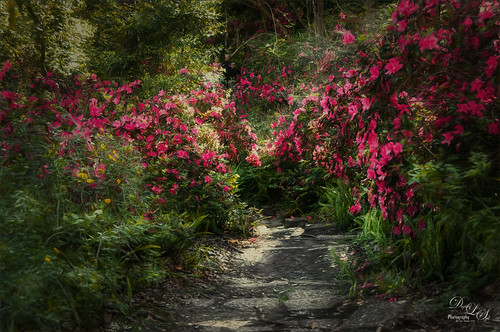
This image is another one of Ravine Gardens National State Park in Palatka, Florida. In March the trail is filled with Azaleas. As I was post-processing this image, it felt a little weird to me but I was not sure why. Then I discovered the three kids hidden in the upper center background who were patiently waiting for me to finish my shot before trouping down the trail – it really startled me to see them in perfect focus back there!
For this image, Luminar (see sidebar for website link) Flex was used in Photoshop first – the Accent AI Filter 2.0, Details Enhancer, Image Radiance, HSL, Dodge & Burn, Highlights/Shadows, and Vignette filters were applied. A Color Lookup Table was added using a preset from Photofocus. Topaz (see sidebar for website link) Studio’s Impression was applied using the default and set to 71% layer opacity in Photoshop. I find these garden images very difficult to post process due to the dappled light patterns. Still a beautiful place to visit…..Digital Lady Syd
Happy 4th of July!
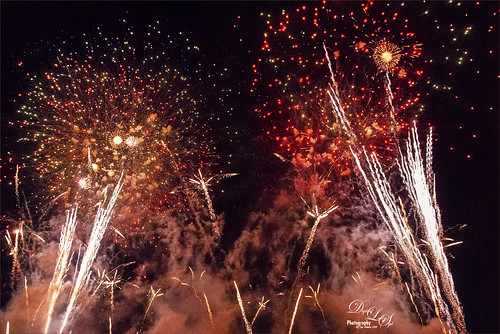
Just wishing everyone a very Happy 4th of July here in the US! Have a great time celebrating!….Digital Lady Syd
Refreshing Watermelon Colored Leaves
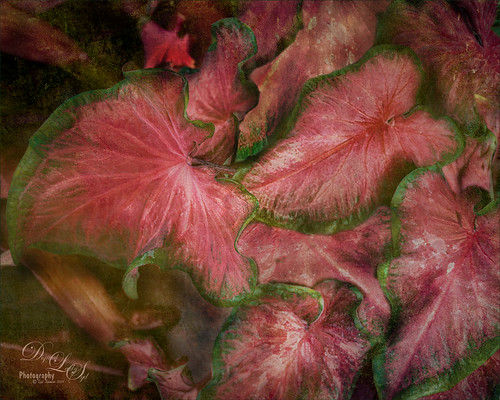
Every time I look at these leaves all I can think about is watermelon! These plants are really beautiful and I always have to stop and take images of them. The Harry P. Leu Gardens has several varieties and I could have spent all my time photographing just the various types. Not much was done to this image other than a little leaf fill-in. Three textures were added set at various blend modes. Luminar (see sidebar for website link) Flex was used to adjust the color tone (HSL, Image Radiance, and Vignette filters). Viveza 2 was used to adjust focus. Finished with some dodging and burning using a Darken and Lighten spotlight effect layers. ……Digital Lady Syd
Observing the Local Terrain
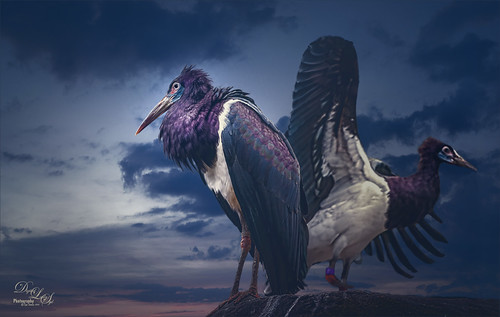
As I stated on Flickr, these Abdim’s Storks are huge and they were not real happy about being in a rather crowded aviary at the Jacksonville Zoo. So at their request, here they are in a more appropriate setting. They seem to be quite comfortable now. First in Lightroom Serge Ramelli’s Safari Warm Dramatic Light preset was used – then adjusted his Graduated Filters and Radial Filters before bringing them into Photoshop. (For presets go to his video called How to Edit Amazing Landscape Photos in Adobe Photoshop and Lightroom.) The birds were selected using the Quick Select Tool and the Select and Mask command. Then to find a good background, I used one of Serge’s free skies called Blue Morning from his his video called Replace the Sky in 2 minutes using Photoshop Libraries. I did create a PS Library Group for these skies and added a few of my own. Then just some clean up and an Eye Exposure Adjustment Layer. Nik Viveza 2 was used to even out the color tones in their bodies and last step was a Curves Adjustment Layer. I think they look much happier……Digital Lady Syd
Singing Orchids in New Costumes
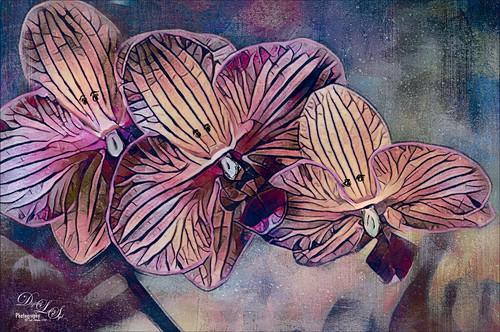
Just had some fun with these orchids again – Lots done in Topaz (see sidebar for website link). Mainly used Studio’s AI Remix Neon Rise preset, Glow Adjustment, Smudge Adjustment, and Texture Adjustment. Used French Kiss’s Solstice SeaSprite texture set to Linear Dodge at 53% layer opacity and on a stamped layer applied Topaz ReStyle’s Cream and Plum preset. Added some crazy eyes and painted a few lines for definition. Finished off with Nik Viveza 2. Totally just a fun image to create……Digital Lady Syd
Pink Carnation
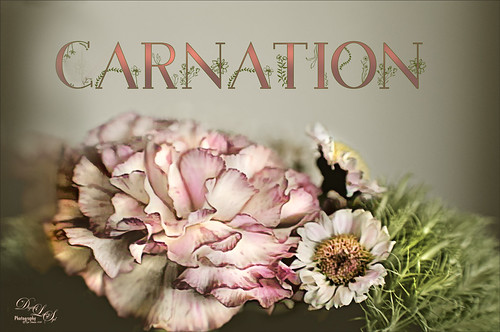
Image taken from a grouping I received for my birthday. I love carnations and they photograph so beautifully. Not much done with this image – used On1 Photo Raw 2018 (see sidebar for website link) Effects default settings for the Dynamic Contrast and the Sharpening effects. Then on a stamped layer Topaz Studio (see sidebar for website link) AI ReMix Adjustment was applied using the Parting Ways swatch and set to an opacity of 0.64. On another stamped layer, a Dodge Brush set to Range Highlights and Exposure 33% and just the light areas were dabbed – it gives a very natural effect. A spotlight effect layer was created to just emphasize the whites. My favorite thing about this image is the free font by Blossom by Chimerique. A Layer Style using the Stroke set to a green and 3 pixels, and an Outer Glow set to the same green color and Opacity of 86%. The text layer was duplicated and rasterized (right click and select Rasterize Text (not Rasterize Layer Style). Then with the same Dodge brush, the tops of the text were painted to lighten a little – really cool subtle effect. This was a lot of fun to do!…..Digital Lady Syd
Sunny Florida
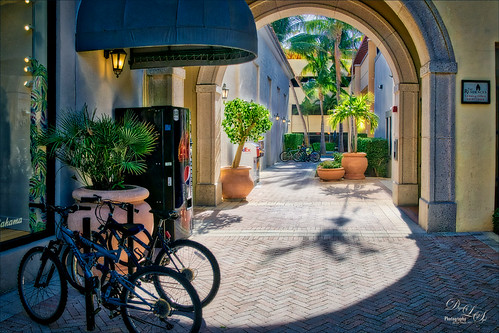
Image taken at City Block in West Palm Beach, Florida using 3 bracketed images and post-processed in Skylum’s Aurora HDR 2018 for Windows (see sidebar for website link). I really like the results I am getting with this program. I did a recent blog on this software (see my Checking Out Aurora HDR 2018 for Windows blog) where I got some similar great results. This image got really good results with the HDR Denoise filter, and a little of the Image Radiance filter which gave it a nice feel. In PS the Adaptive Wide Angle filter was used as the arch was off just a little (see my How to Use the Adaptive Wide Angle Filter blog). A Black and White Adjustment Layer was used set to Luminosity blend mode to adjust the colors (see my How to Use a Black and White Adjustment Layer to See Contrast in an Image blog). On a stamped layer Nik Viveza 2 was used to sharpen the bikes in the background. A Gradient Fill Adjustment Layer was used to create a slight vignette effect (see my Yet Another Great Way to Create a Vignette! blog) That was it……Digital Lady Syd
Night at the Museum
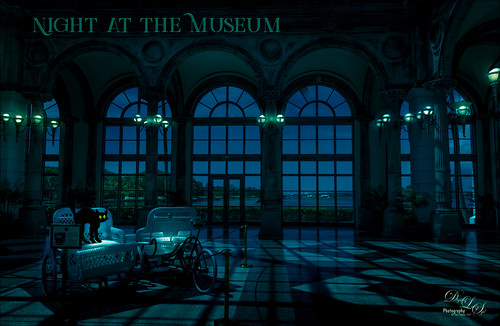
Had some fun creating a night scene out of this image. The image was darkened in Lightroom using Serge Ramelli’s American Night Darker preset to start and adding radial light effects on all the different lamps. Once in Photoshop the cat was added from an image by Graphics Fairy and then his outline was smudged to give it some hair effect. Some whiskers were drawn in and a shadow was added underneath his body. Some text was added using the Green Light Bold Inline Grunge font. A 50% gray layer was added and set to Overlay blend mode where the lights were painted in at 20% layer opacity to get the correct flare effect on the walls behind. That was it. A lot of fun to do!…..Digital Lady Syd
A Wintry Scene
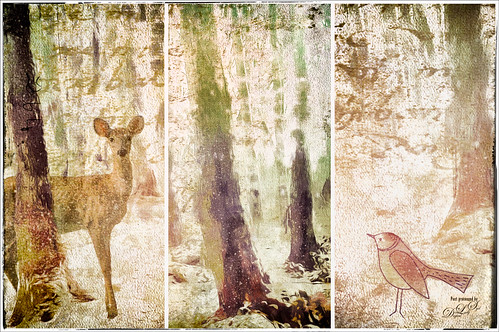
Just having some more fun here using a free wintry tree scene from stokpic and adding some of my own elements. In Lightroom Trey’s Free Packs A Marshmellow Happysmell preset was used. Then in Photoshop Topaz (see sidebar for website link) Impression was applied using an abstract effect. Added the deer, a bird and some snow. 2 Lil’ Owls (see sidebar for website link) Freebie Set 3 texture was added for the beautiful lettering in the background. Her Starry Night 5 was added on top and set to Overlay blend mode at 50% layer opacity. Next Nik Analog Efex Pro 2 was opened and the Multilens was used to get the three frames – really a fun effect! And there you have it, my wintry scene!…..Digital Lady Syd


